Background #
This guide gives a general overview of all the steps required to officially port a map into Momentum Mod. There are multiple tools available that accomplish the same things, so it is up to the map porter to decide what works best for them. The general process for porting maps is the following:
- Zone the map in-game or in Hammer
- Make the required entity modifications using in-game entity tools and/or Hammer
- Use Lumper to apply entity modifications to the BSP and remove Valve assets
- Ensure the map is following our guidelines
- Upload the BSP and zone .json file to the Momentum Mod website
In-Game Zoning #
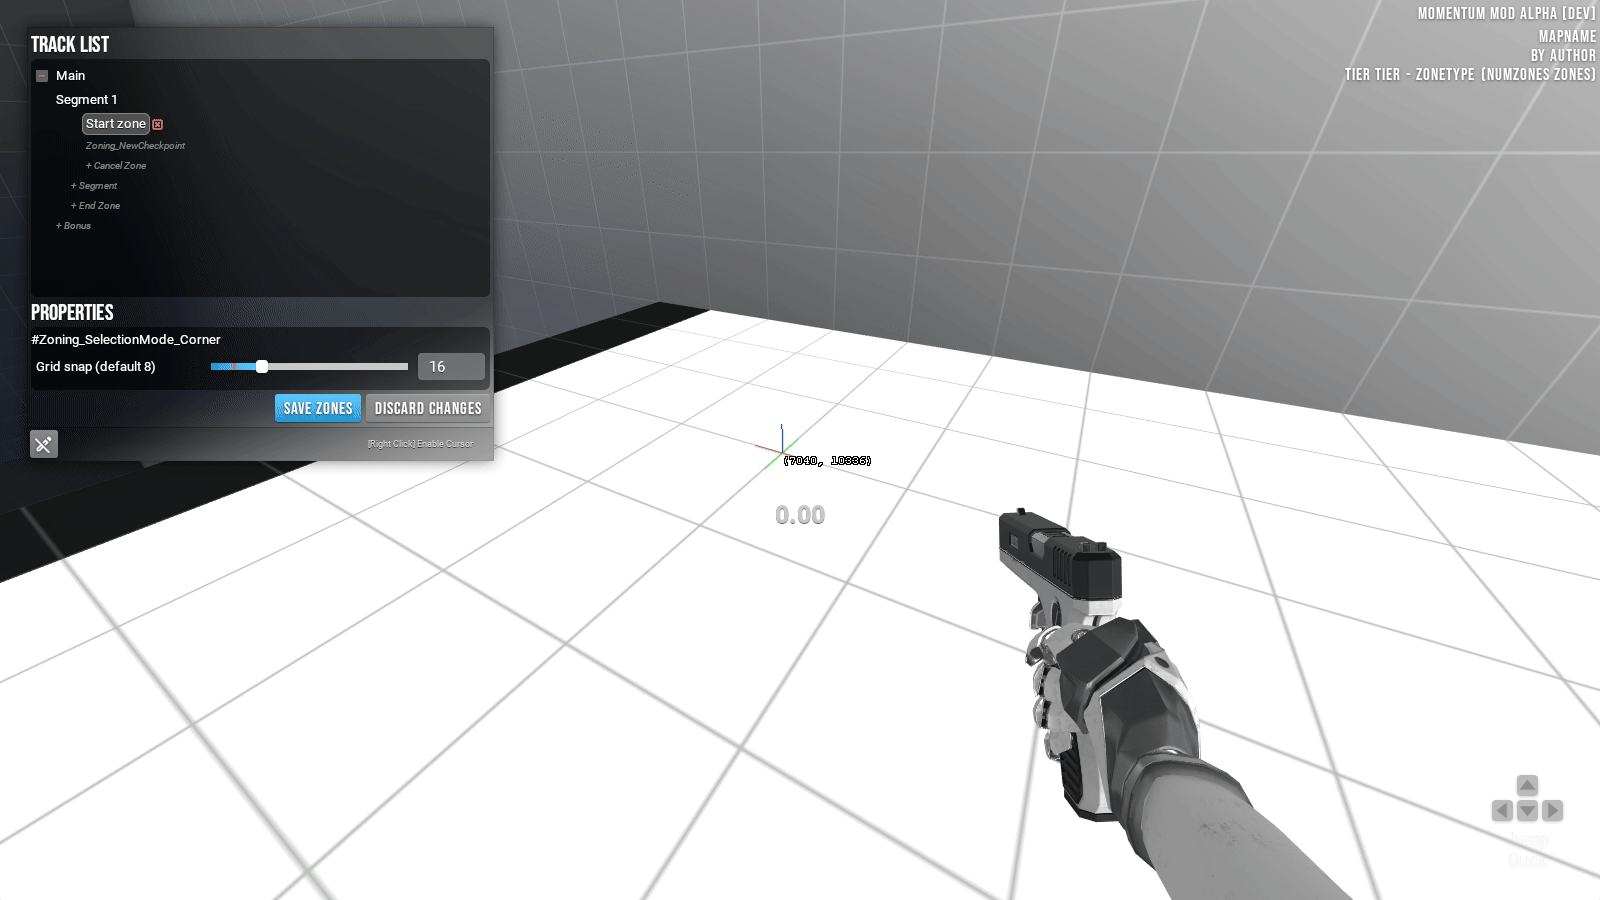
In order to use the in-game zoning tools, sv_cheats must be enabled. When cheats are enabled, a button on the tab menu will be displayed that lets you edit the zones. The mom_zone_edit 1 command can also be used to display the zone editor menu:
Create a start zone by clicking the “+ Start Zone” text in the zone editor. Use left click to set the start corning, end corner, and height of the zone:
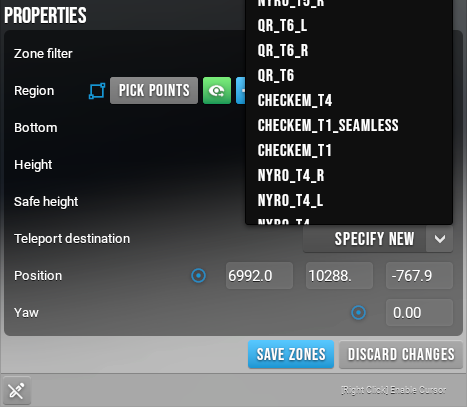
Set a teleport destination by clicking the dropdown in the zone properties editor. You can also specify a custom location by using the “Specify New” option and then setting the “Position” and “Yaw” properties:
You can add stages/courses by clicking the “+ Segment” text. Segments also have their own properties:
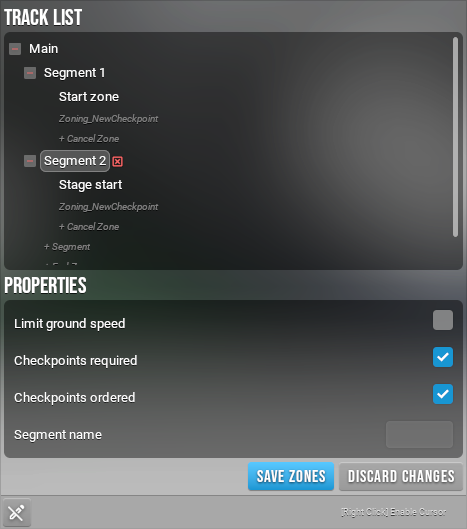
You can set map-wide properties by clicking on any of the tracks in the list:
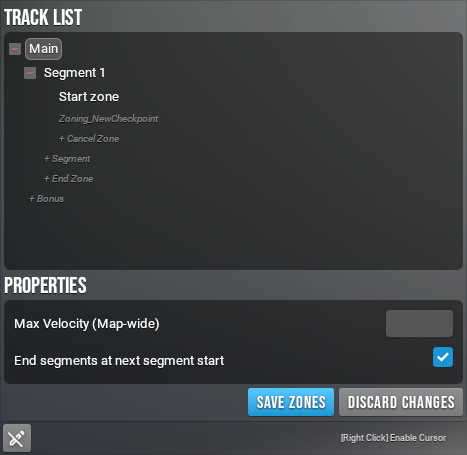
When you are done zoning your map, you can save your changes by clicking the blue “Save Zones” button. Zones will be saved into your maps/zones/local folder.
For more advanced zoning options, please see our Advanced In-Game Zoning Guide. TODO: Add link
Hammer Zoning #
If you would rather zone maps in Hammer, follow this guide instead.
Map Decompilation #
If you are zoning your own vmf, you can skip this step.
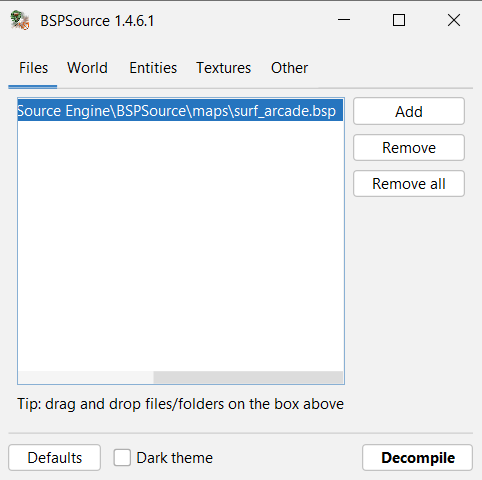
In order to start zoning an existing map in Hammer, you must start by decompiling the BSP file with a tool like bspsrc, or our custom version of bspsrc (Strata) for newer BSP files. Simply add the BSP file to the list and click “Decompile”.
Hammer Zone Entities #
Open the vmf file for the map that you want to zone and go to the start area. Place a zone_timer_start trigger in the area where you want the start zone to be and set the “Restart Destination” field to the destination where you want the player to start.
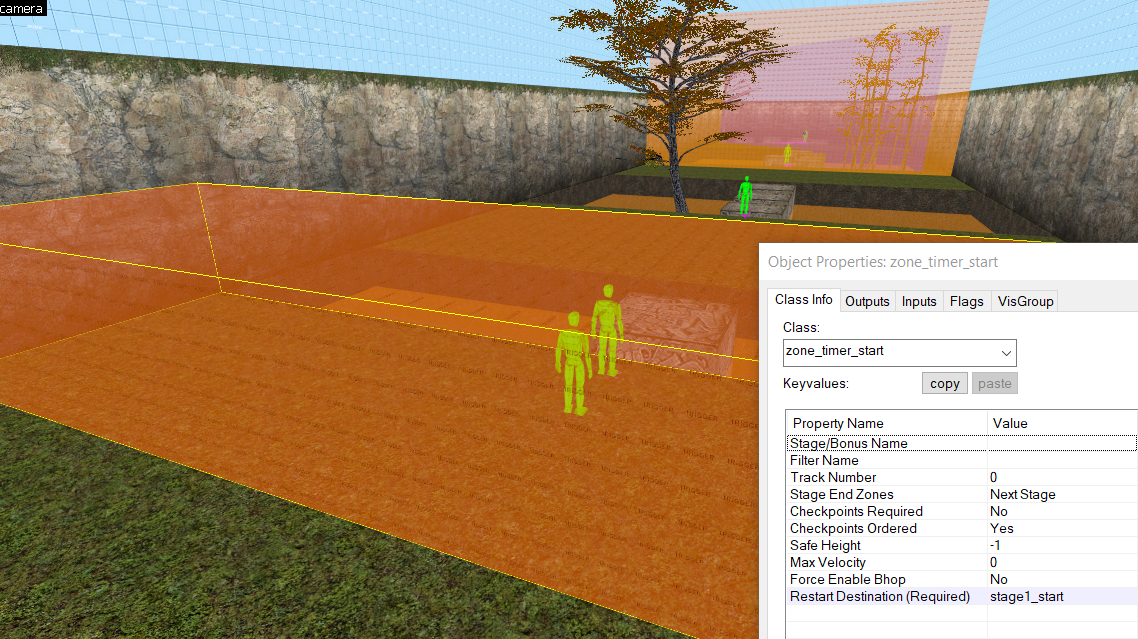
If you are zoning a staged map, use zone_timer_stage triggers for the stage start zones (starting at stage 2). For linear maps, use zone_timer_checkpoint to add checkpoints throughout the map. Use zone_timer_end for the map end zone.
Bonus Tracks #
Bonuses can be created by using a zone_timer_start trigger and setting the “Track Number” property to the bonus number. Bonuses cannot have stages, but they can have checkpoints. The zone_timer_checkpoint and zone_timer_end triggers also need to have their “Track Number” set to the bonus number.
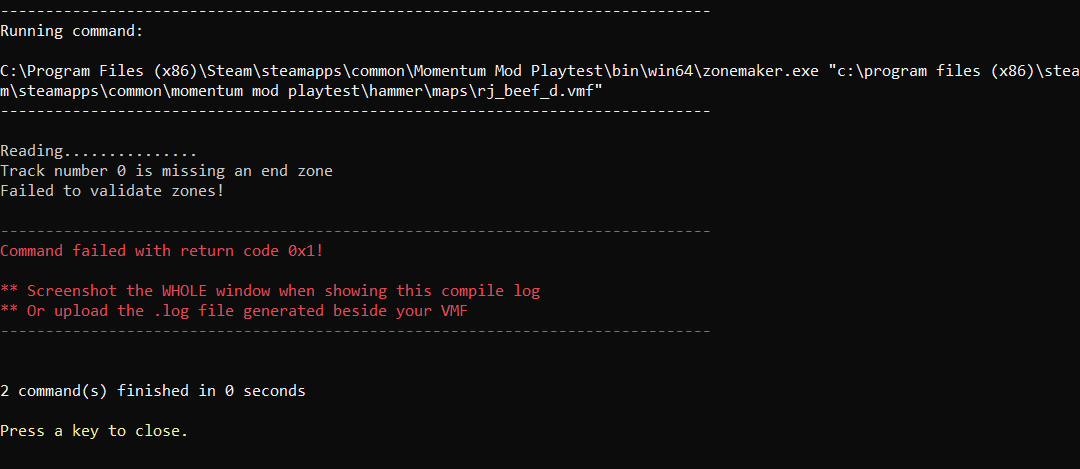
Generating Zones with ZoneMaker #
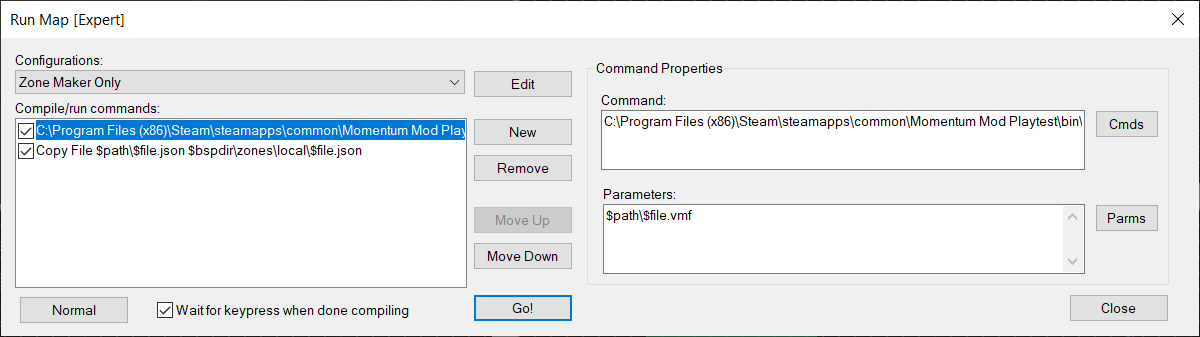
After all of your zones are set up, you can generate the zones by running zonemaker.exe on the vmf. Strata Hammer will have this tool included in the compile options:
If there is a problem with how your zones are set up, ZoneMaker will fail and display an error in the compile log:
Advanced Zoning Concepts #
Safe Height #
You can prevent players from climbing in start zones by modifying the “Safe Height” property. When the player is standing on a surface above the safe height, their timer will not prime and they will not be able to start a run. This is currently only used on surf maps.
Limit Ground Speed #
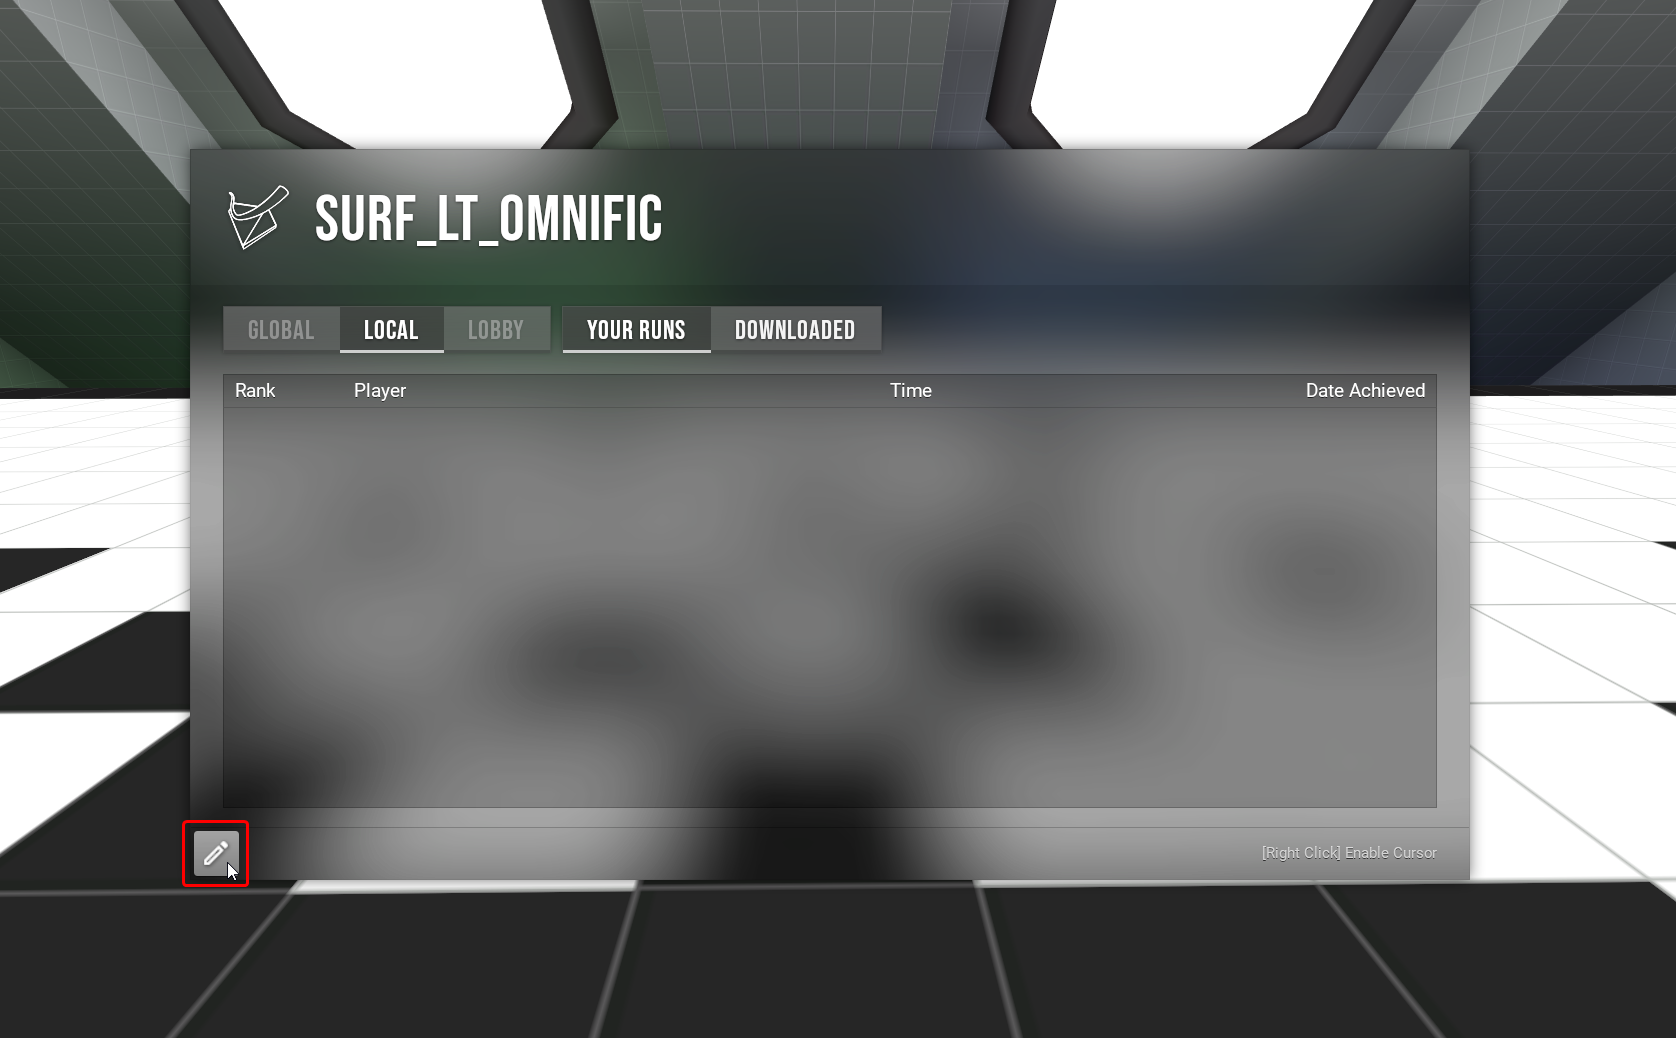
You can allow the player to keep speed while bhopping in stage start zones by disabling the “Limit ground speed” property. This is useful on maps with intentional stage telehops such as surf_lt_omnific. Keep in mind that players who bhop through these start zones will not record their individual stage runs because they do not meet the max ground speed prime condition.
Allow Bhop Zones #
In surf maps, players are only allowed to bhop if they are jumping on a large enough surface. The minimum surface area can be visualized with the console command mom_bhop_area_debug 1. This restriction prevents the player from bhopping on ramp spines, but in some cases the mapper may want to allow that. Mappers can override this behavior by using zone_allowbhop to allow the player to bhop on a surface that is otherwise too small. Bhop can also be enabled globally by setting “Force Enable Bhop” to “Yes” in zone_timer_start.
Stage End Zones #
Typically stages are considered complete when the player enters the start zone of the next stage. In rocket/sticky jump maps, this does not work well since stages (AKA courses) are often split up by hub areas. Instead of requiring the player to touch the next stage start zone, the mapper can set the “Stage End Zones” property in zone_timer_start to “Last Checkpoint” to use the last checkpoint in a course as the stage end zone.
Required Entity Modifications #
Some entities must be modified to be compatible with Momentum Mod’s version of Source engine or replaced with a more consistent/less exploitable version of the entity. Entities can be modified in-game with the devui_show entitytools command. This command will open an interface with various tools for quickly modifying and fixing map entities and exporting the changes to a Stripper config.
Drop Teleports #
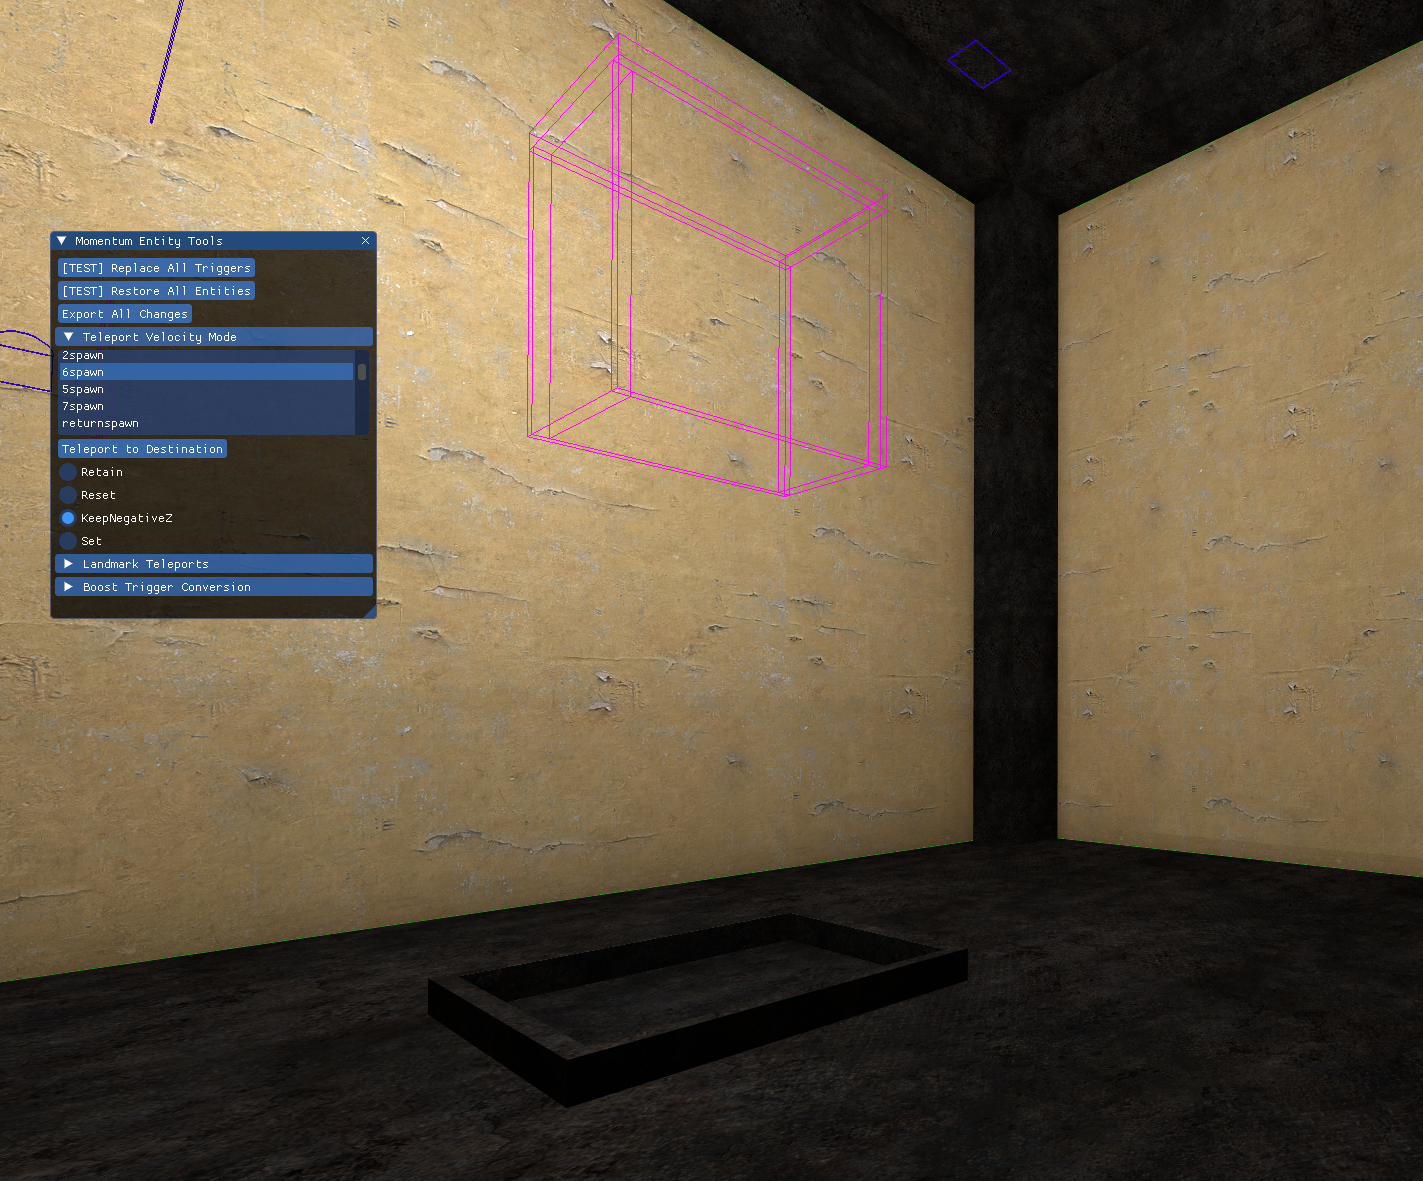
In surf maps, it is common for mappers to use “cages” to reset the player’s velocity after they fail or transition between stages. Players can sometimes exploit these cages with +left binds that allow them to spin in the small area to gain additional speed at the start of a stage.
Momentum Mod introduces the “Keep Negative Z Velocity Only” velocity mode option for trigger_teleport that prevents the player from air strafing while dropping from a stage teleport. All maps that use teleport cages must now use this new velocity mode to prevent exploits. This can be done with the in-game entity modification tools: devui_show entitytools. Open the “Teleport Velocity Mode” dropdown, select the destination that you want to change to a drop teleport, and then select the “Keep Negative Z” radio button.
Landmark Teleports #
Landmark teleports on maps made for Source engine versions before CS:GO are no longer working correctly and need to be updated. The UseLandmarkAngles keyvalue needs to be set to 0 and the angles of the landmark entity need to match the destination entity. The in-game entity tools make this easy by listing all available landmark teleport triggers and giving you some options for fixing these triggers. In most cases, all teleports can be fixed by clicking the “Fix All Destination Angles” button. If you need to fix angles for a particular trigger, select it in the list and then click the “Fix Destination Angles” button.

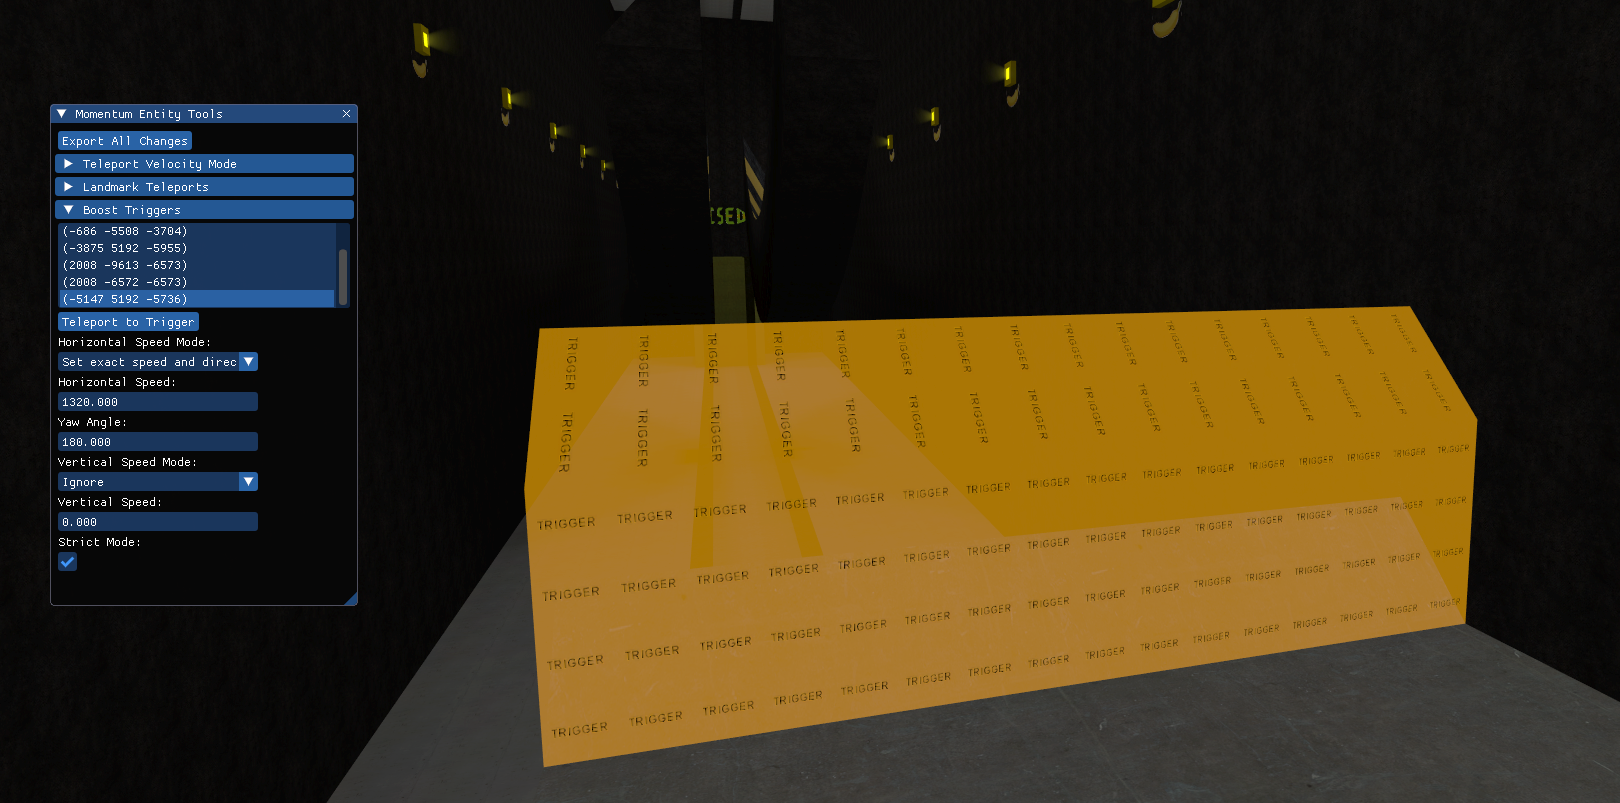
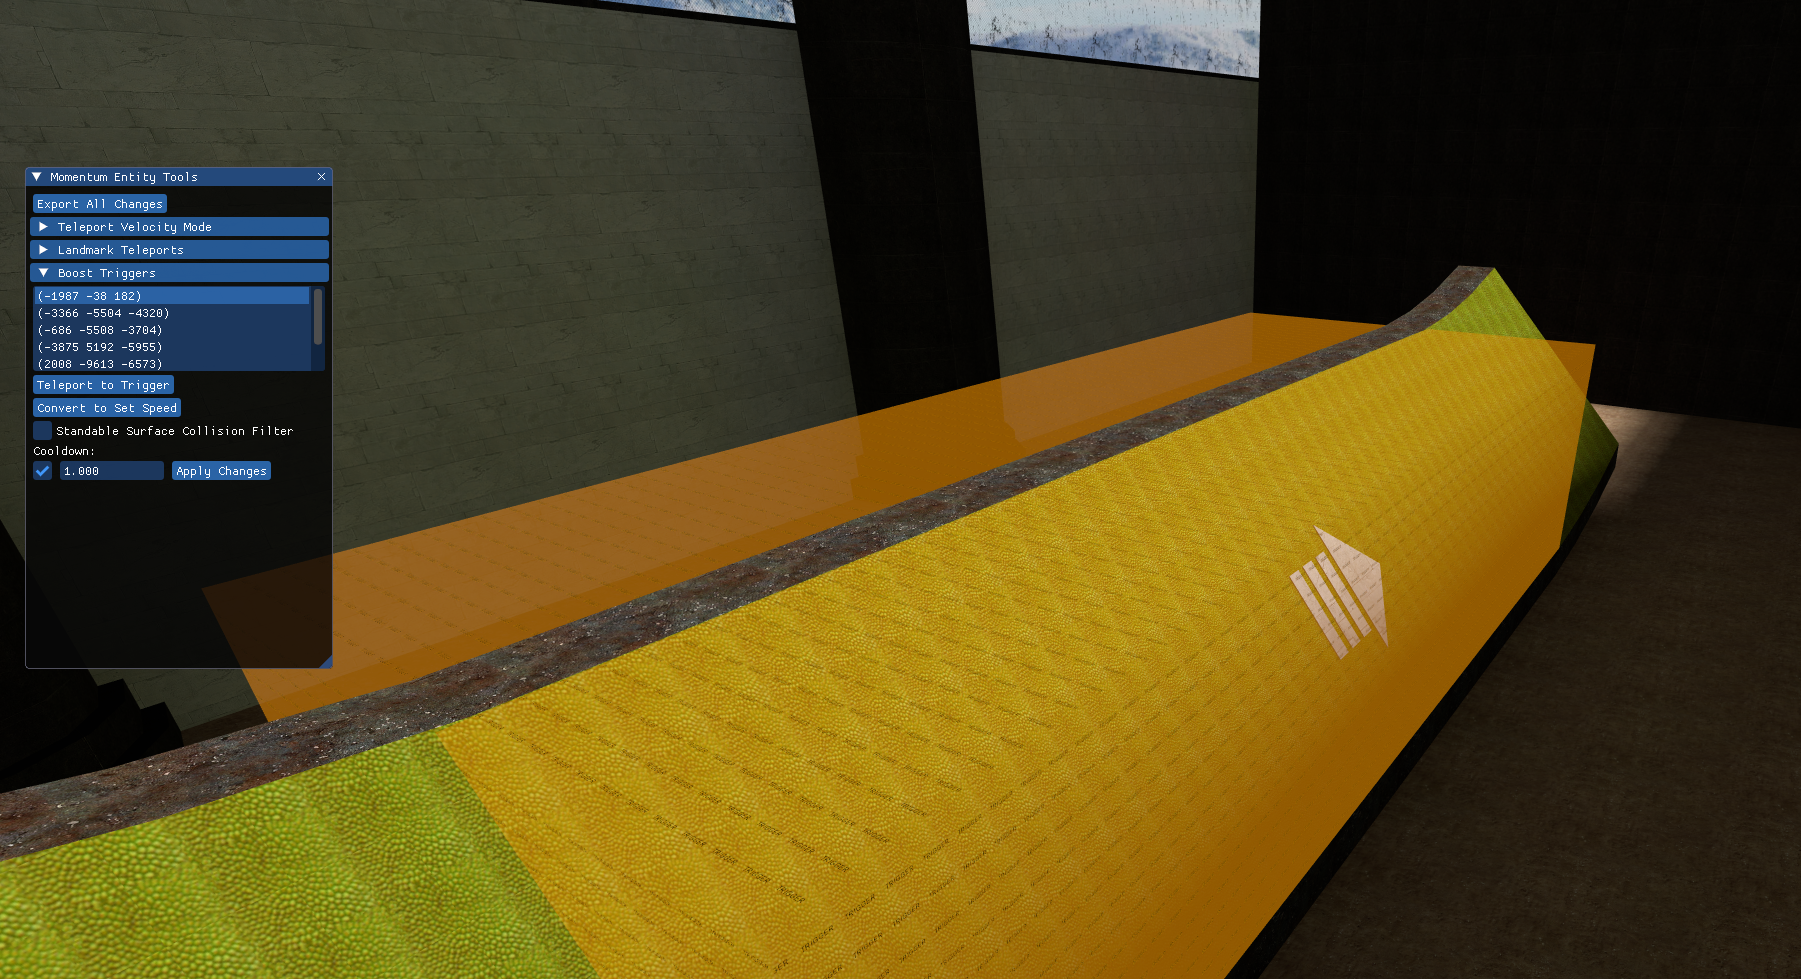
Boost Ramps #
trigger_push entities that push the player into a ramp are very inconsistent and give different speeds depending on how you jump into it. Replace these with trigger_setspeed for a more consistent and less exploitable boost. You will have to tweak the values to make the boost similar in speed and trajectory to the original trigger_push. Enable the “Strict Mode” option to prevent the trigger from activating at all when the player jumps into it.
Fixing Crouchboosts #
The player can sometimes activate a boost multiple times while falling into it with the “crouch boost” exploit. This exploit can be fixed by making push triggers more restrictive. There are various scenarios that require different approaches to fix crouch boosting:
- Surf Ramp Boosts - These boosts can be fixed by adding a cooldown so that the player has to wait before re-activating the trigger. This cooldown will add the following outputs to delay the trigger’s re-activation:
OnEndTouch !self,Disable,,0OnEndTouch !self,Enable,,1. Eventually when save states are implemented, you will be able to make these triggers activate only once until the player fails or restarts the stage by using the “Only Once” spawn flag.
- Floor Boosts - In some cases, you can fix crouch boosting by making it so the boost only activates while the player is touching the ground. One option to fix this is to change the trigger into a
trigger_multiplethat boosts the player withOnJump !activator,AddOutput,basevelocity # # #output. Alternatively if you want to allow the player to get pushed continually, you can leave it as atrigger_push, but use afilter_momentum_surface_collisionfilter with the “Touching standable surfaces” option so the boost only applies on the ground. You should only use this option if the floor is completely flat, otherwise the boost will re-apply every time the player touches another surface. If you have the original vmf and can compile the map, changing the surface below the trigger_teleport into a func_conveyor is also an option.

Jump Boosts #
Boosts that launch the player upwards with OnEndTouch !activator,Addoutput,basevelocity # # # should be updated to use the more consistent OnJump output. Sometimes mappers will also make jump pads that reduce the player’s gravity. In these cases, it is recommended to replace these with a trigger_setspeed or trigger_multiple with an OnJump !activator,Addoutput,basevelocity # # # output.
Exporting Entity Modifications #
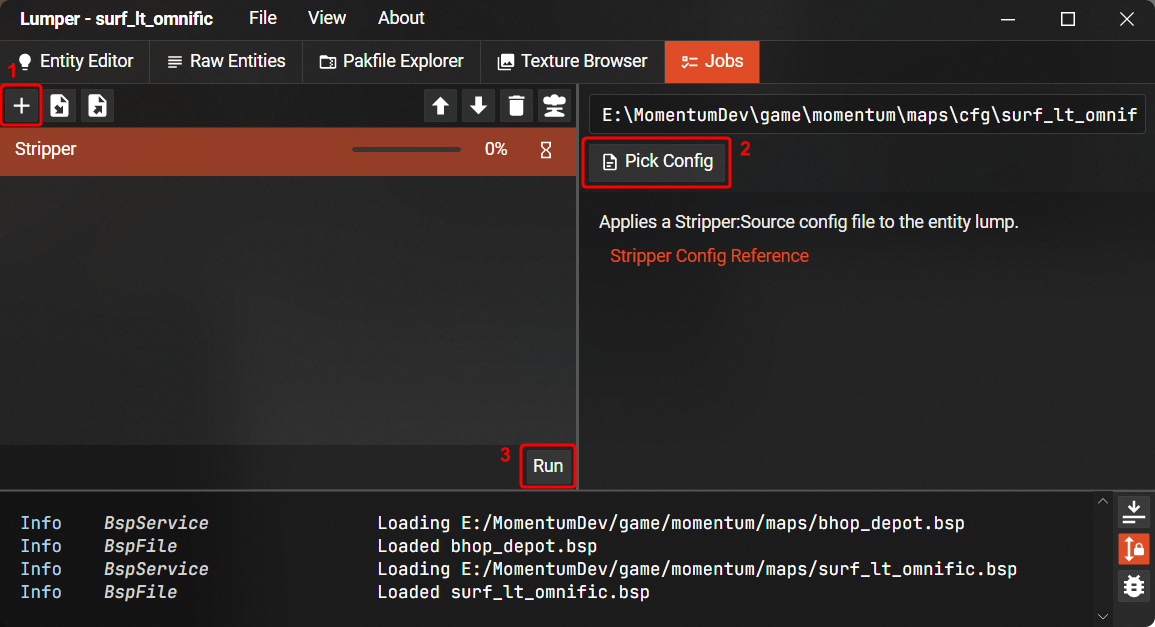
Changes with the entity tool can be exported by clicking the “Export All Changes” button. The entity changes are then written into a <mapname>.cfg file in your maps/entitytools_stripper folder. These changes can then be applied to the BSP file using our tool Lumper. Open Lumper and load your BSP file by going to File -> Open. Then go to the Jobs tab and click on the + icon to add a Stripper job. Load the config file that was generated from the entity tools and click the run button to apply the Stripper config to the BSP. You can then save the BSP by going to File -> Save. You can check the “Save Compressed” checkbox if you plan on submitting this version of the map to the official website.
Other Tools for Entity Modifications #
Hammer #
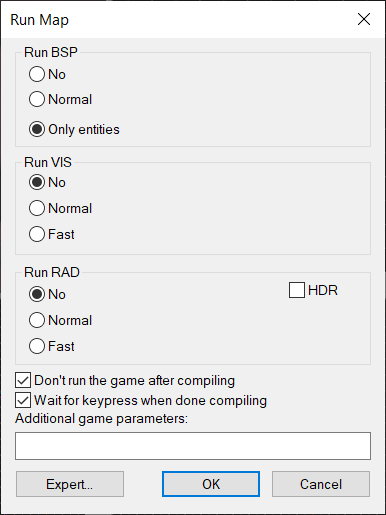
Entities can also be modified in Hammer without having to recompile the entire BSP. This is done by decompiling the map, making the entity changes, and then compiling with the “Only entities” option checked. The BSP file has to be in the same directory as the vmf for this to work.
Lumper #
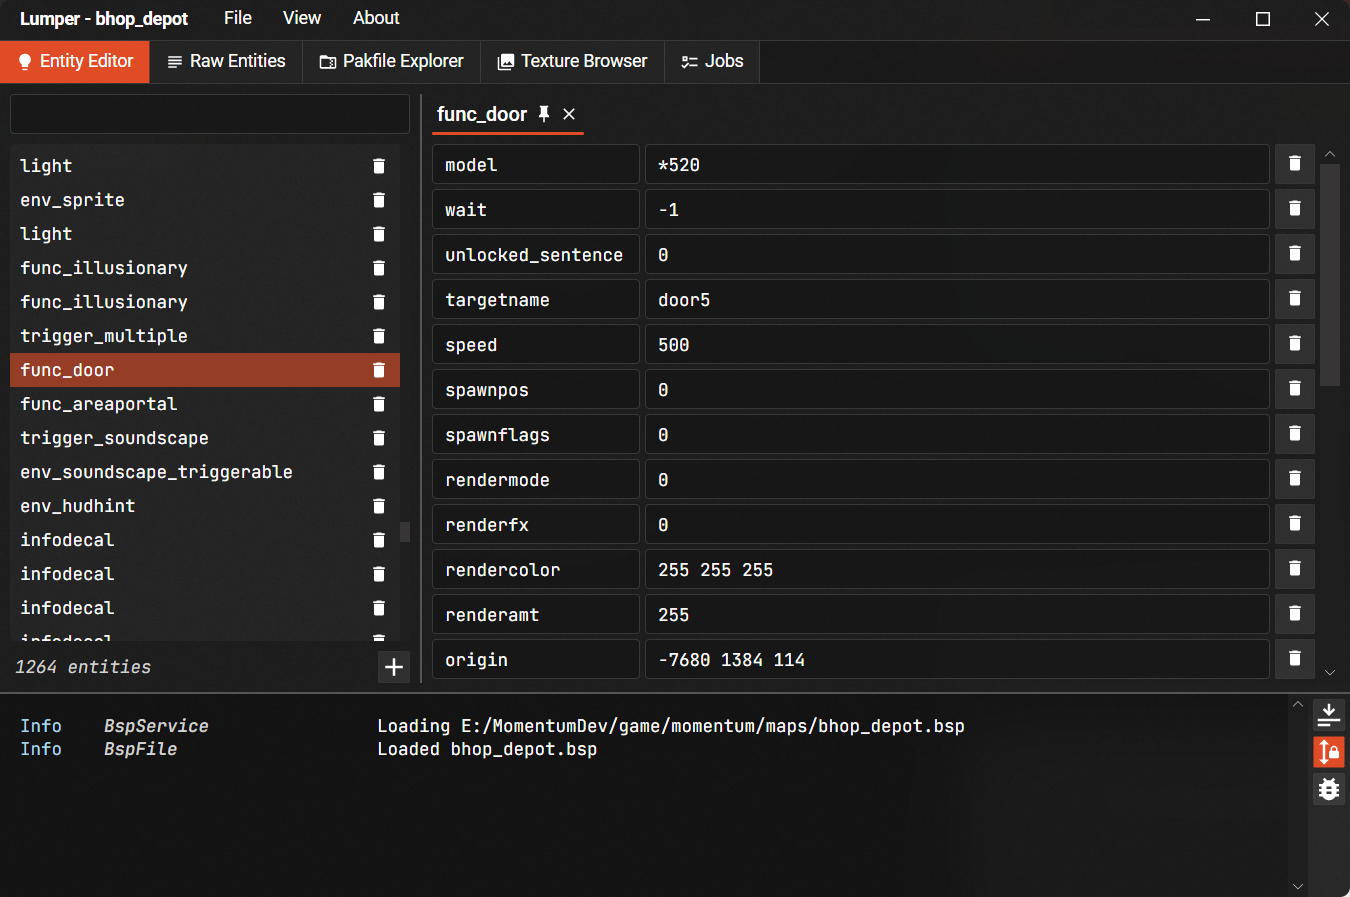
Lumper also has an entity editor that can be used to easily modify the key/values of entities.
Map Submission #
Lumper Cleanup #
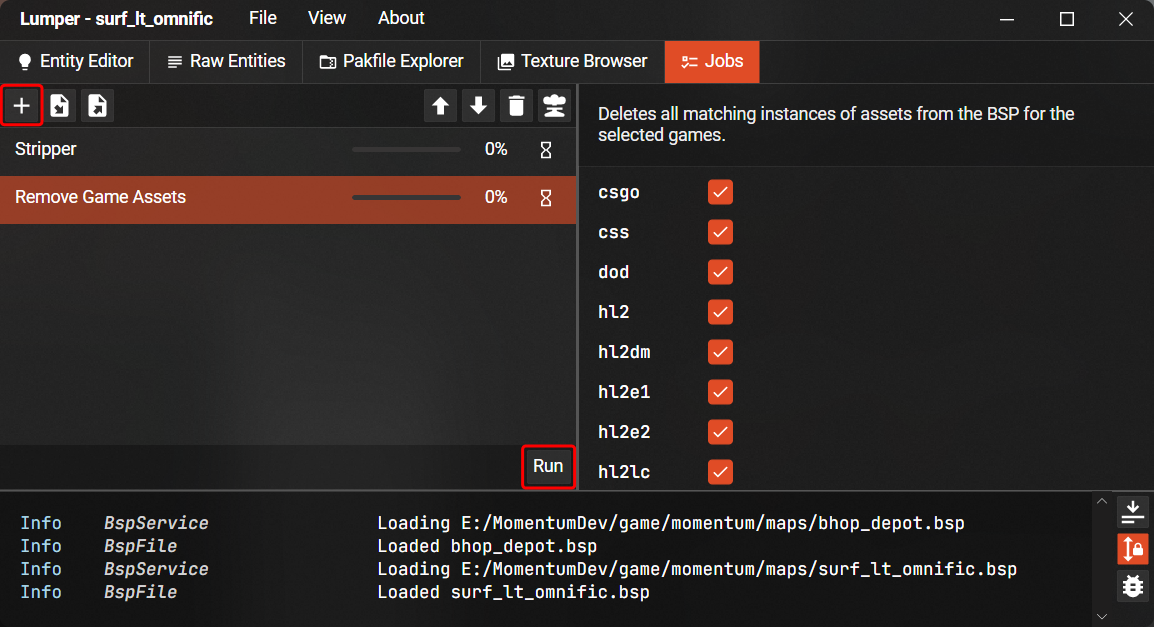
There are a few more things to do before a map can be officially added to the game. Valve assets cannot be uploaded to the website and must be removed from the BSP’s pack file. Fortunately, Lumper makes this process very simple and automated. You just need to run a job to remove the game assets:
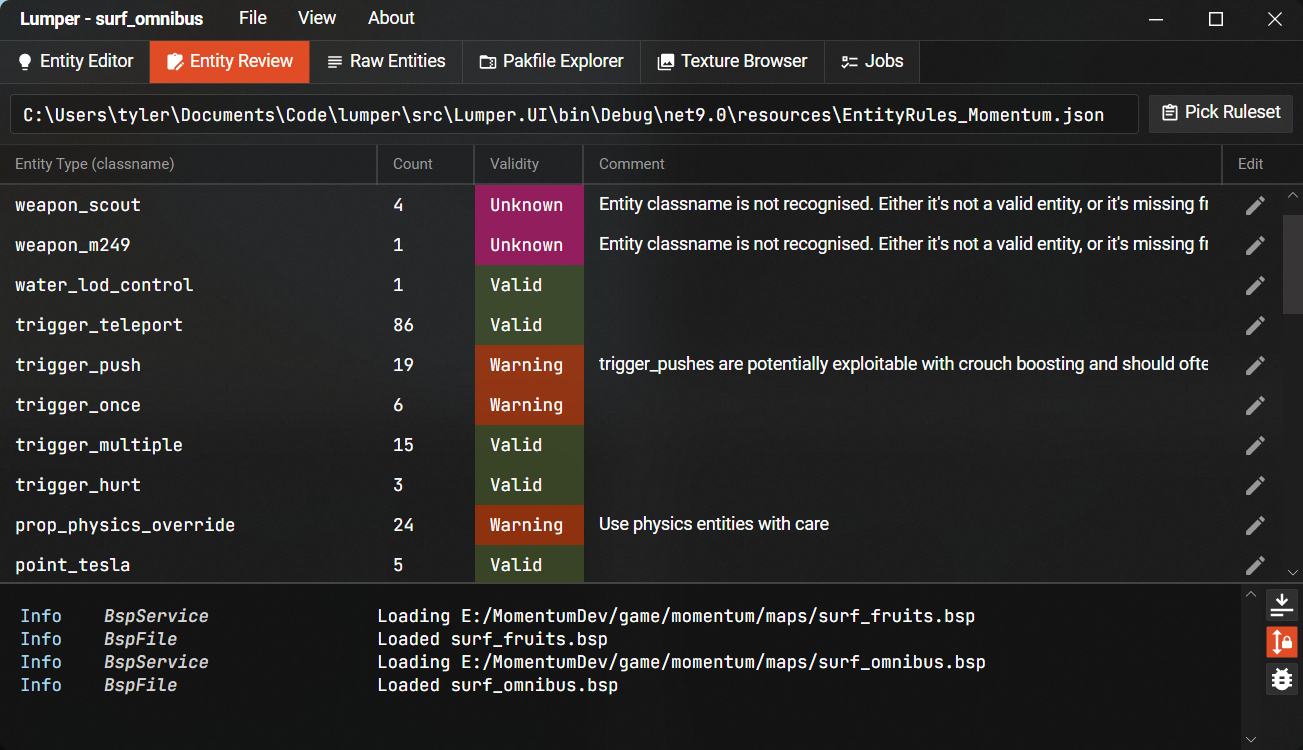
Lumper also lets you review entities for anything that might be worth changing or removing from the map:
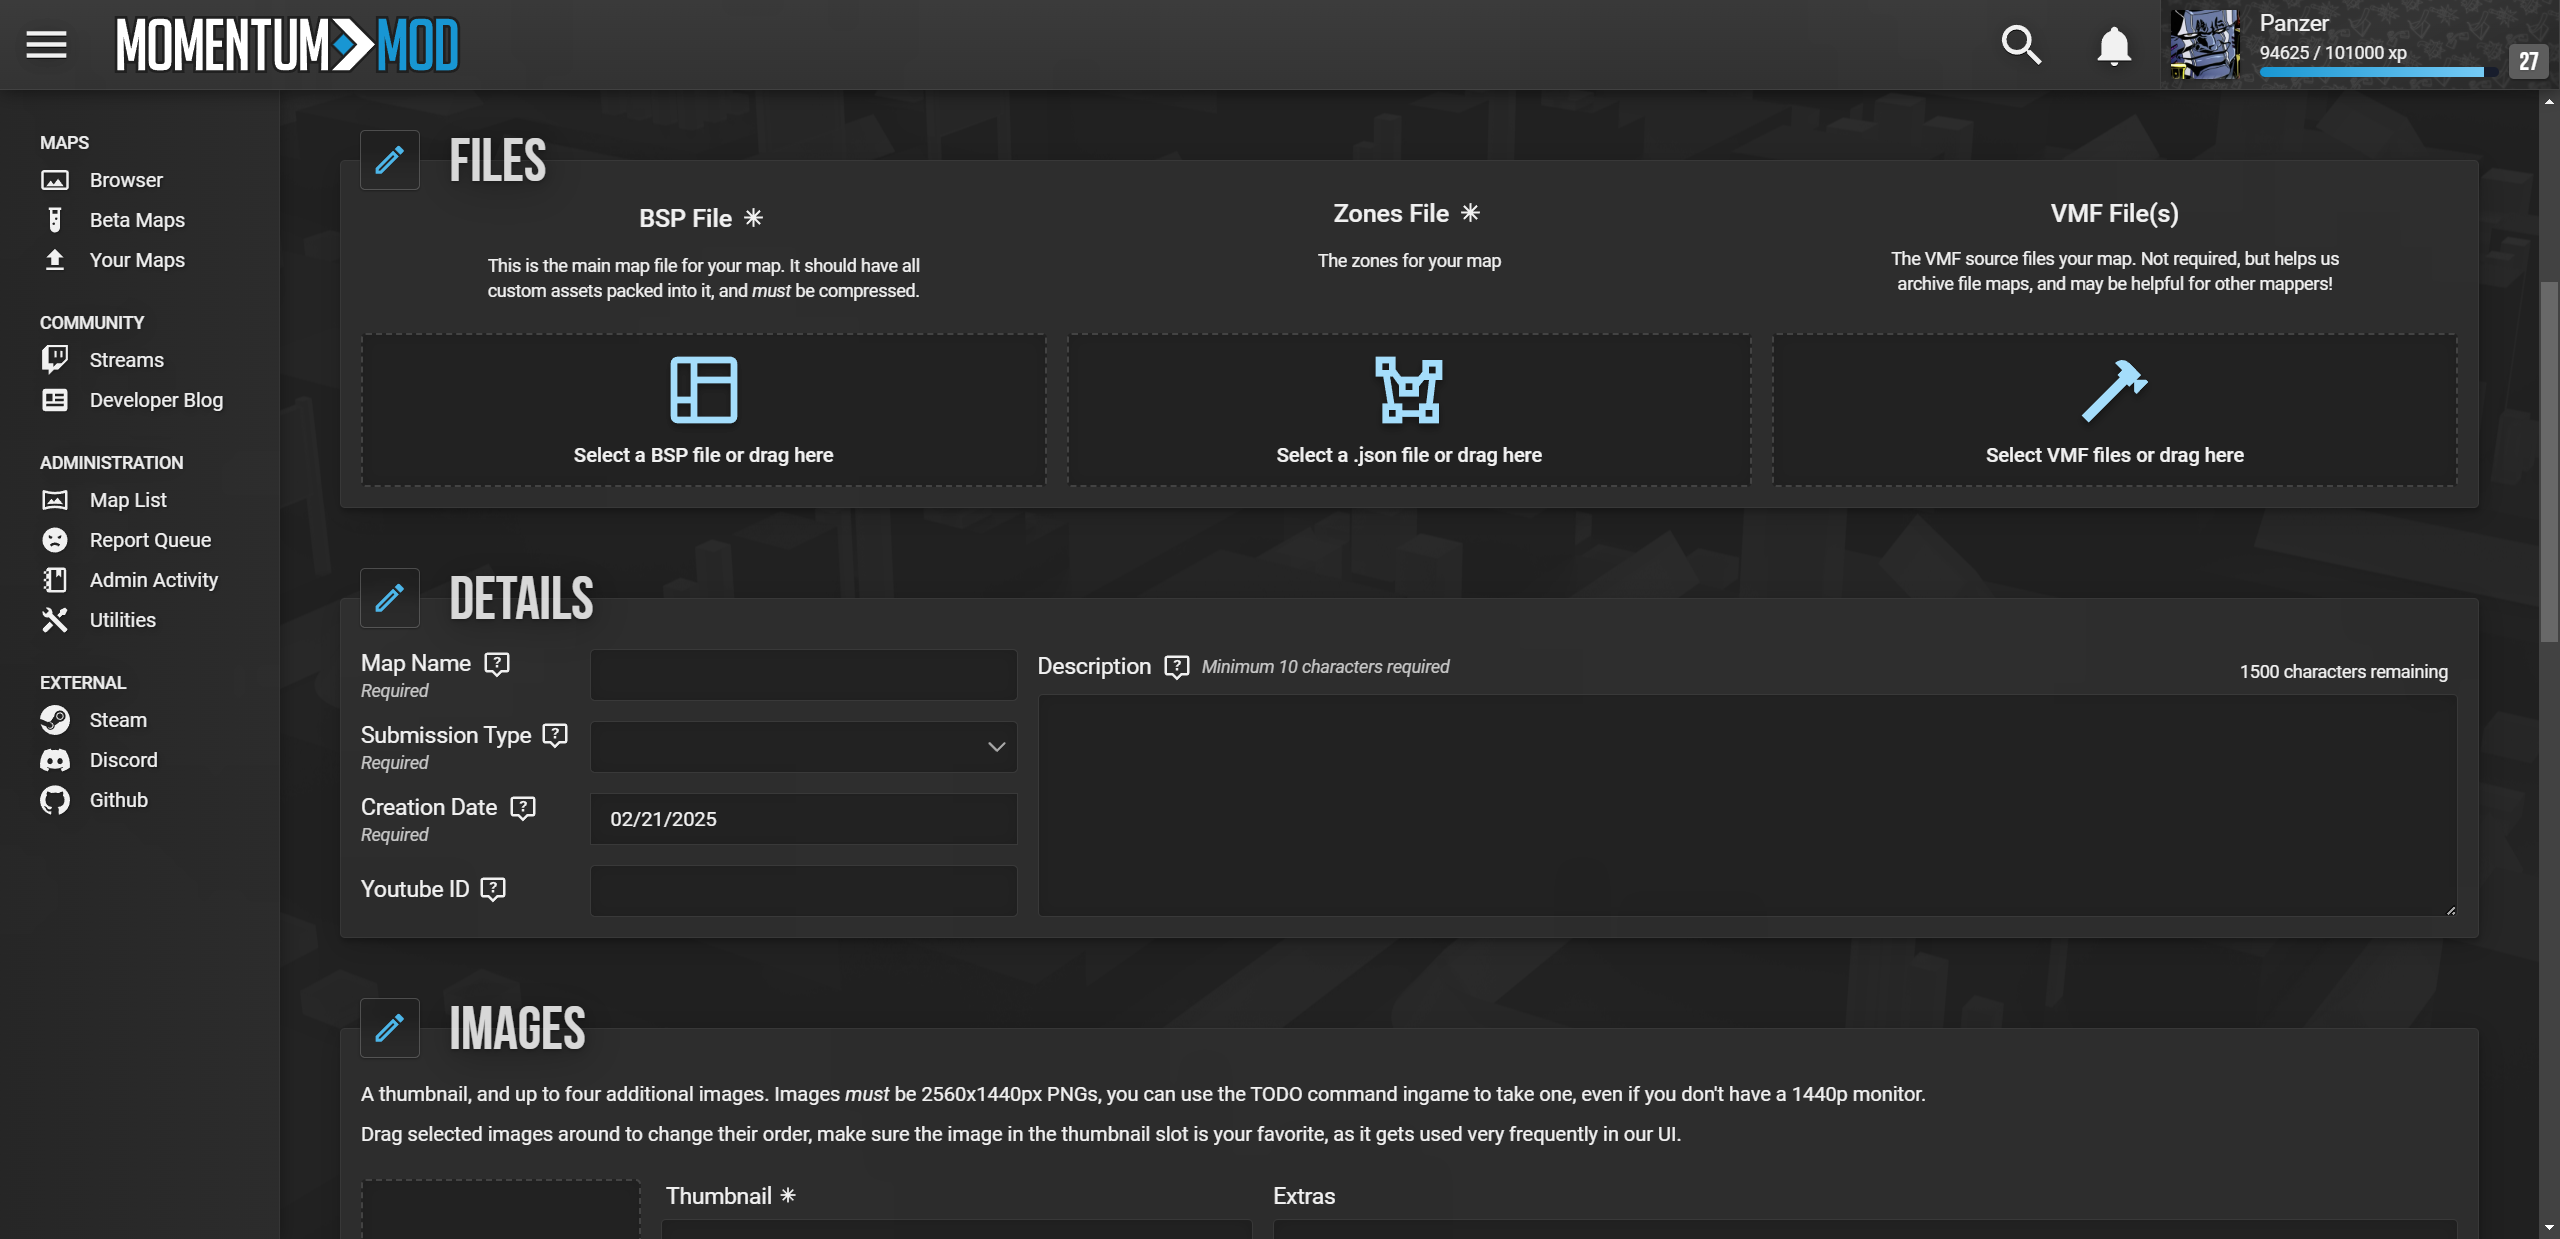
Website Map Submission #
Maps submitted to the official website will only be approved if they follow our Official Porting Guidelines. TODO: Add link
-
Go to the Momentum Mod Submission Page and click the “Submit a Map” button to begin the submission.
-
Upload the BSP and zone .json file. Uploading the VMF is also recommended since it helps speed up the review process in some cases.
-
Fill out the rest of the required details. Use the
mom_screenshot_officialcommand to take screenshots with the official settings for map submissions.
Other Useful Porting Tools #
- Hammer++ - Improved Hammer editor
- CompilePal - Improved expert compilation tools