Note: This guide assumes that you have a basic working knowledge of the hammer editor and the tools used.
Basic Surf Ramps #
Planning #
Before you start to create your ramps in hammer, there are a few factors you should consider:
- How steep do I want the ramps to be?
- A ramp that is too steep / wide may be considered awkward to board.
- People tend to use a 5:4 ratio for the dimensions of their ramps
- What size do I want for my ramps?
- People may find themselves sliding off the bottoms of small ramps.
- They may feel like they are going slow on oversized ramps, it is important to find a balance.
- How do I want to detail my ramps?
- Will models be needed to achieve the visual style, or can it be brushes?
These characteristics of your ramps will inevitably be refined through testing, but it is a good idea to start off with a plan for how you want the surf to feel. Look at different surf maps that you enjoy and try to get an idea of how exactly you want yours to pan out.
Creating the Base Ramp #
Once you’ve figured out what you want your surf to play like, it is time to open hammer!
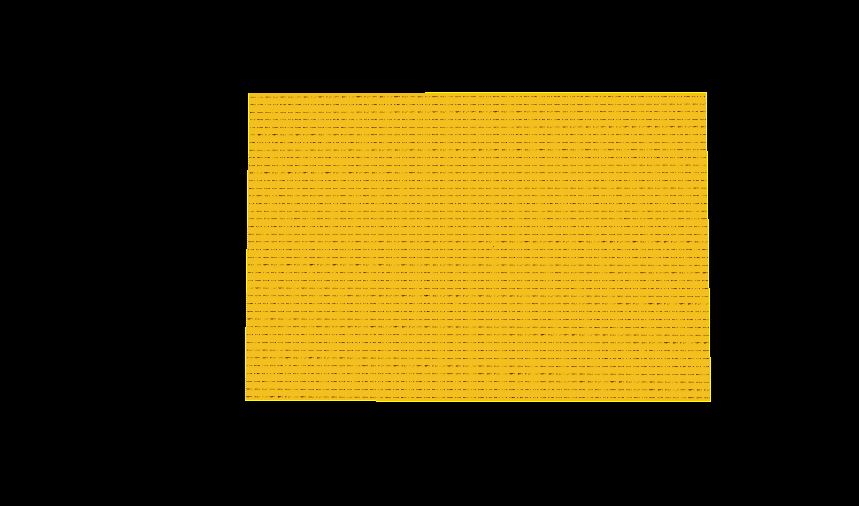
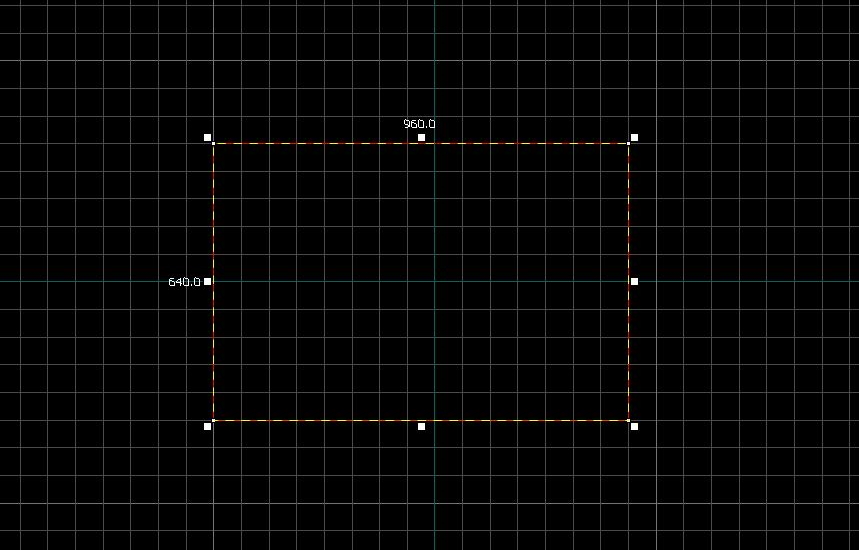
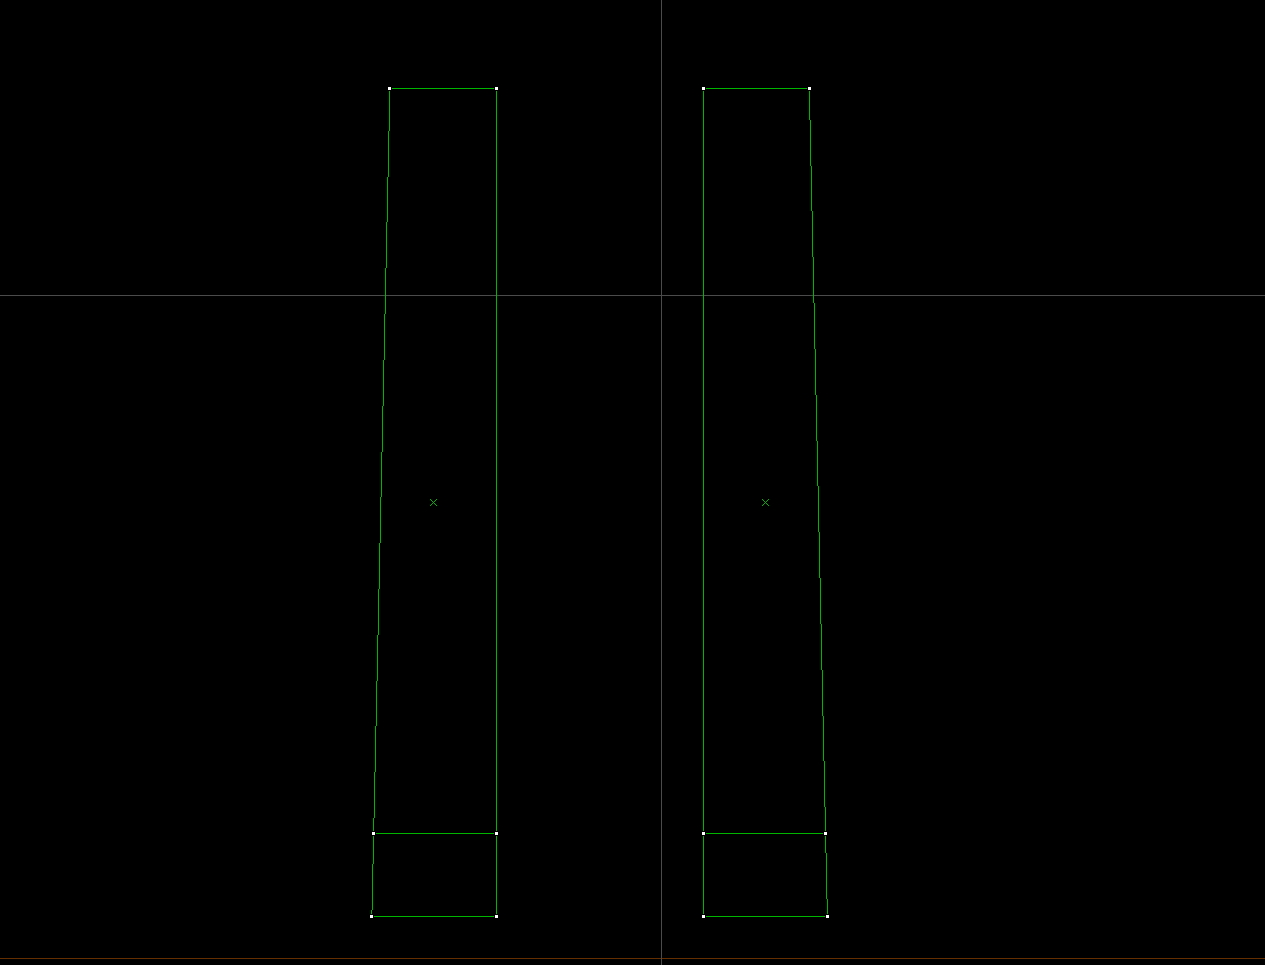
The first thing you will want to do is select nodraw as your texture in the texture browser and then create a block that is the dimensions you want them to be using the block tool. For this guide the dimensions will be 960 x 640 for double sided ramps.
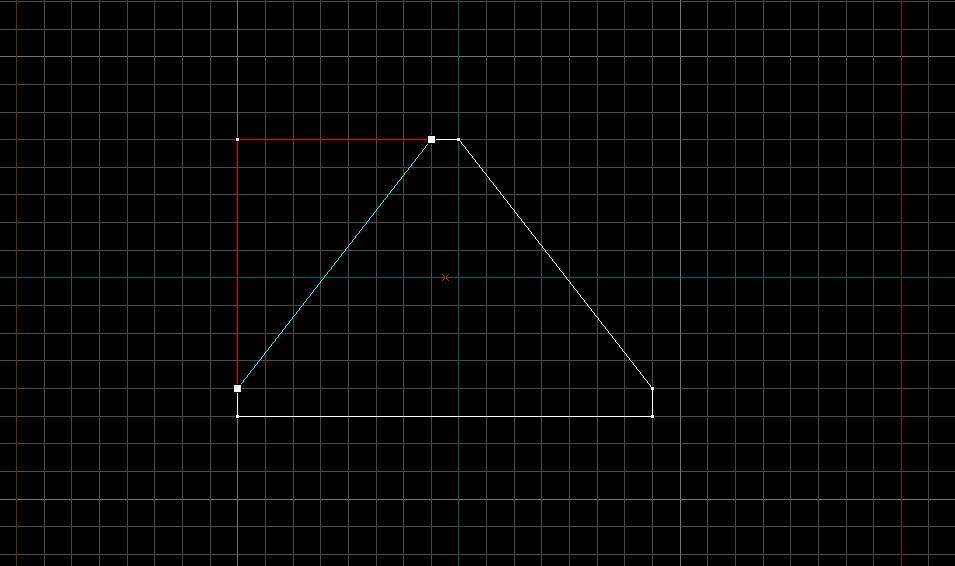
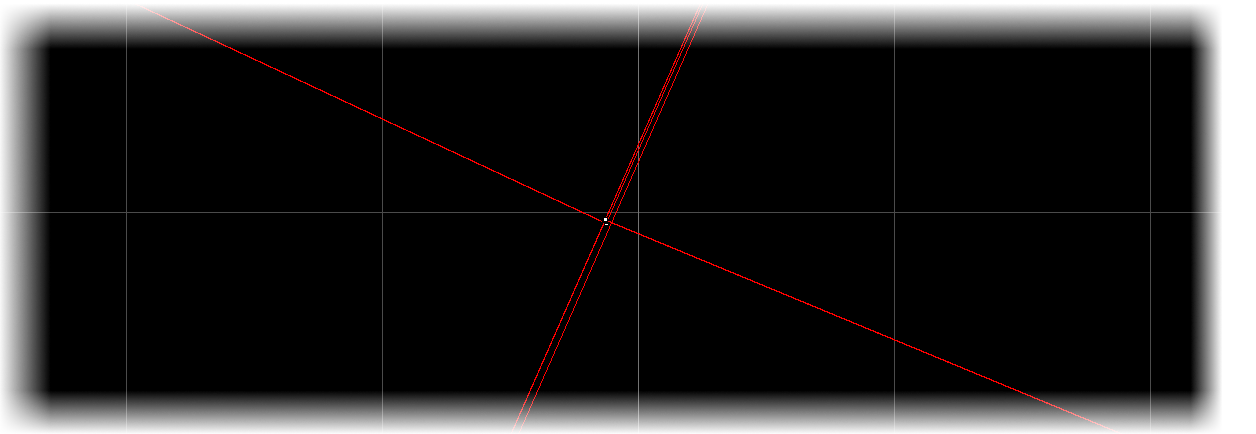
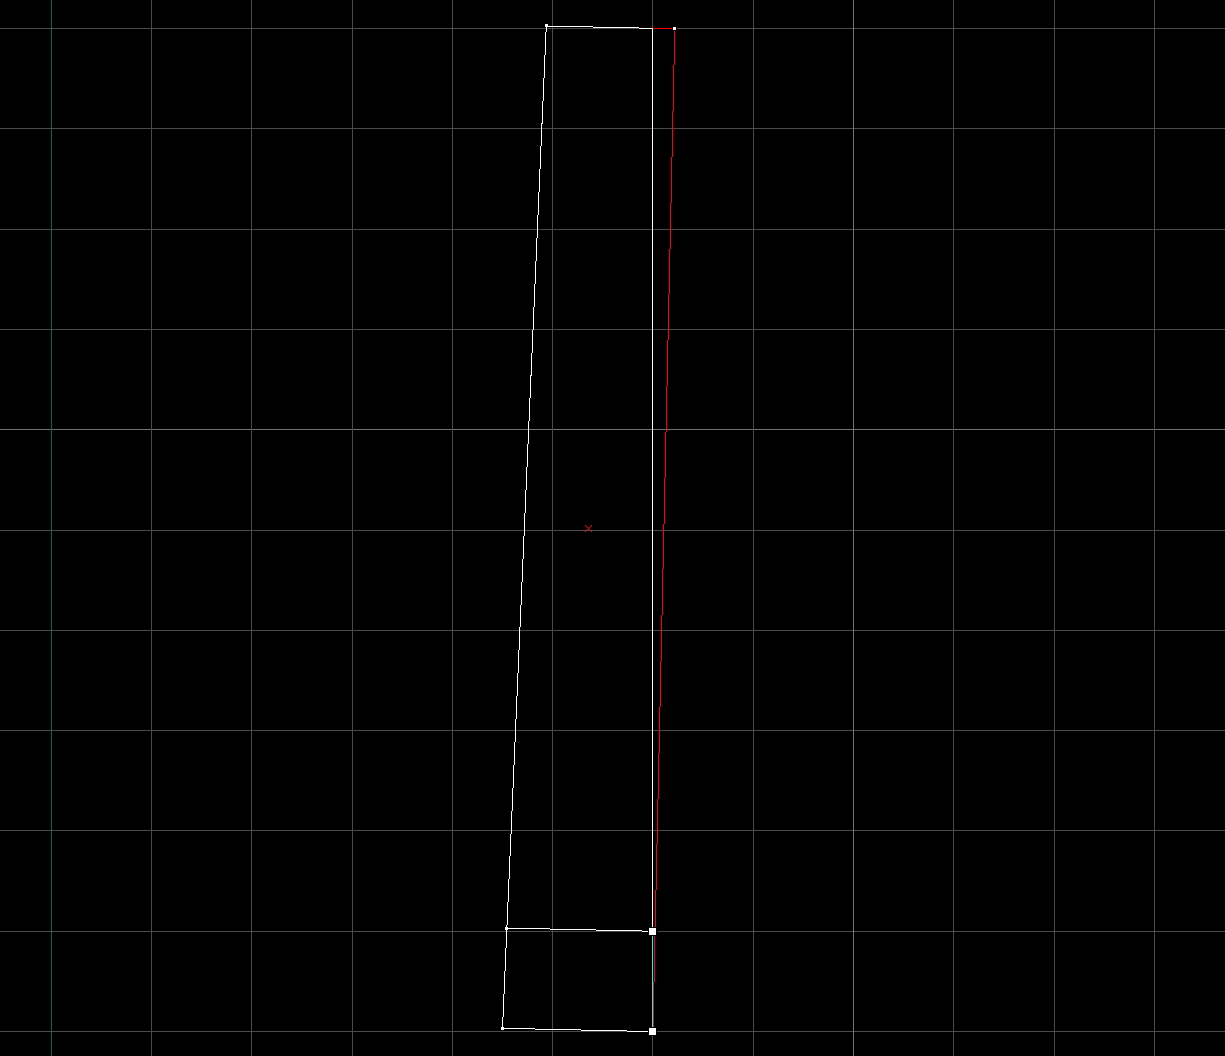
Now you need to cut the block you have made in order to create the surfable slanted surface. Using the cutting tool, make one end near the lower corner of the ramp and the other one near the top center.
Cycle through the options by pressing Shift + X or pressing the tool logo until the part that you want to cut is red, and the rest is not. Press enter to cut it.
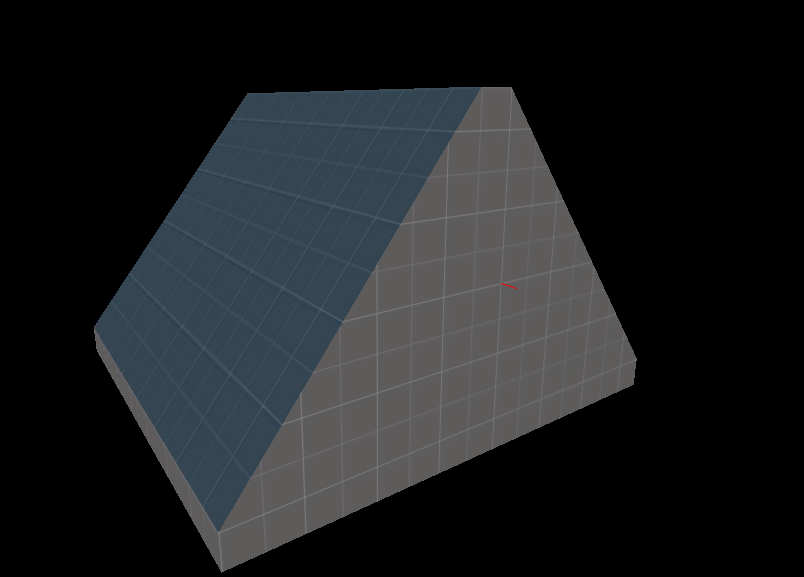
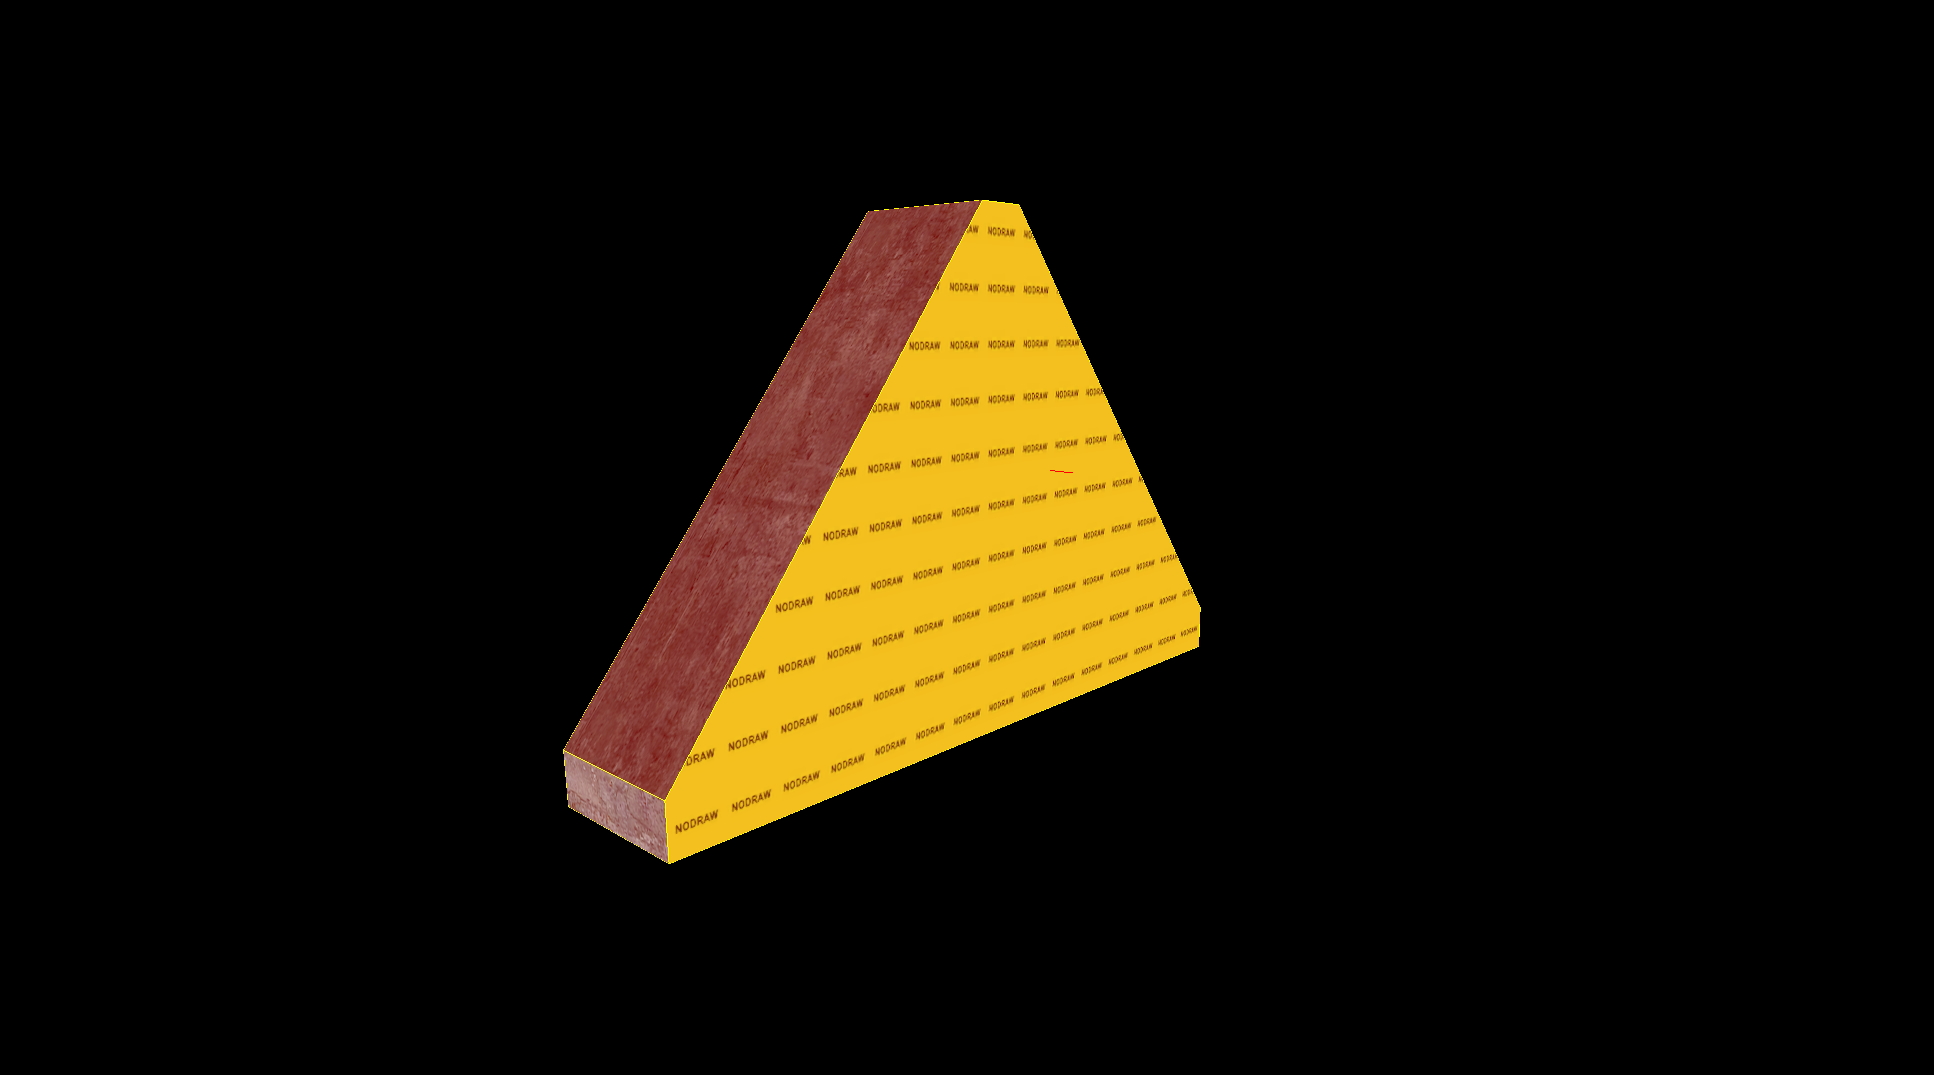
You now have your first surf ramp. To finish off, use the texture application tool to add materials to your ramp.
Finally, use Ctrl + T with the ramp selected to make it into a func_detail.
Making your ramp into a func_detail means that it will not be used to seal the map or calculate visibility. This is important when working with complex ramps as the compile will take a lot longer trying to involve these ramps in the visibility calculations and can also lead to visual errors in-game.
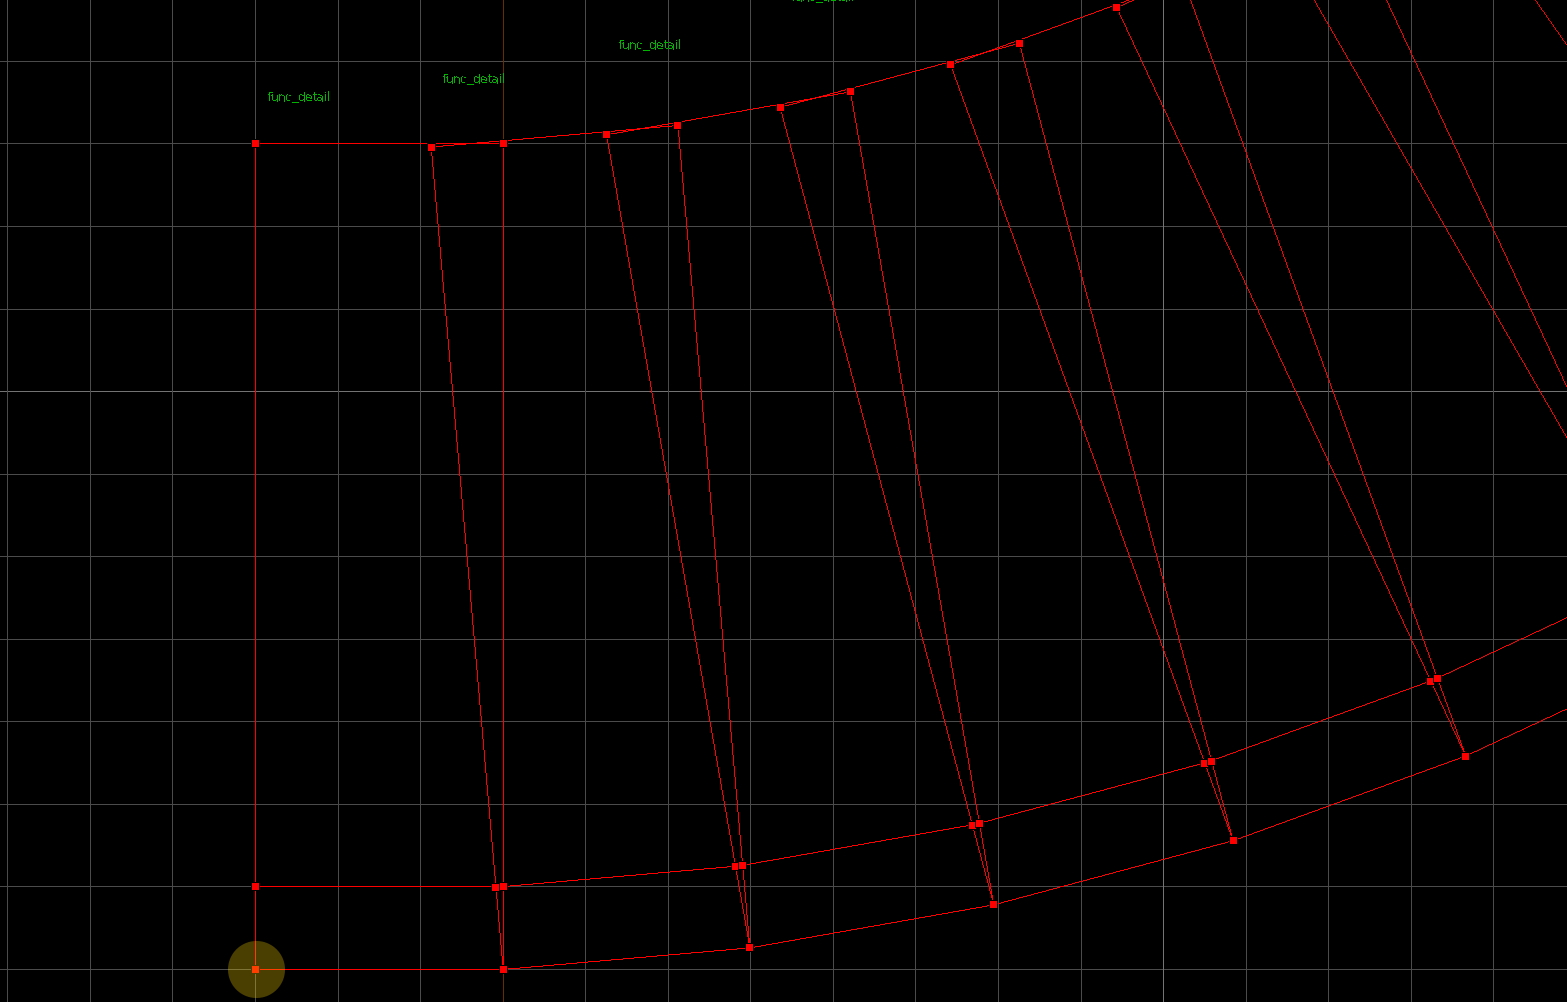
You may notice that the lower edge of the surf ramp has been cut 64 units above the bottom corner of the ramp. Though this can sometimes just be a stylistic choice of the mapper, this can also be significant when creating curved ramps. This will be covered in more detail later.
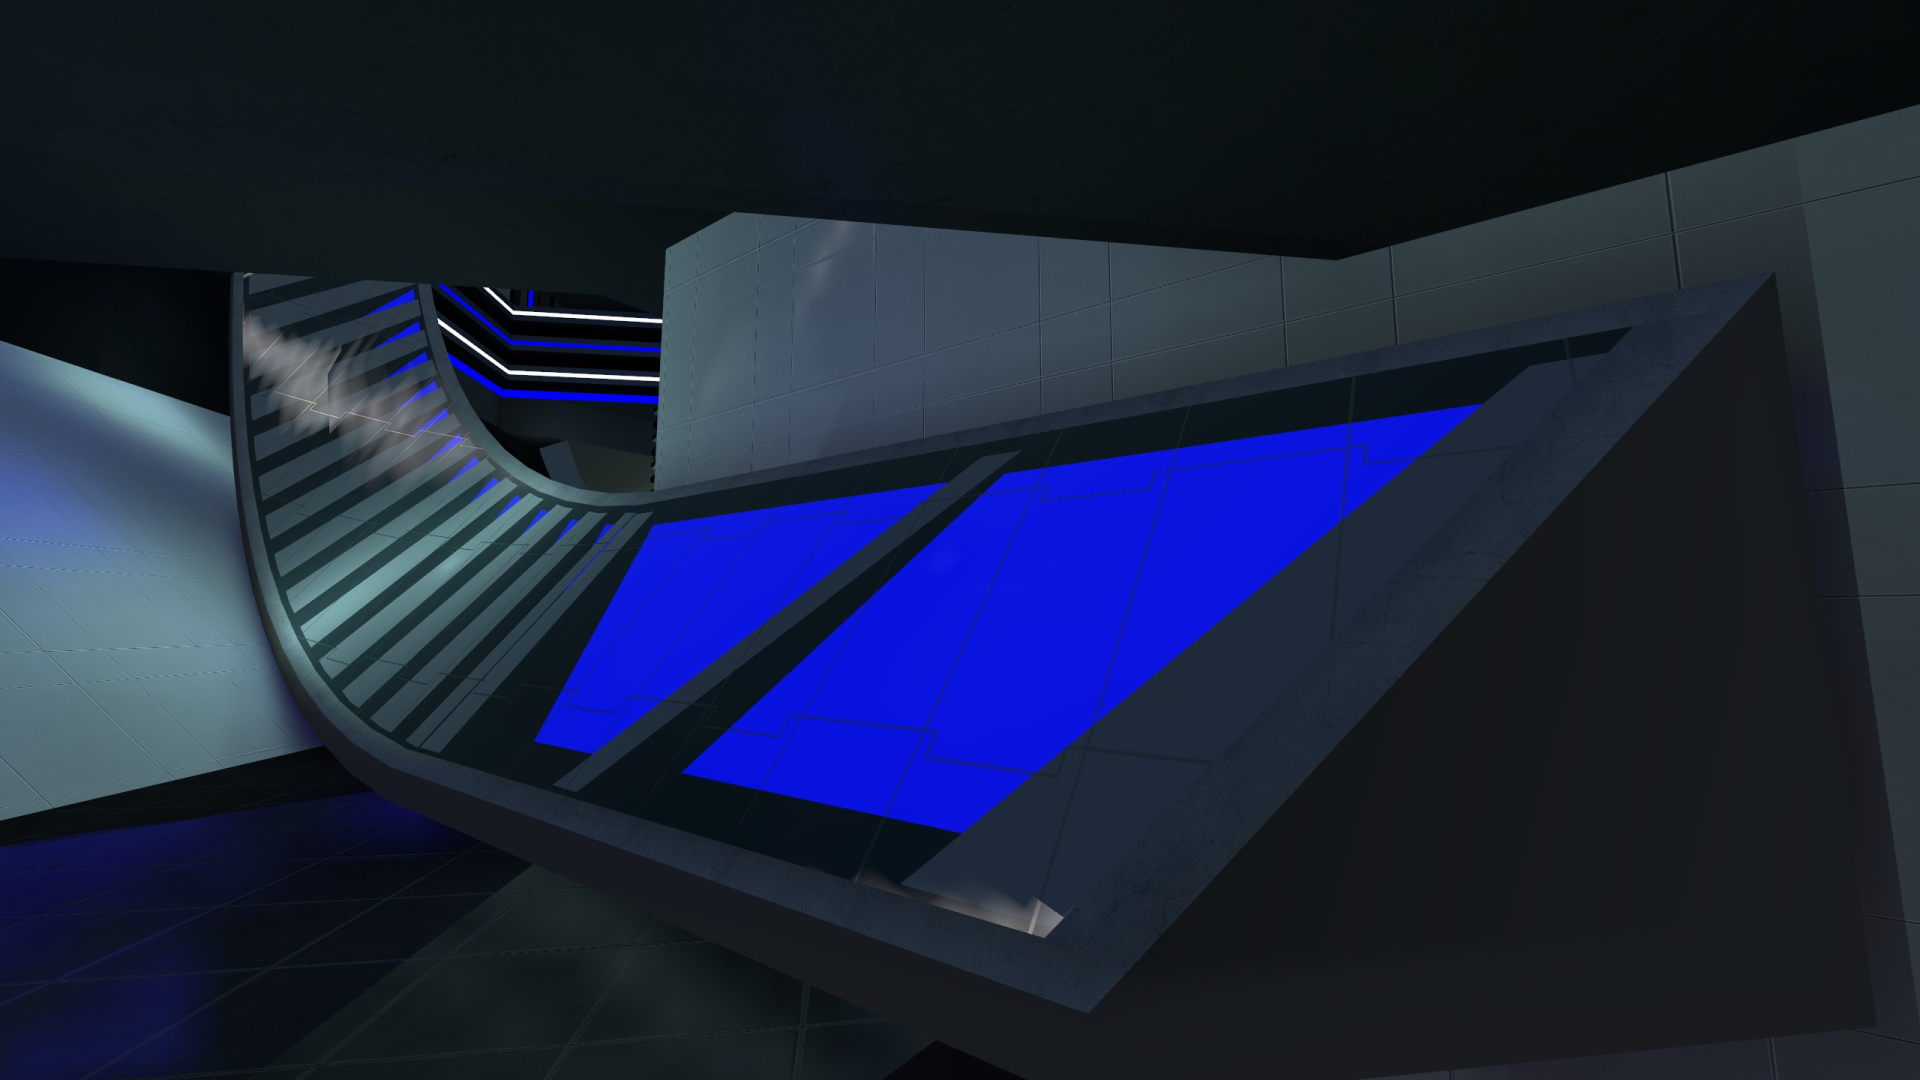
Detailing the Ramp #
Say you are not satisfied with the surfable area being entirely blue dev textures, and you want to spice it up near the top and bottom edge. The instinctual thing to do would be to use the cutting tool to slice up the ramp and then apply new textures.
Doing this alone can cause the collision on your ramps to break near the seams where these slices meet, often causing players to get stuck or lose speed on them.
This is where the importance of separating visuals from collision comes in. You want your collision on the surfable portion of the ramp to be as simple as possible to avoid these errors. In this case you would want to create a copy of your simple ramp and make it into a world brush using the toWorld button and texture it as tools/toolsplayerclip or tools/toolsblockbullet. This creates a separate brush to represent the collision for the ramp and will not appear visible in-game.
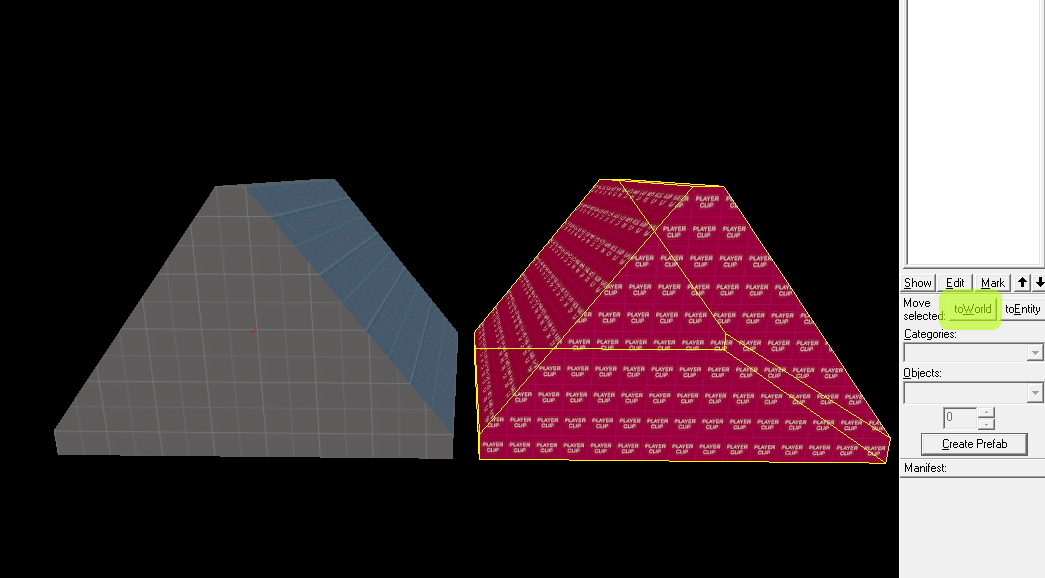
Now you can cut the visual representation of the ramp however you want. When finished you need to make sure the cut version of the ramp is not solid.
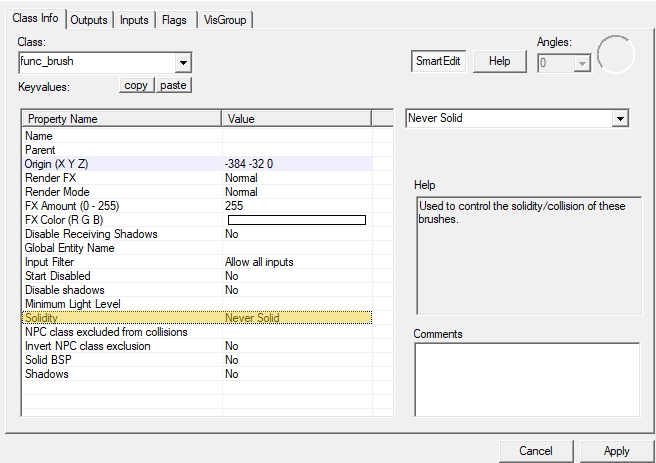
To do so, use Ctrl + T or double click the ramp if it is already a func_detail and change the class to a func_brush. Change the “Solidity” property of the func_brush to “Never Solid”.
Finally move the two versions of the ramp so that they overlap in the exact same position.
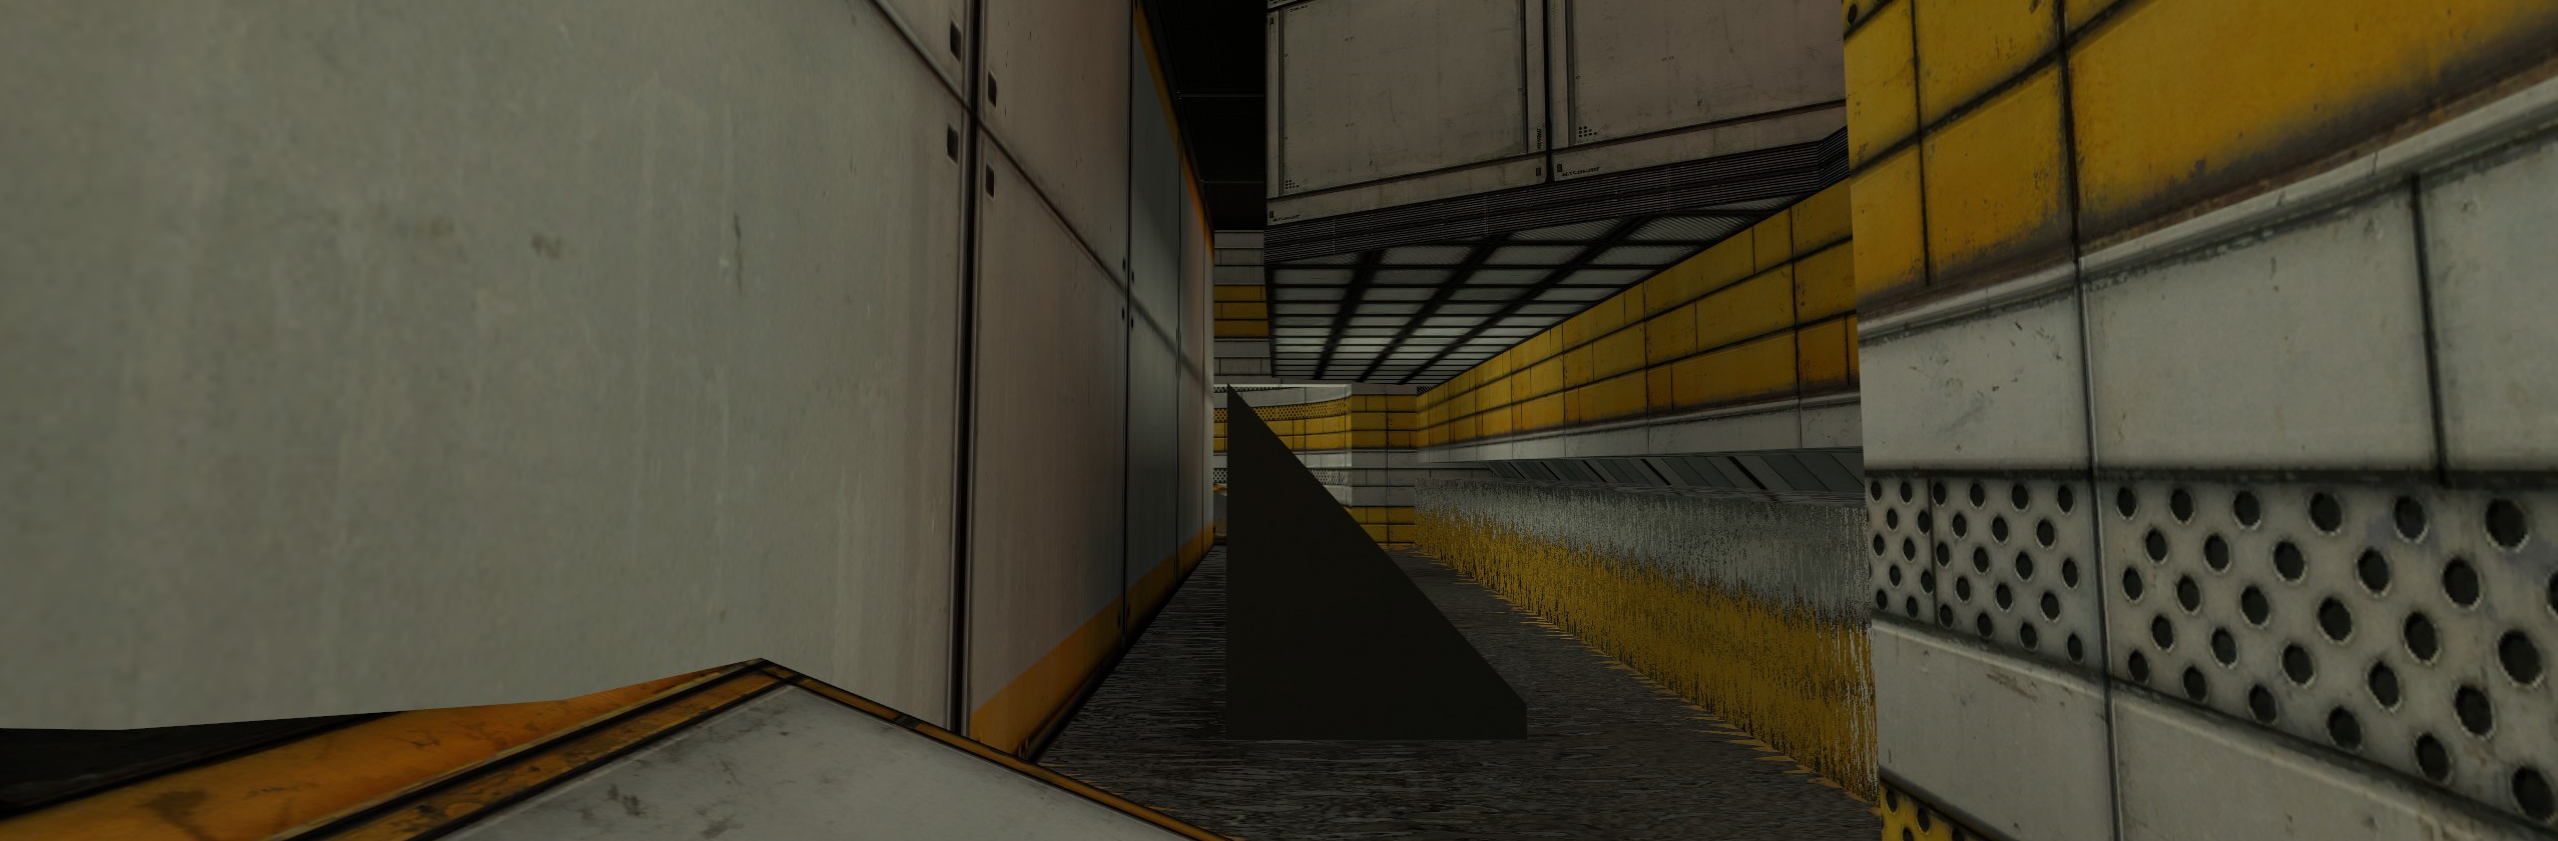
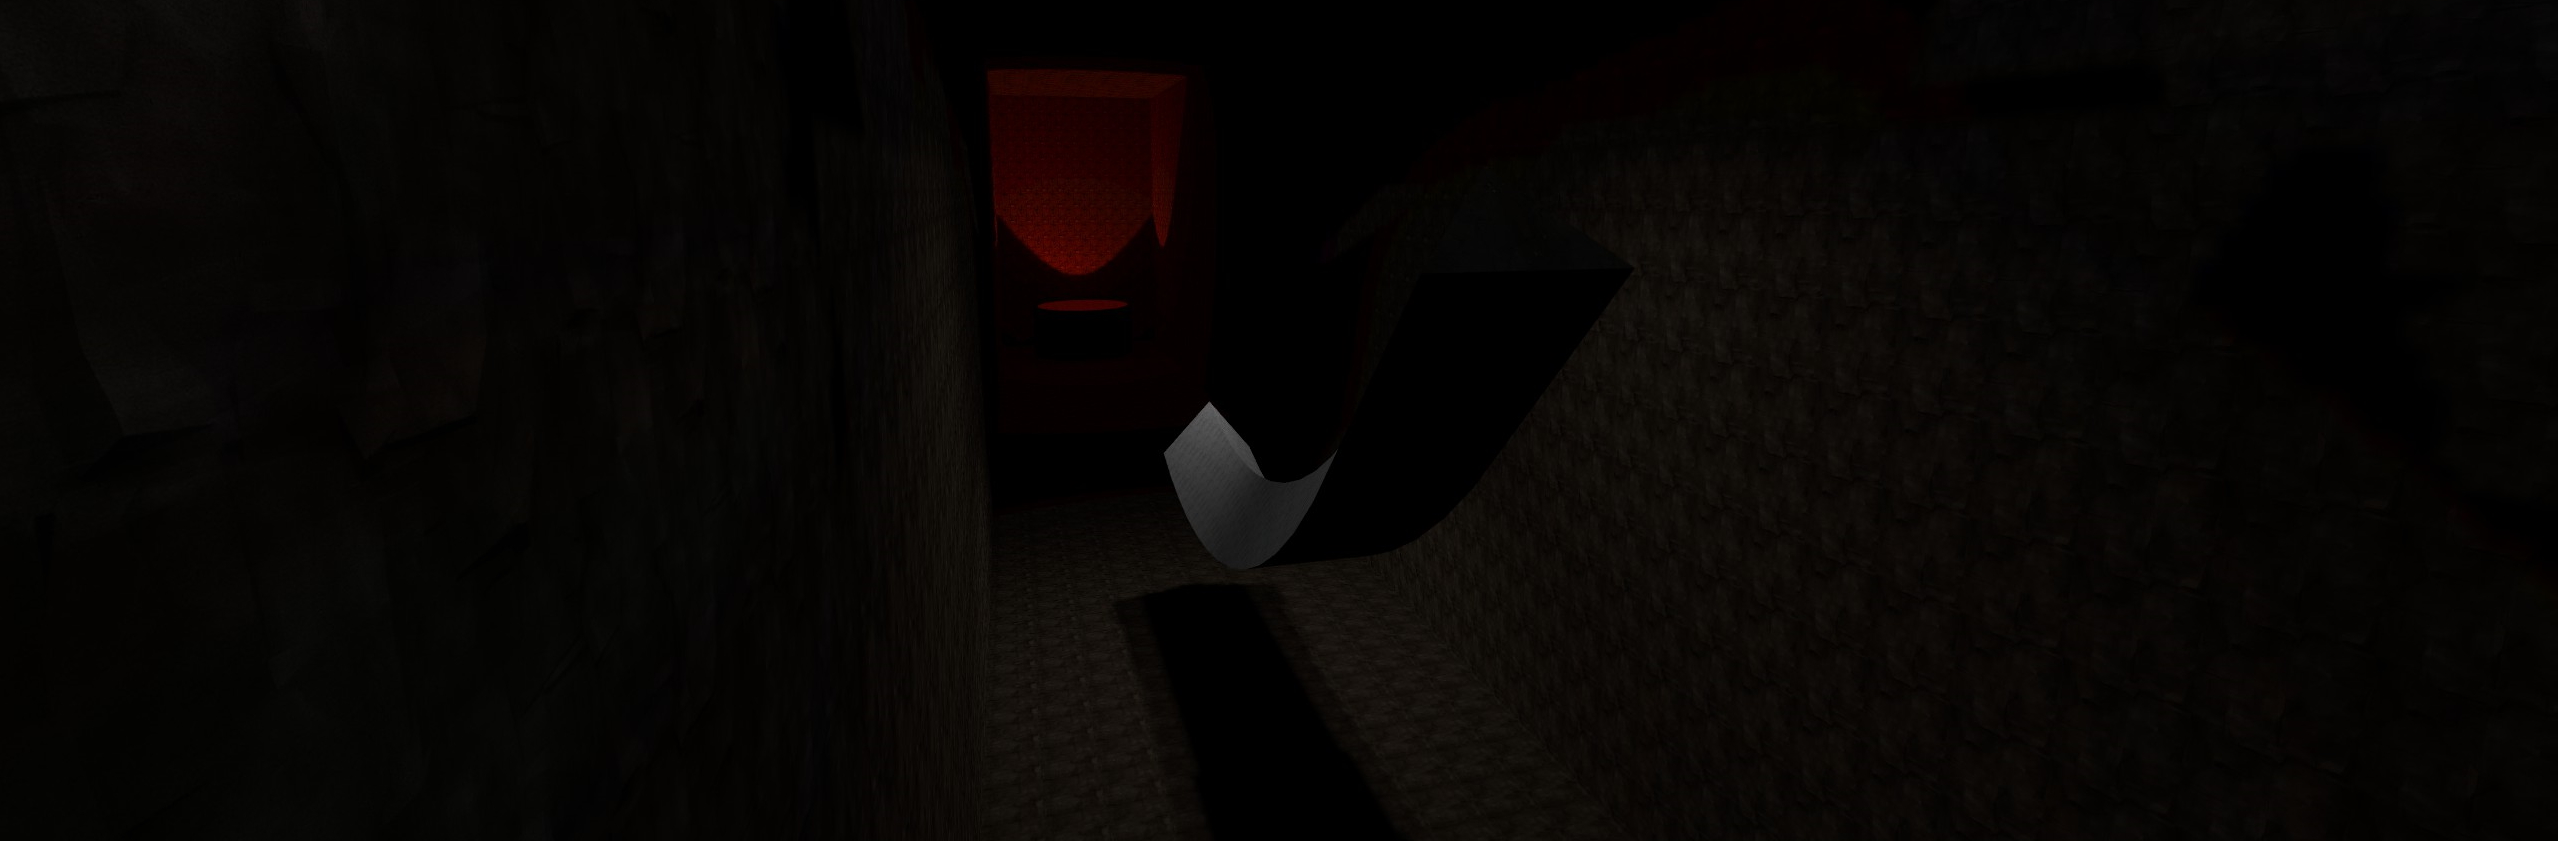
With your ramp completed, you can use the cordon tool to seal it off and compile the map to view it in-game. At this point in development normally you would just want to test the surf, so you don’t need to compile with lighting or vis.
There it is! Absolutely stunning! Looking ready for release!
The vmf created during this guide is available here.
Curved Surf Ramps #
Although you can do a lot with simple surf ramps, sometimes you will want to add curves to your surf in order to add variety. Curved ramps can be helpful on easy maps since beginners will have an easier time landing on them.
Limitations of Precision #
If you have ever zoomed in really close on off grid brushwork you may have noticed that the vertices act a bit strange. Sadly, the way hammer was made does not give mappers infinite precision with their brushwork. This means that the editor has to do some guesswork when dealing with vertices that are not aligned with the grid. Due to this limitation, vertices left off grid will shift very slightly when compiling and loading the map file.
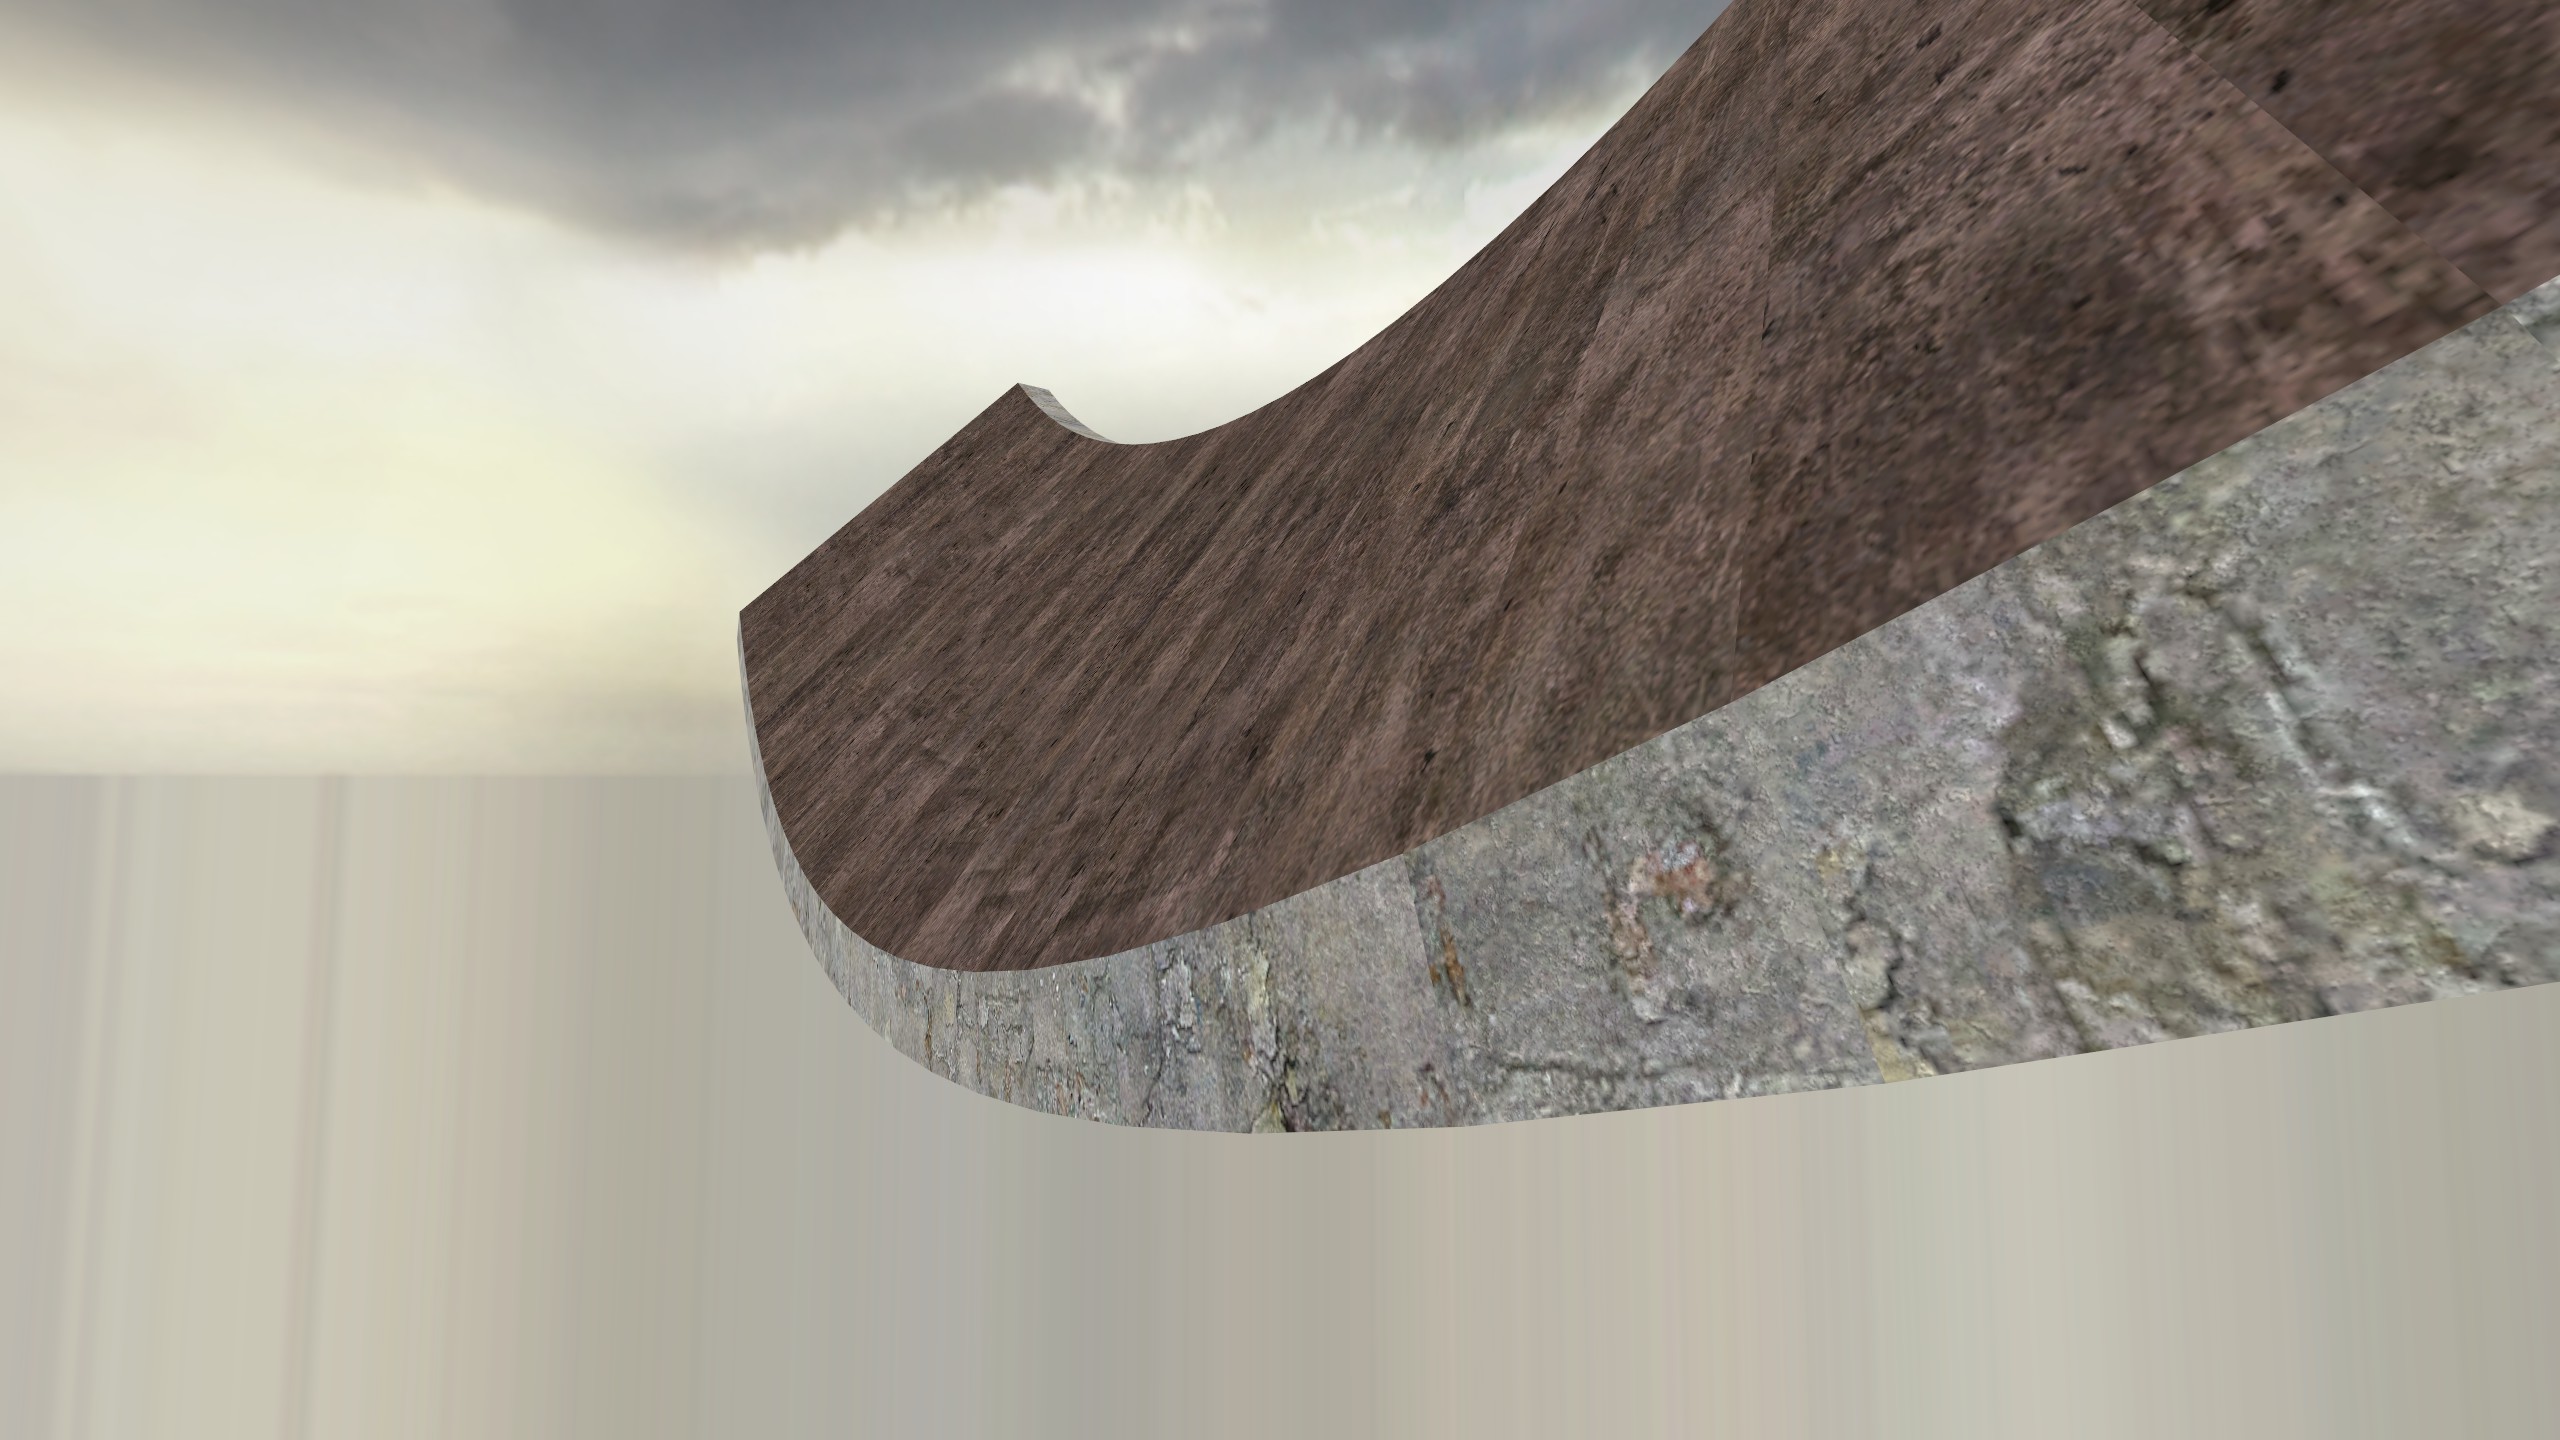
For curved ramps this means that the portion near the bottom of the ramp where segments will meet can have collision errors. The standard fix for this has been to add a flat “base” portion at the bottom of the ramp segment that you can’t surf on. This means that any precision errors would only take place at the base of the ramp and not the surfable portion.
This is explained in more depth here.
More intricate fixes have been made including hammer modifications such as Slammin tools and HammerPatch. These improve the precision of the stored vertices and help keep brushwork looking the way it’s supposed to. Momentum hammer also implements a fix similar to HammerPatch.
Note: The purpose of a base portion at the bottom of the ramp is to make the surfable area overlap at all locations. As long as they are used while creating the ramp, they can be deleted afterwards.
Curved Ramps with Func_Detail #
To start working on a curved ramp, the first thing you need is a flat one.
This can be very short since it will be copied and rotated repeatedly to create the illusion of a curve. Generally, ramp segments are rotated by 2 to 5 degrees for each time they are copied. Rotating each segment by too much will make the ramp feel bumpy but giving it too little will require far too many segments to create the curve. The front and back of the segment can be left as nodraw since when the ramp is finished, most of these faces will not be visible.
In the side view, hold Shift with the first segment selected and drag it to duplicate it.
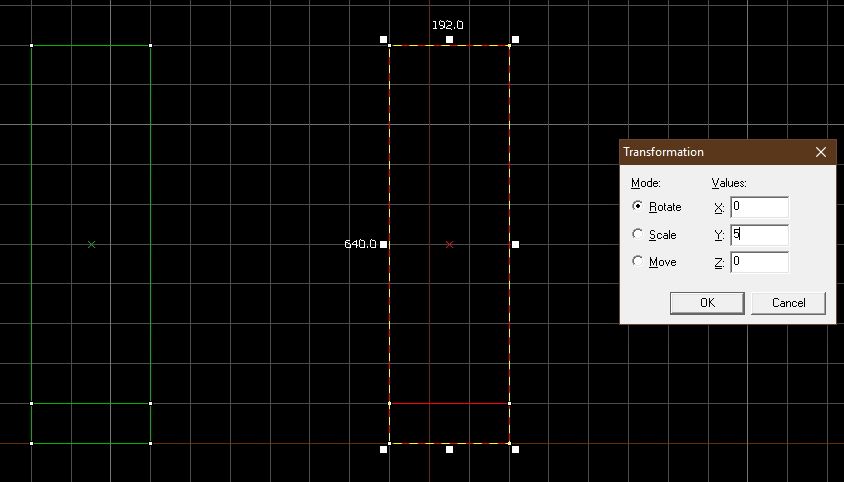
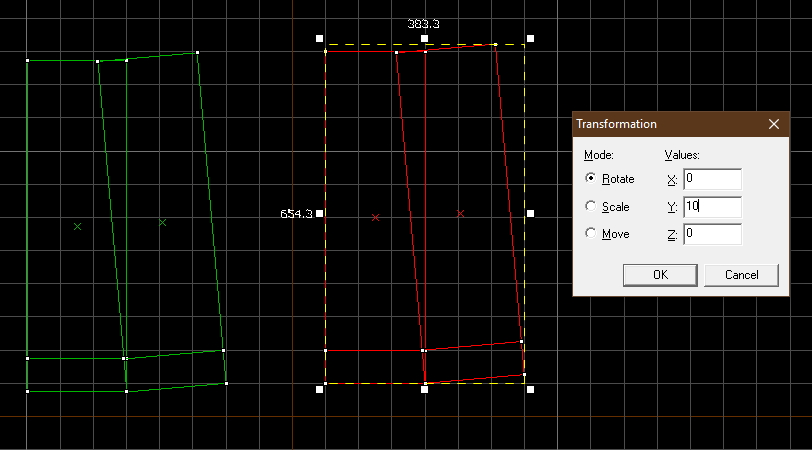
Now with your second segment selected, press Ctrl + M to bring up the Transformation dialog.
From here you can rotate the segment. In this example the segment is rotated by 5 degrees on the Y axis.
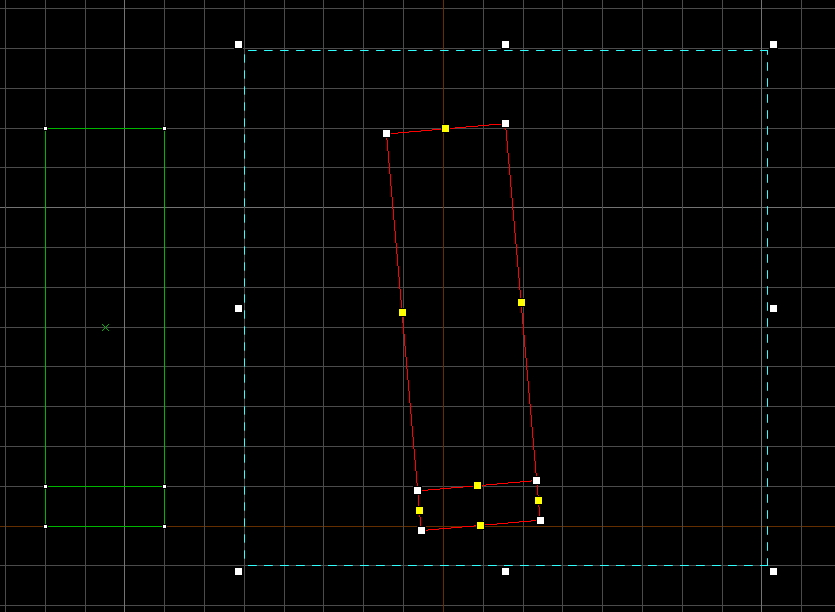
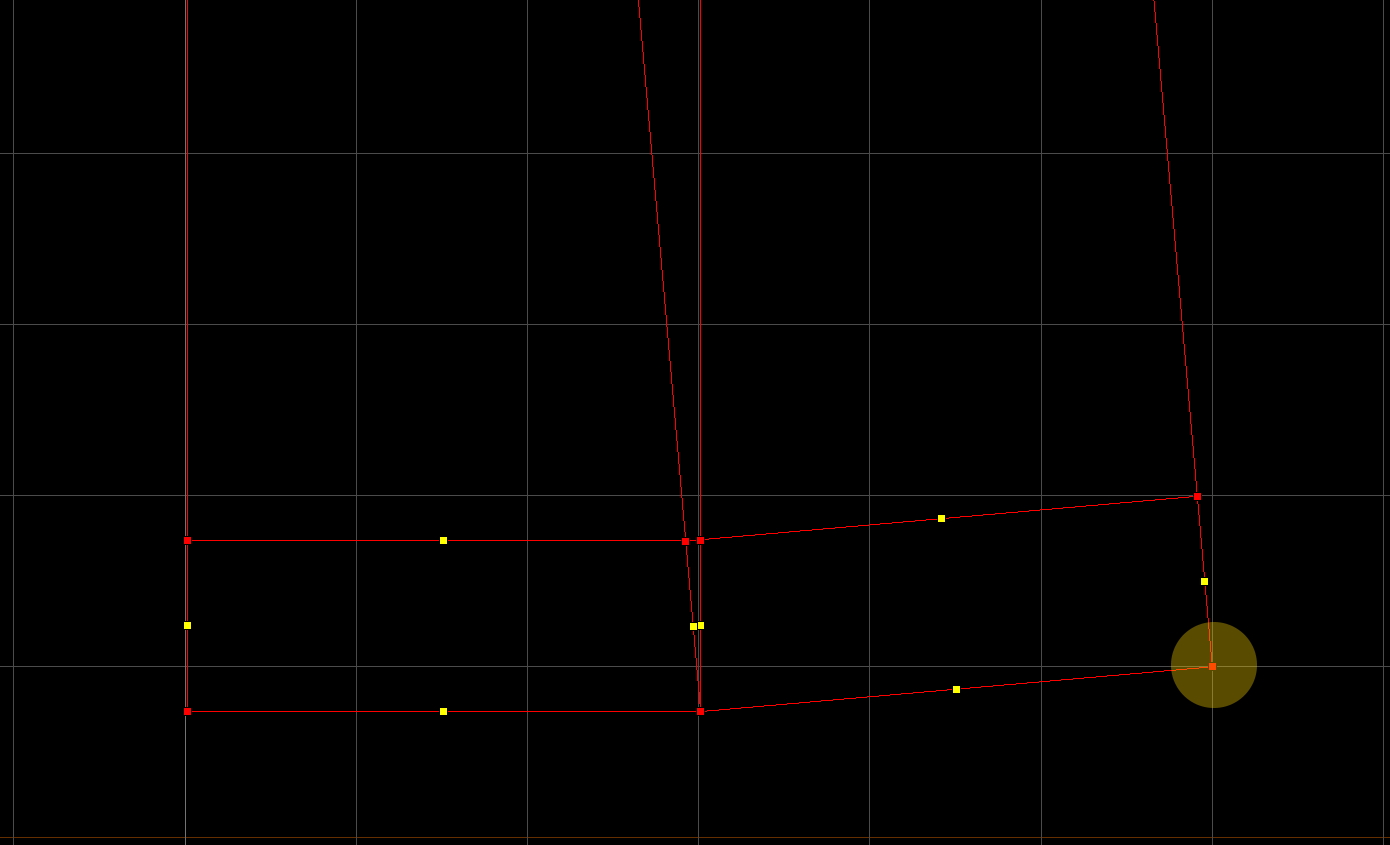
Now it’s time to line the second segment up to connect it to the first one.
With the second segment selected, press Shift + V or click on the vertex tool button to enable vertex editing.
Normally this tool is used to edit solids but for this guide we will just use it to align brushes.
Drag a box around the selected segment like you would when selecting it in the 2d view, then hit enter to select all of the segment’s vertices.
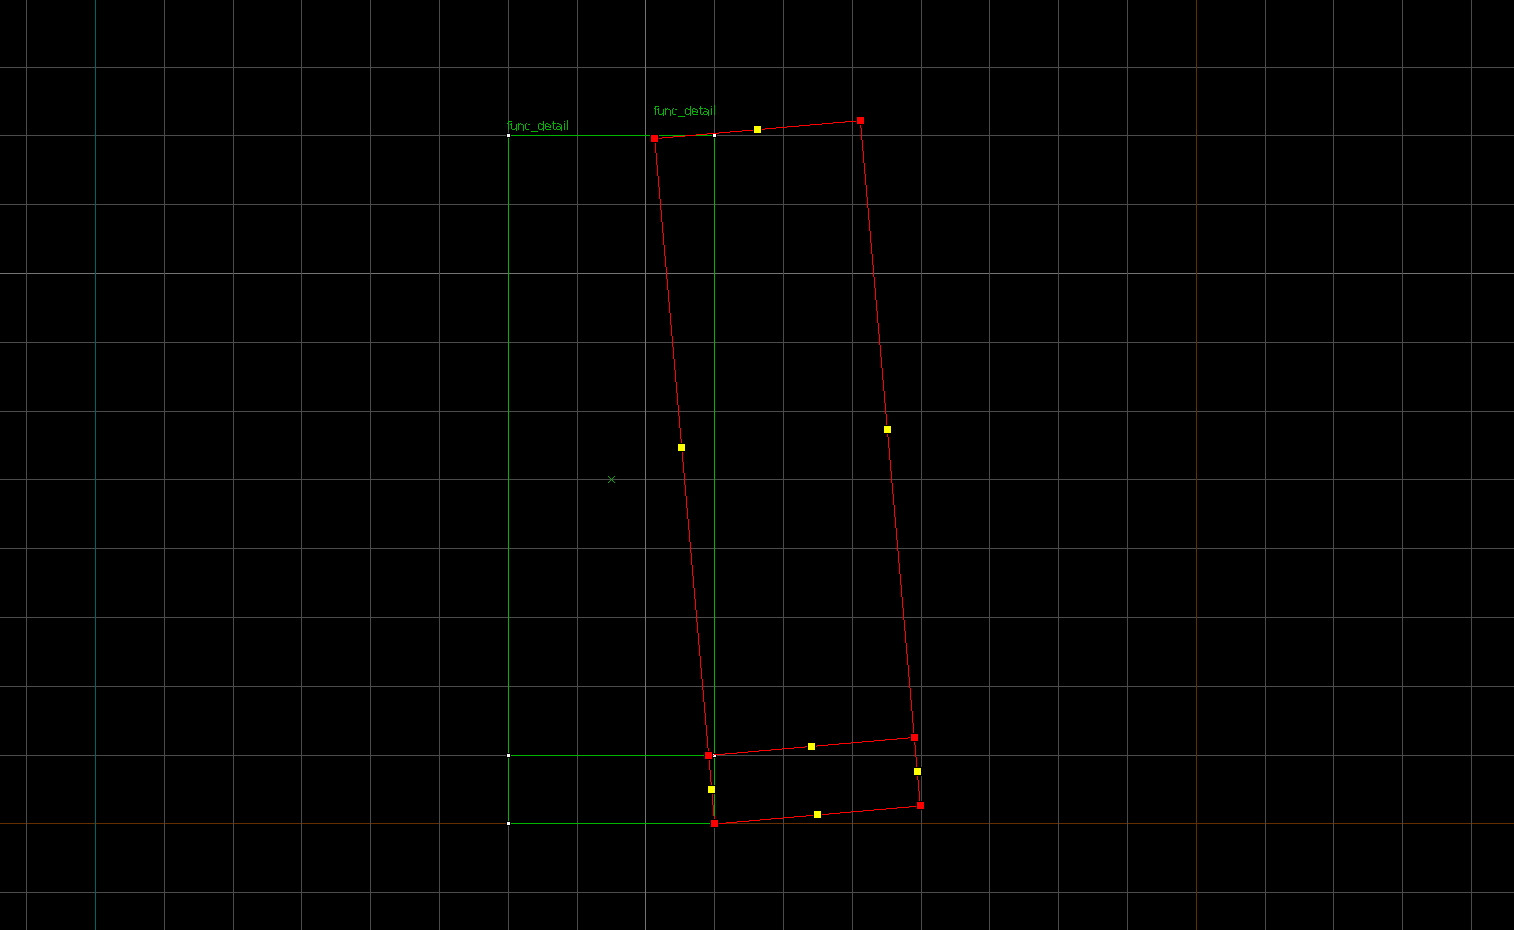
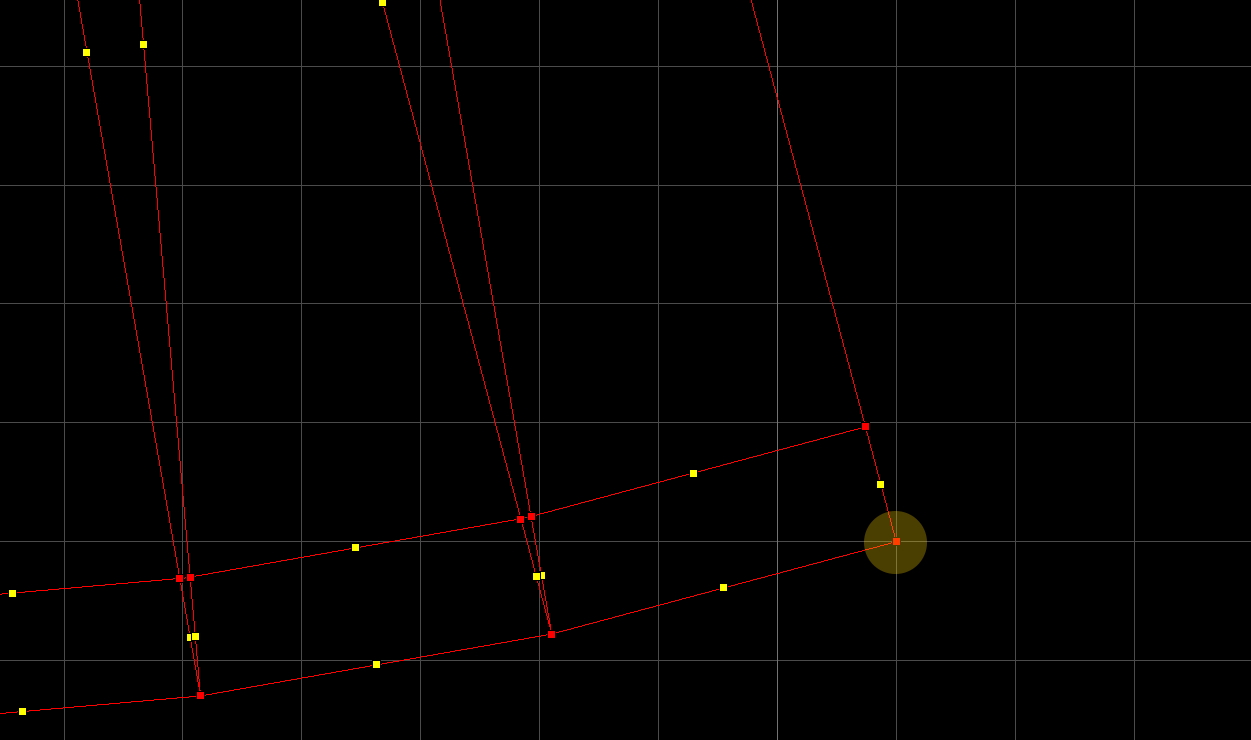
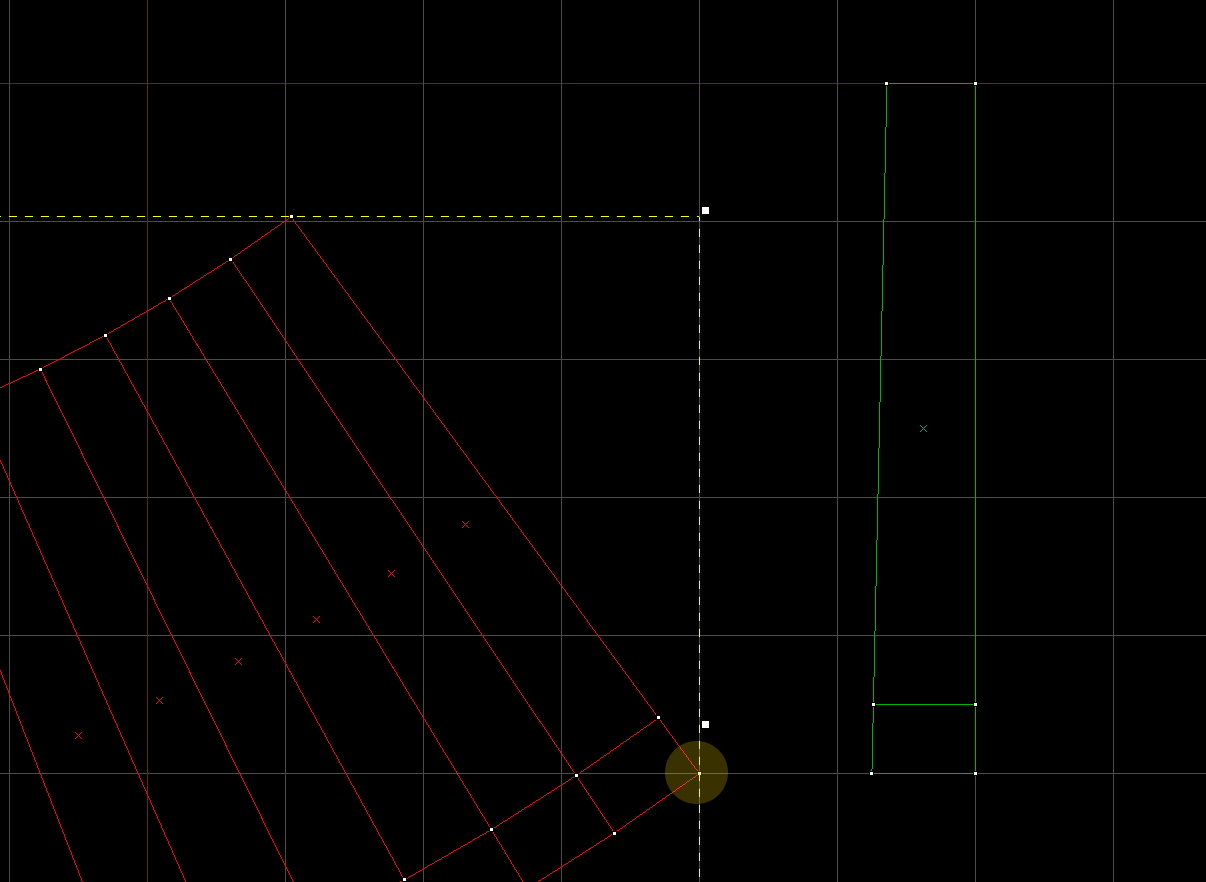
Make sure all of the vertices are red (meaning they are all selected) and drag the bottom corner of the ramp so that it is connects to the other segment at the bottom. Ensure that both of these ramps are aligned to grid at this anchor point. Now that you have two segments connected properly, you can select them both and use the vertex tool again to align the far bottom corner of the second segment to the grid. This is where the next segment will connect.
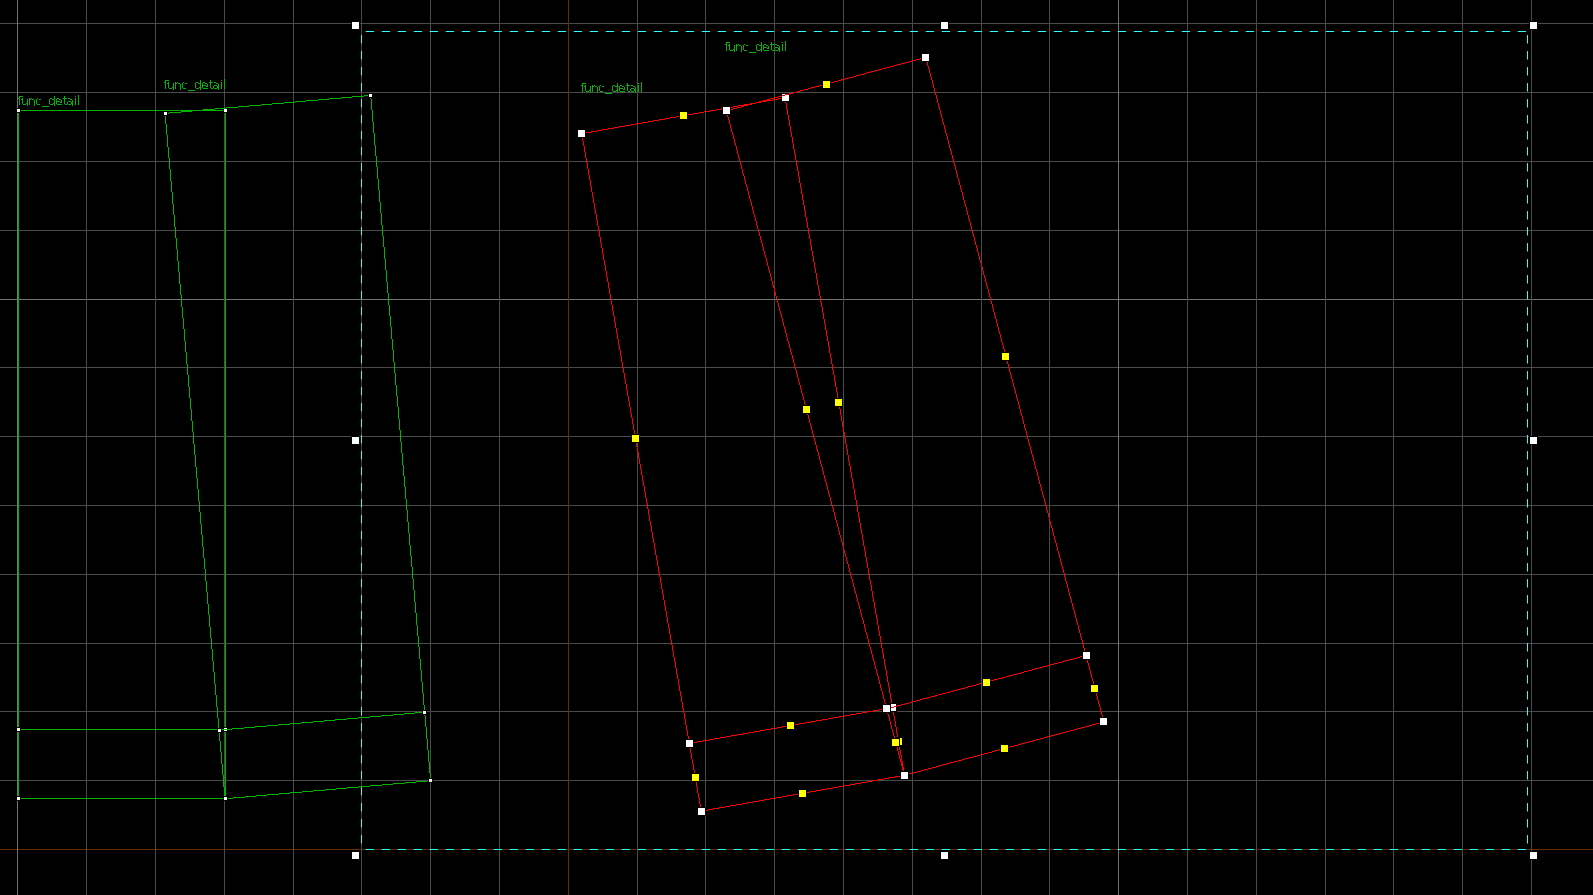
Use Shift and drag with both segments selected to create another duplicate of them.
Open the transformation dialog again with Ctrl + M. You need to rotate these two new segments so they can be added on just like the second one.
Since there are two segments, double the degrees of rotation needed to connect to the last two. In this case we rotate by 10 degrees.
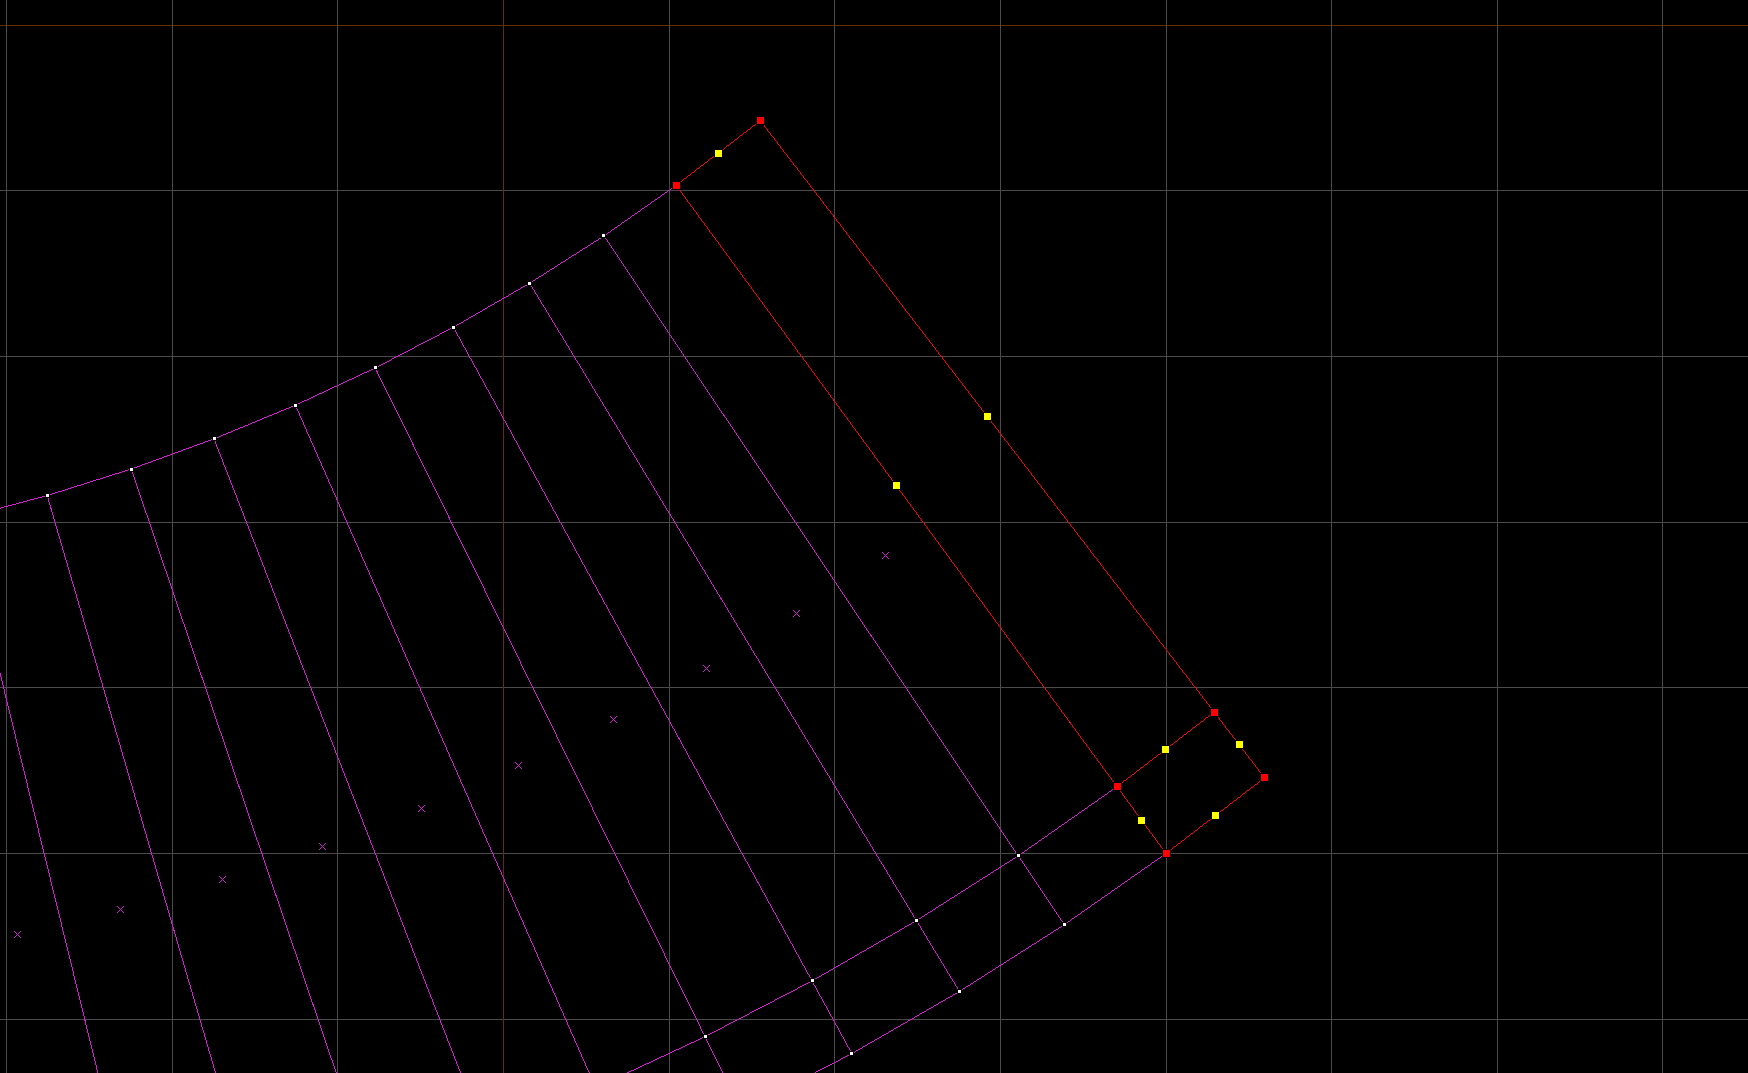
Just like the previous segments, select the two new segments with the vertex tool and then drag it to align the bottom corner with the first two. Afterwards align the new 4 segment ramp to the grid on the farthest bottom corner.
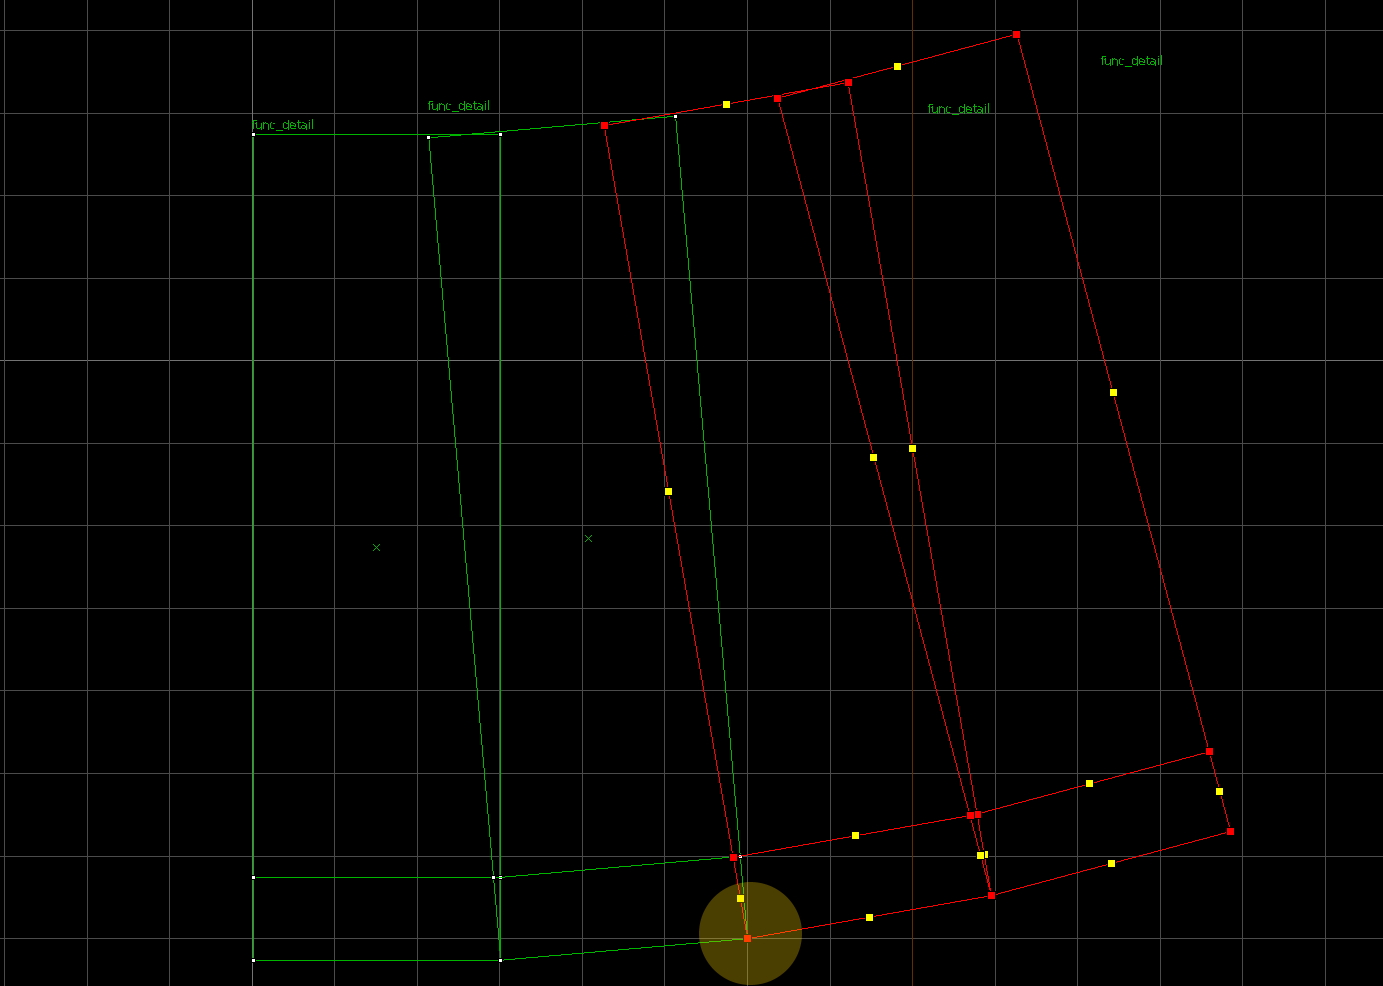
You can repeat this process as many times as you want as long as you keep every segment aligned to the ones surrounding it. For this example, we will copy all four of the segments and do the process one more time, rotating this time by 20 degrees.


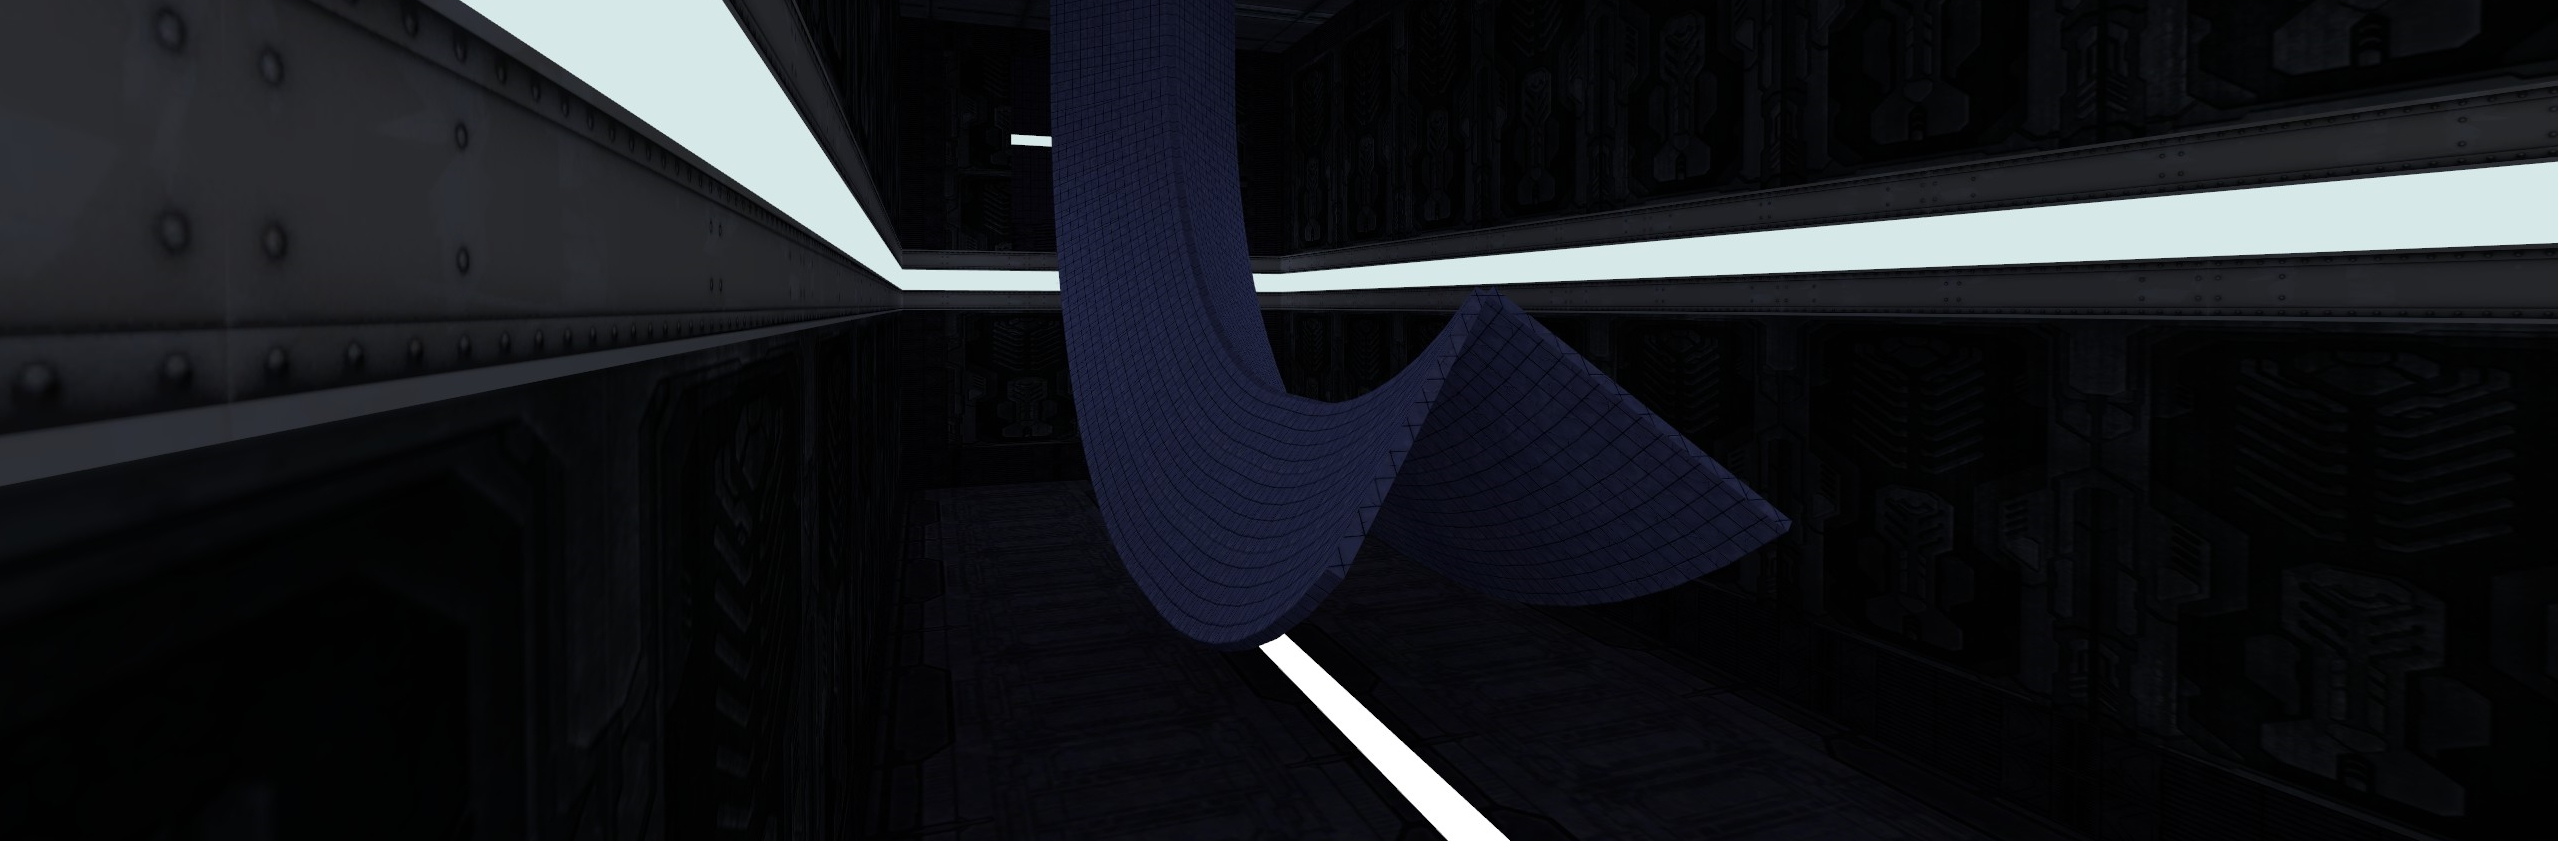
Things are starting to look pretty curvy!
Let’s finish it off by mirroring the segments so it’s curved on both sides.
First off, align the original flat segment to the grid with the vertex tool so that the mirrored segments can be lined up with it.

Next, deselect the first segment then Shift and drag to copy every segment except for the flat one.
Press Ctrl + L with the new ramp selected to mirror the brushes.
Use the vertex tool like before to align the new segment to the old one.
The ramp is almost done, apply textures to the two ends of the ramp that still show nodraw.
Select the entire ramp and use Ctrl + T to make it into a func_detail.
If all of your segments were already func_detail then Ctrl + T will consolidate them all into one entity.
The dialogue asking for which one to keep doesn’t matter much for func_detail.
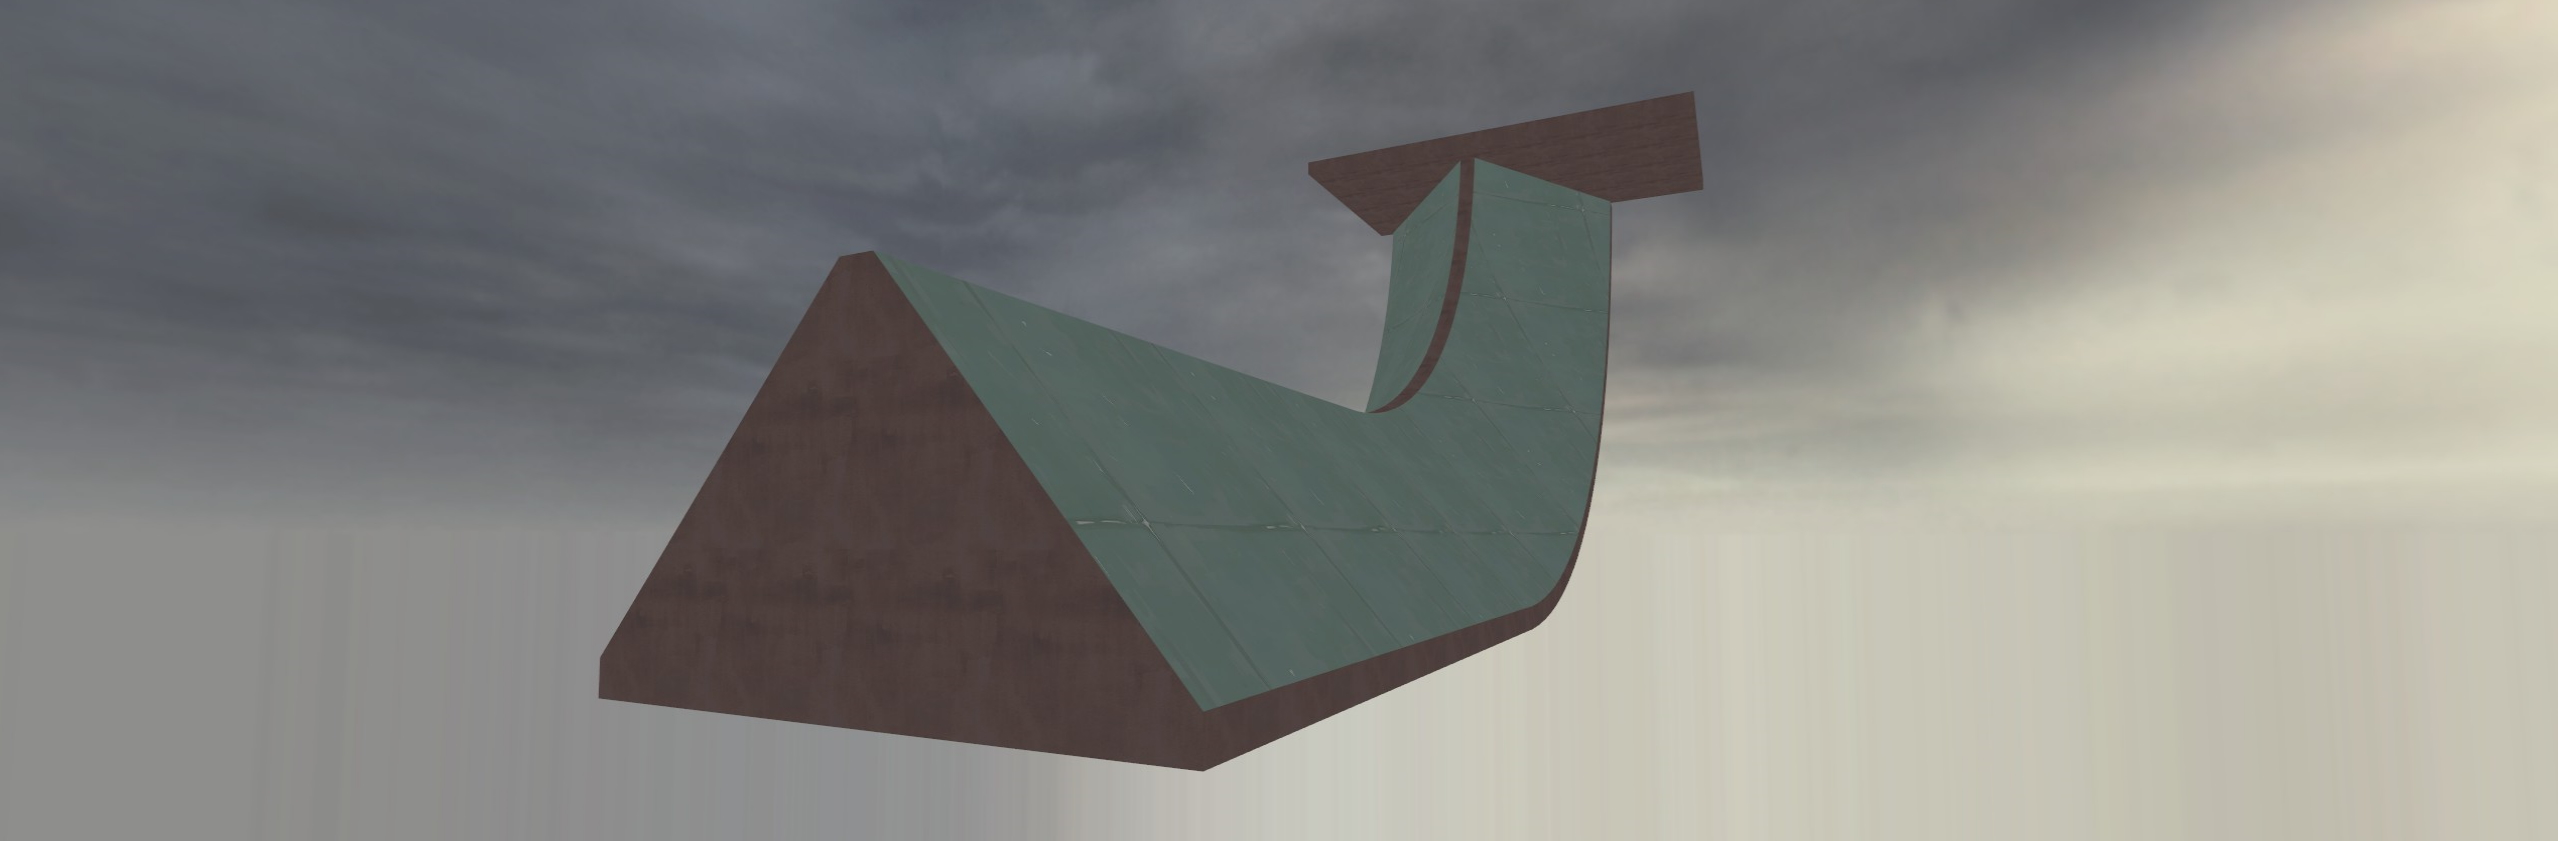
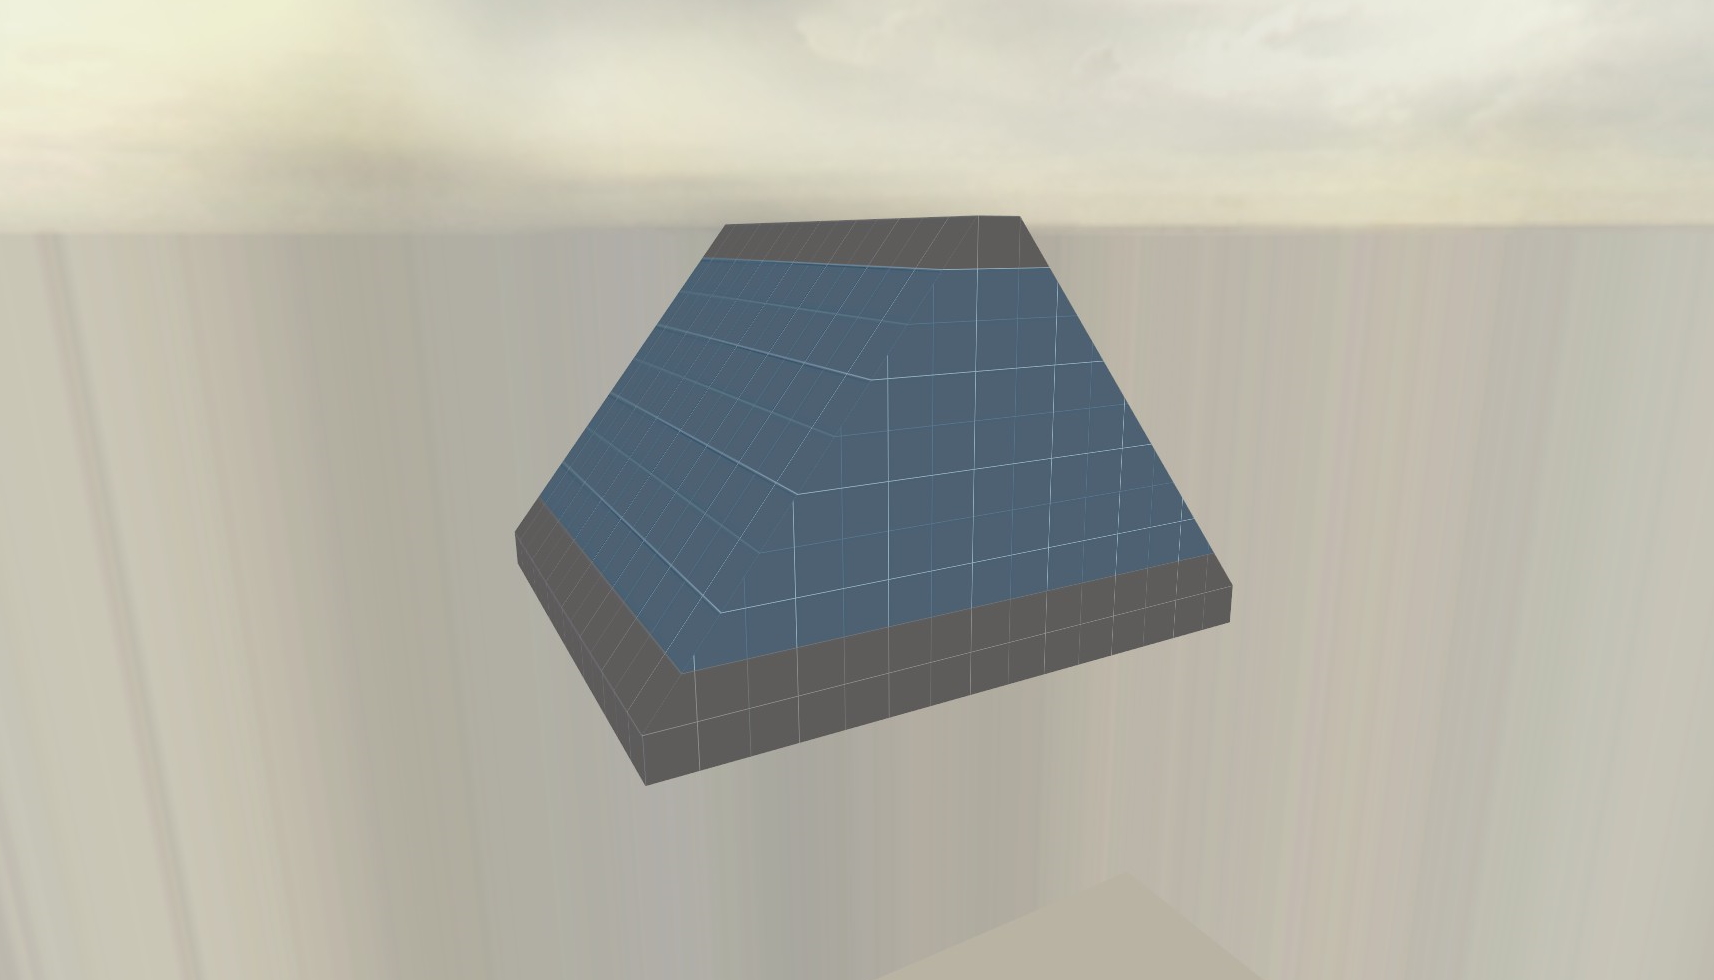
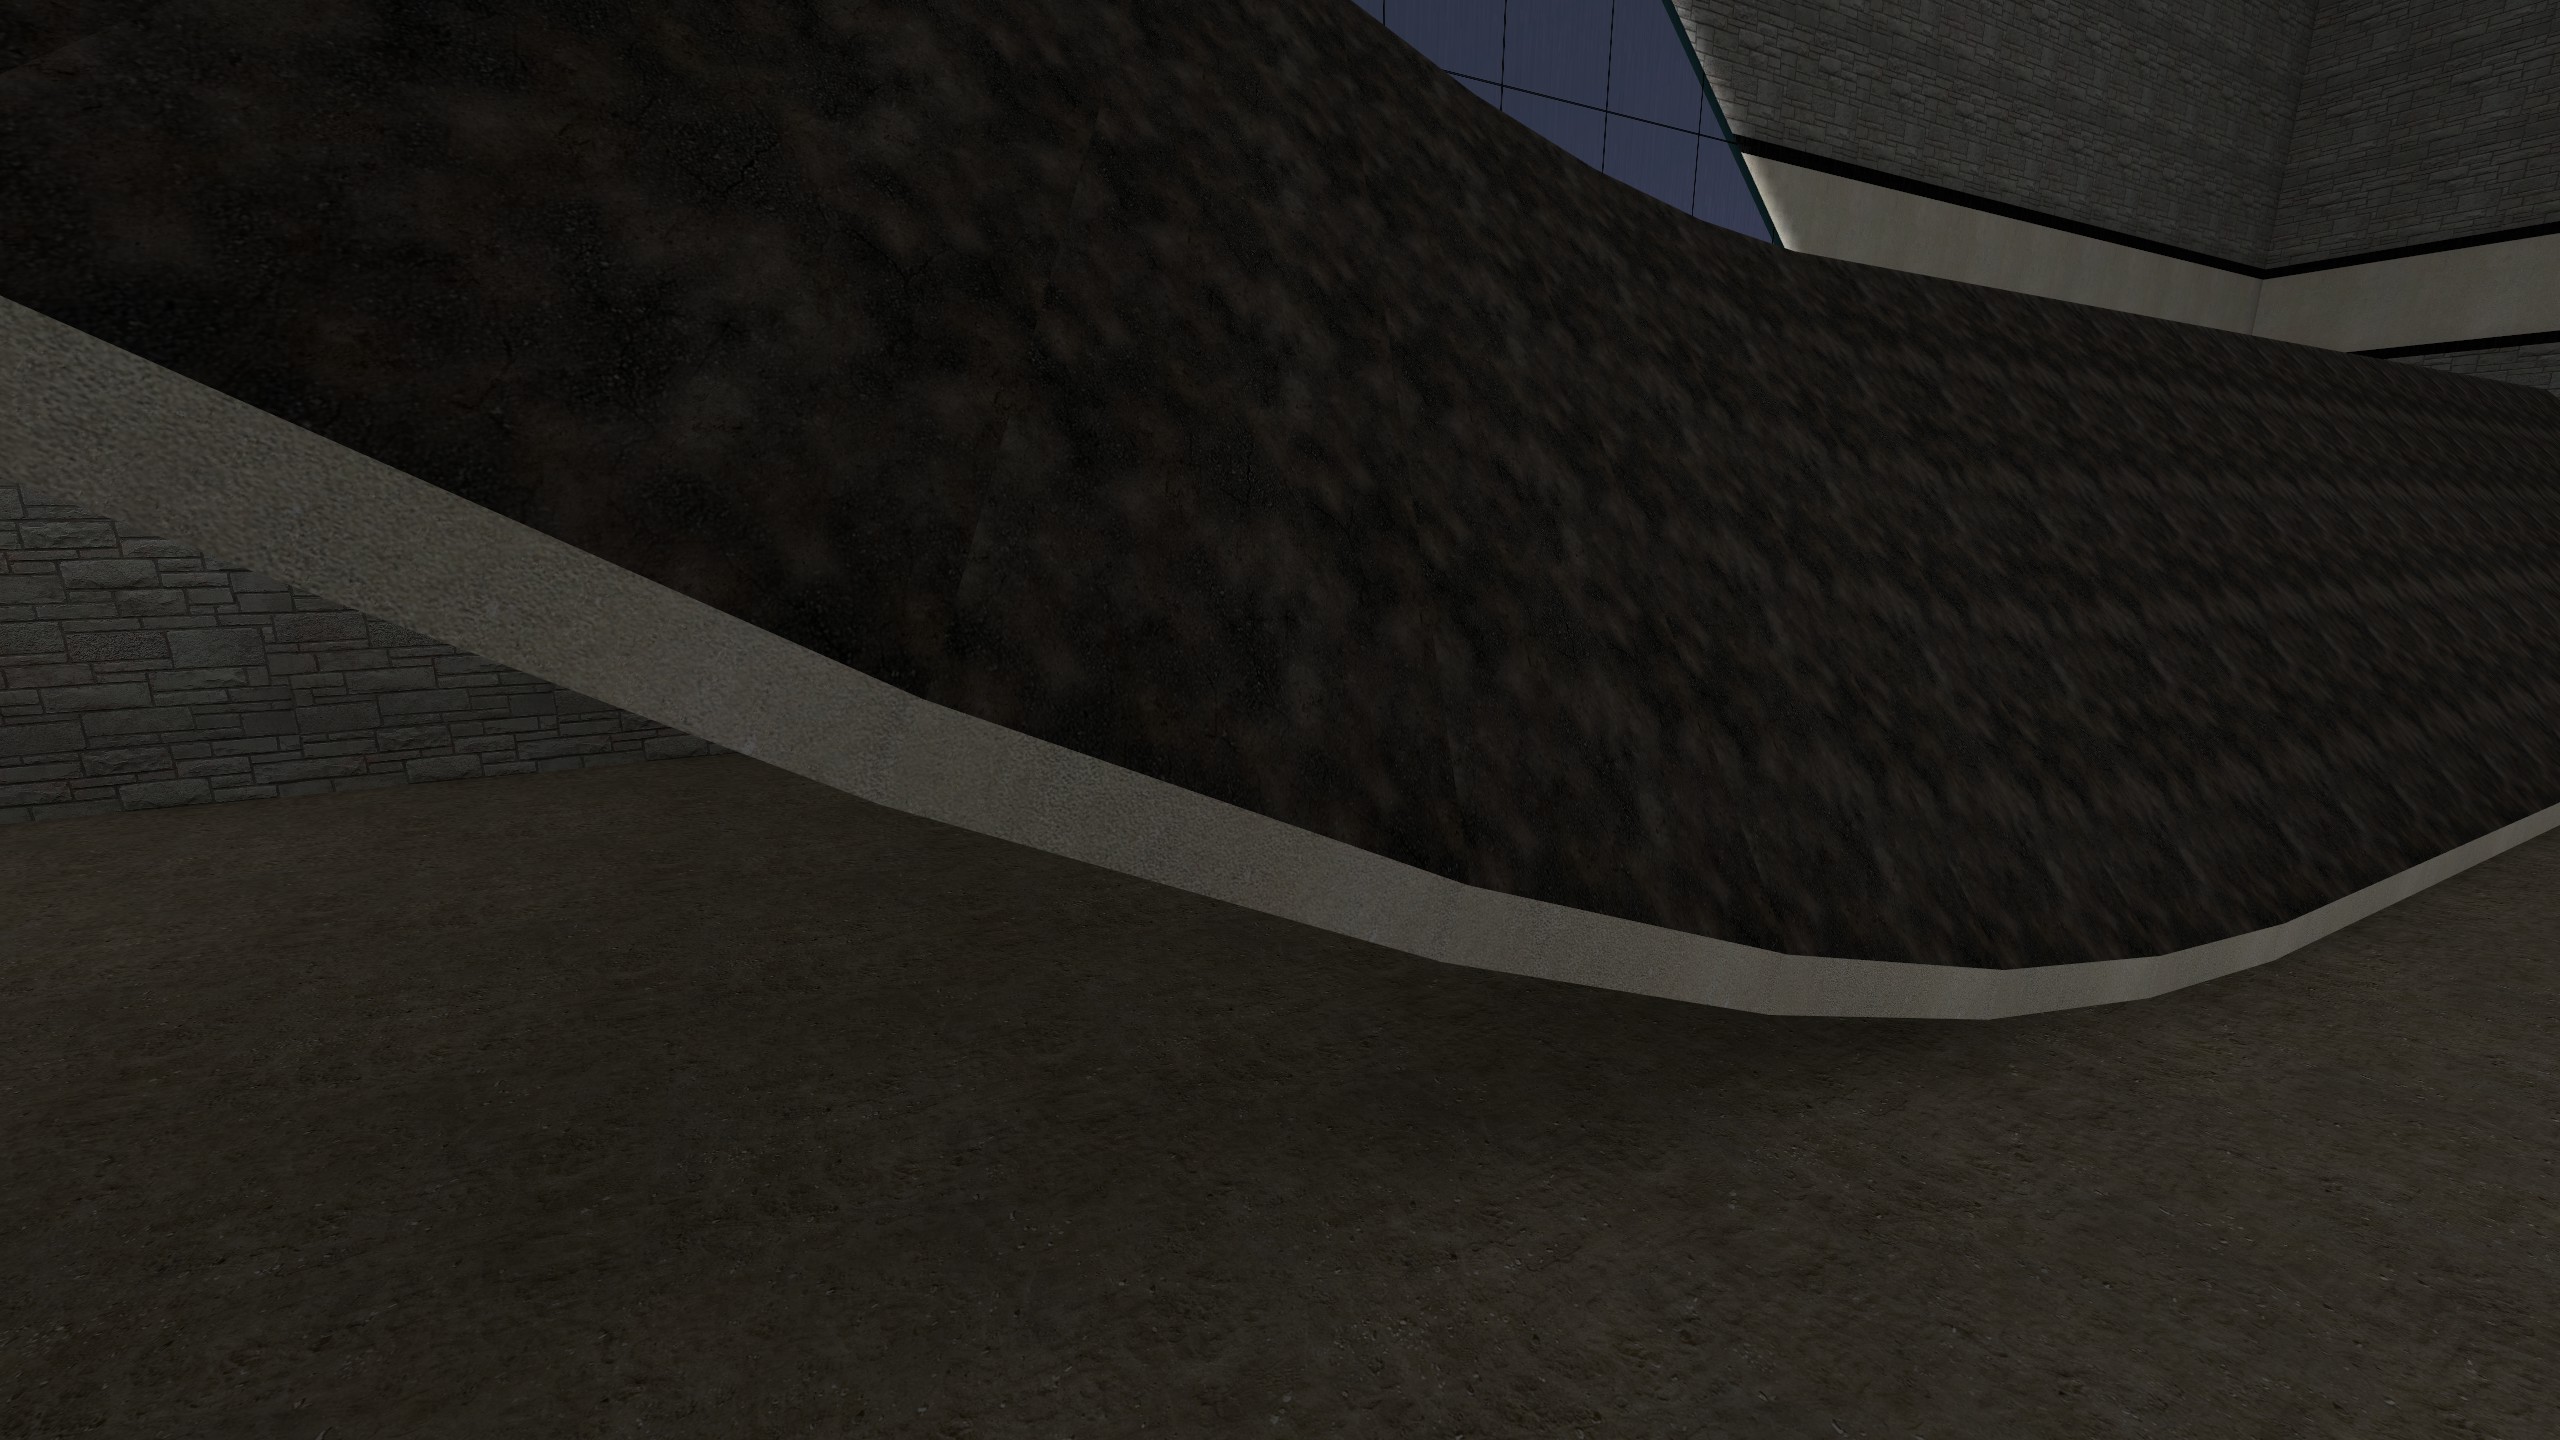
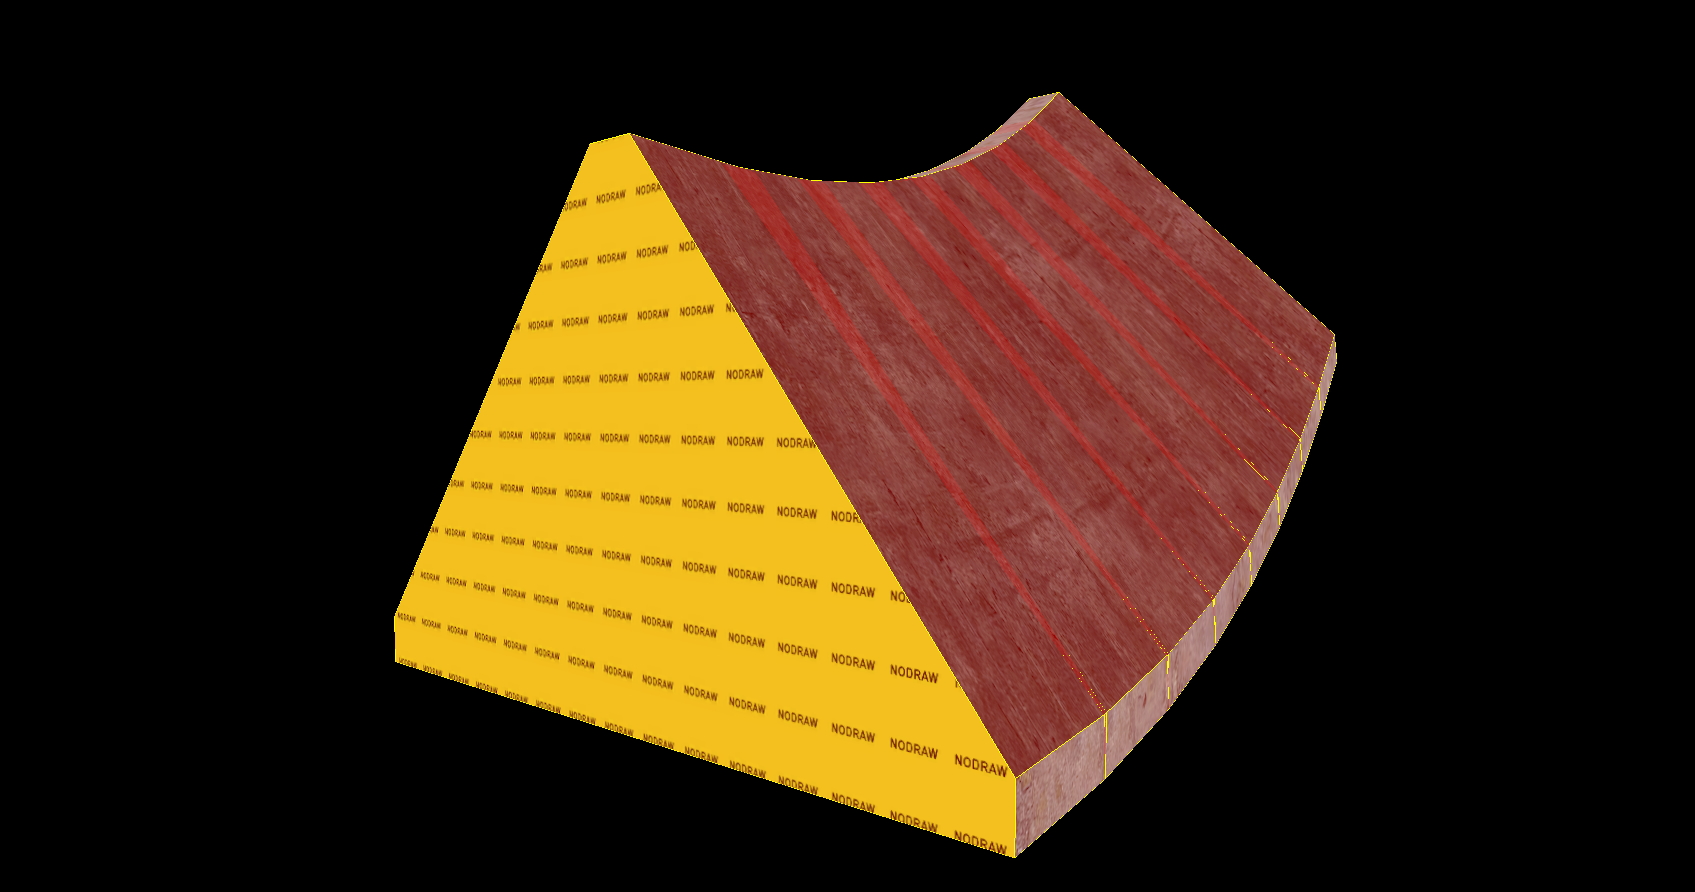
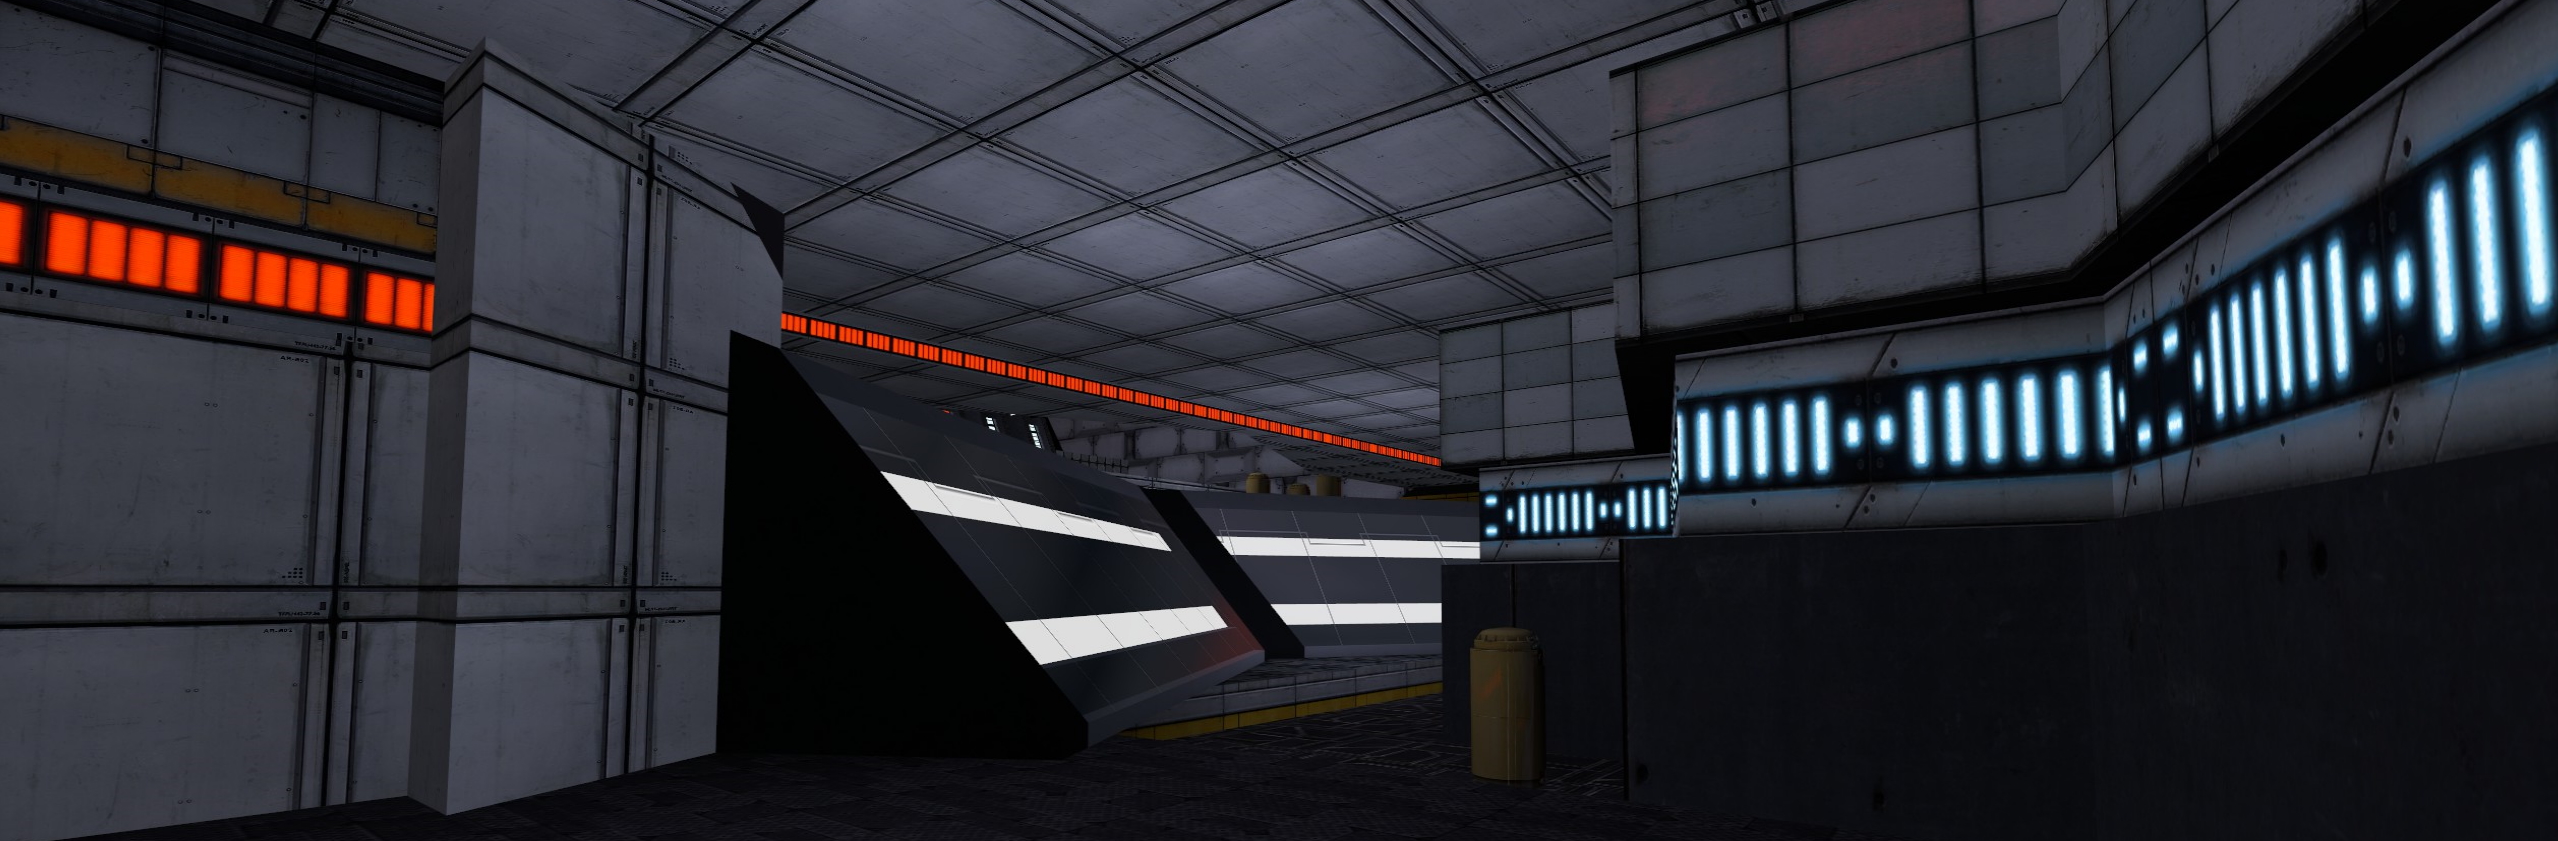
You now have a functioning curved ramp, let’s see it in game:
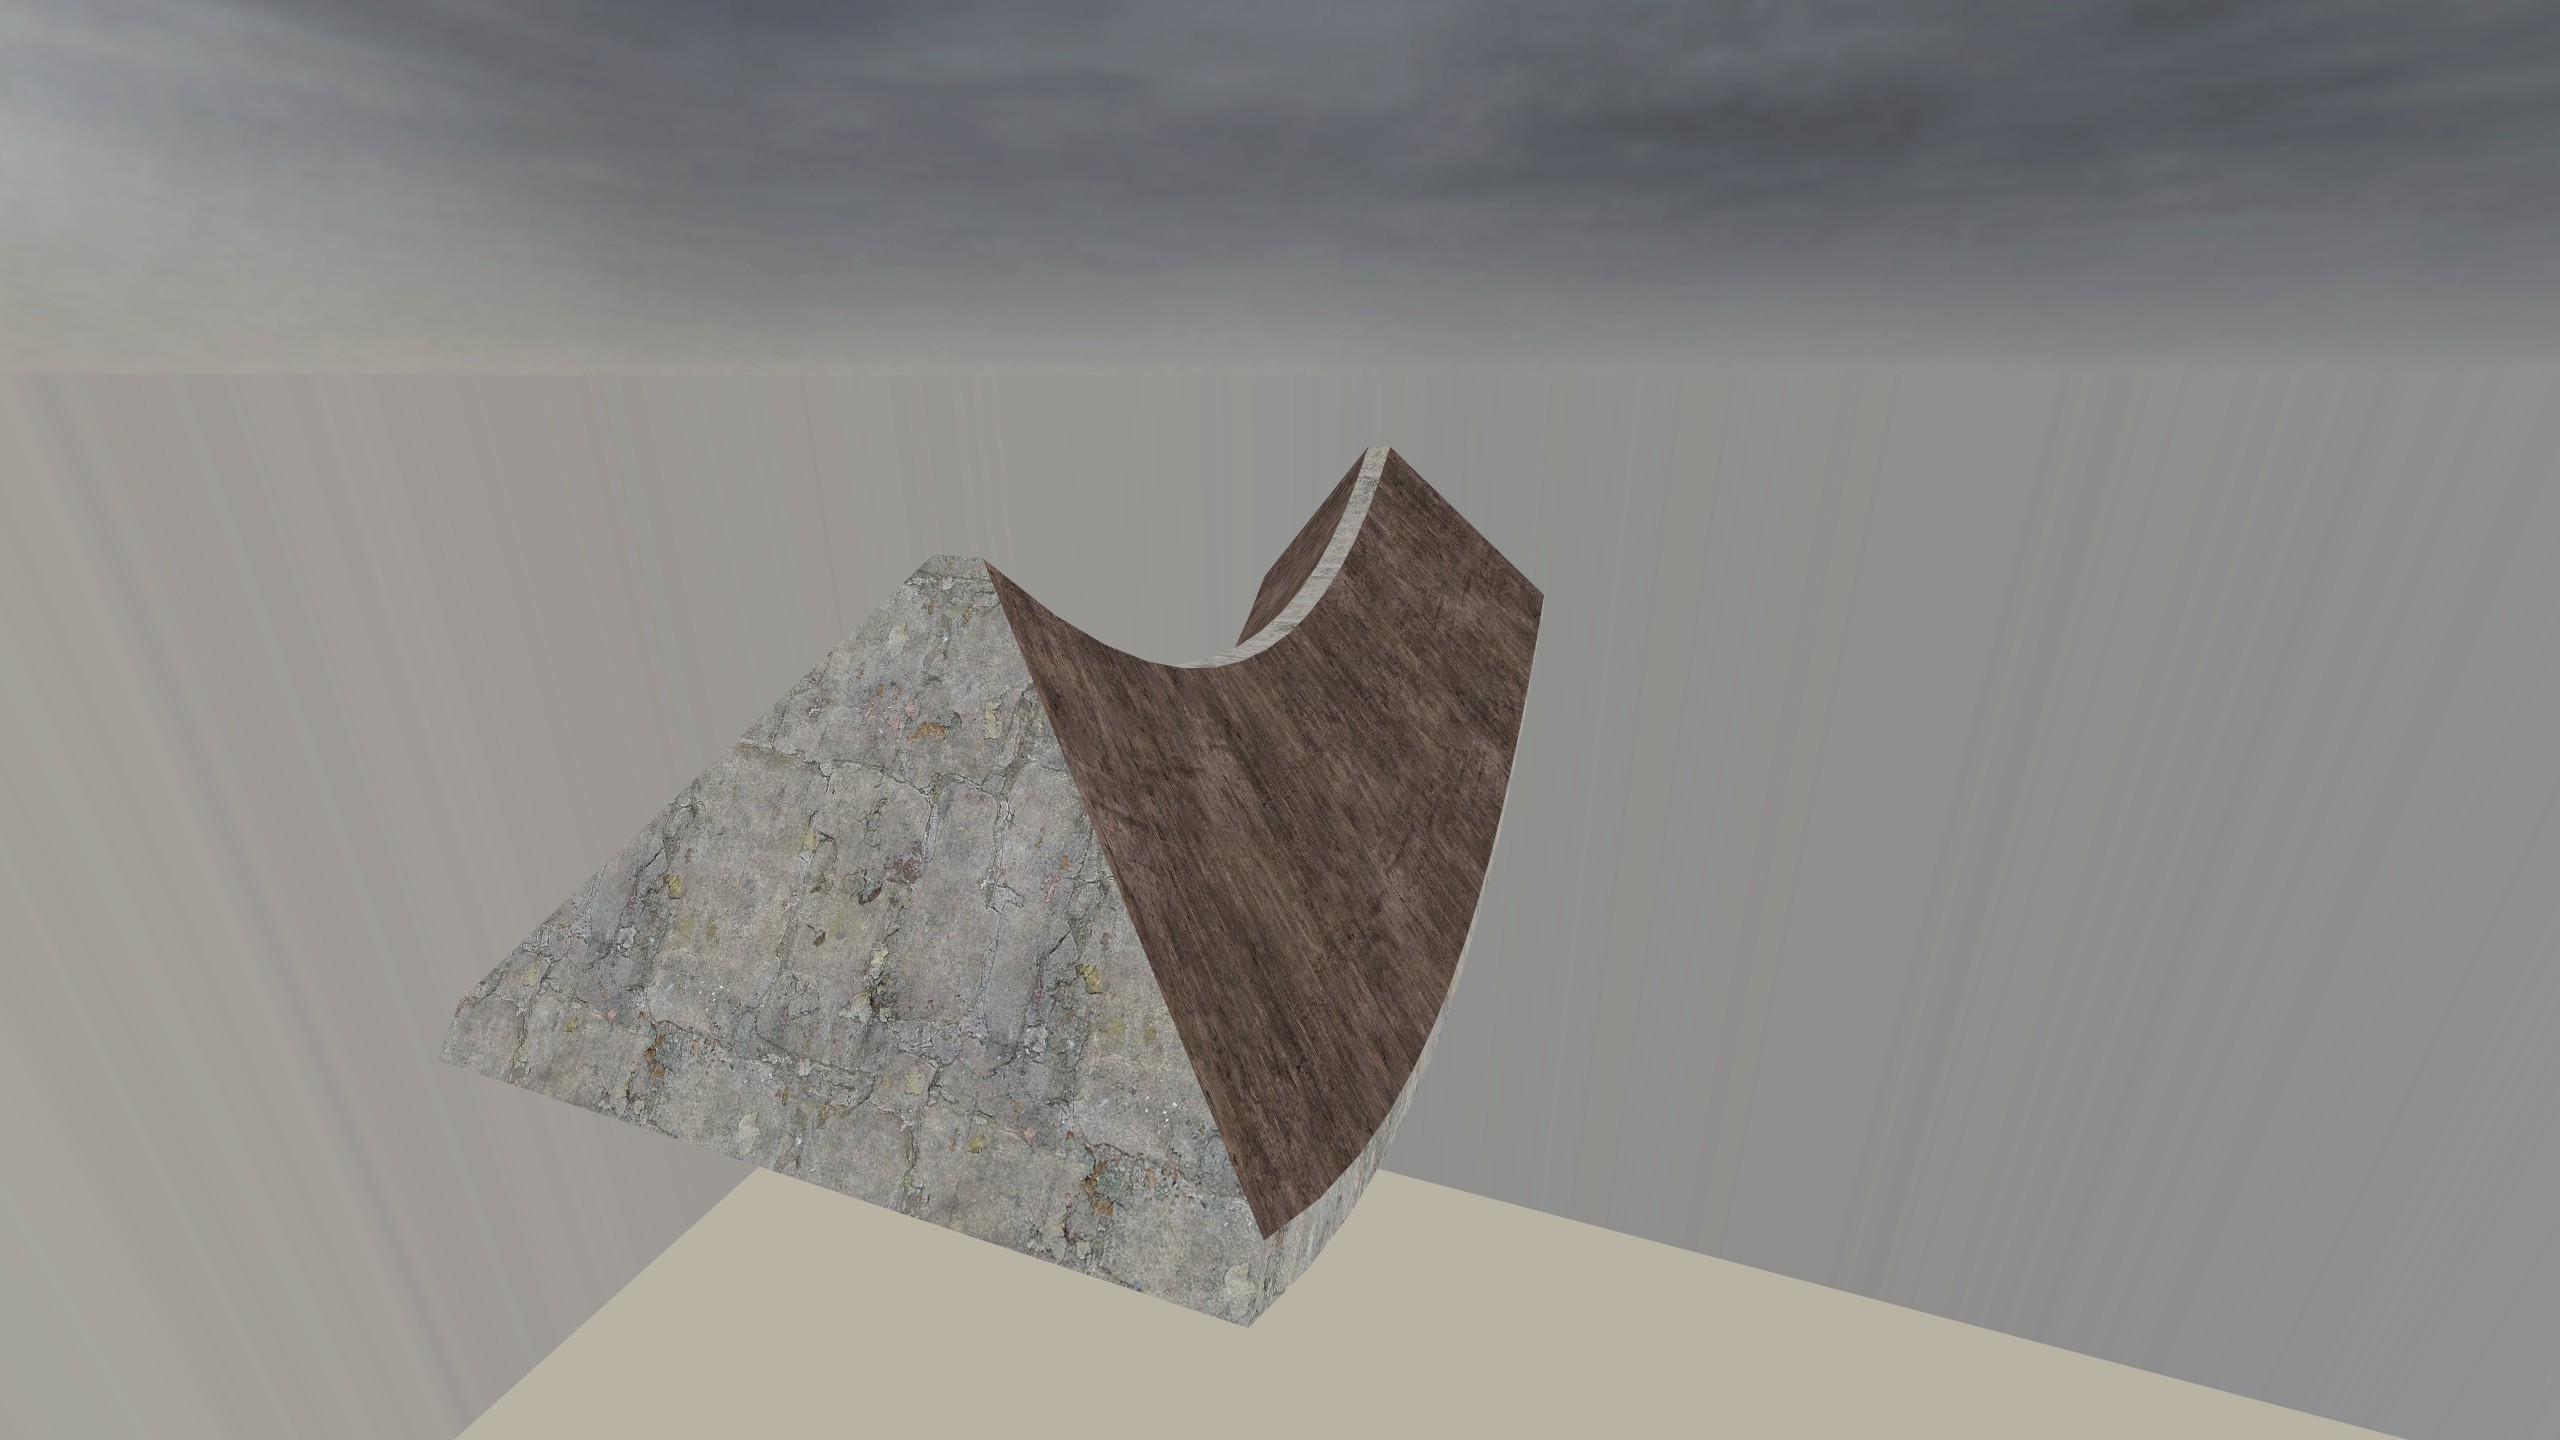
Absolutely stunning! It looks like it was made by someone who really knows what they’re doing.
The vmf created during this guide is available here.
Curved Ramps with Func_Brush #

Similar to straight ramps, curved ramps can only achieve a certain amount of versatility with only func_detail. For instance, trying to rotate each segment by 2.5 with only func_detail can cause for the ramp to have broken collision.
Just like last time, you can enhance your curved ramps with the use of playerclip and non-solid func_brush. With func_brush you should avoid overlapping brushes. This can be achieved with the cutting tool and some creativity.
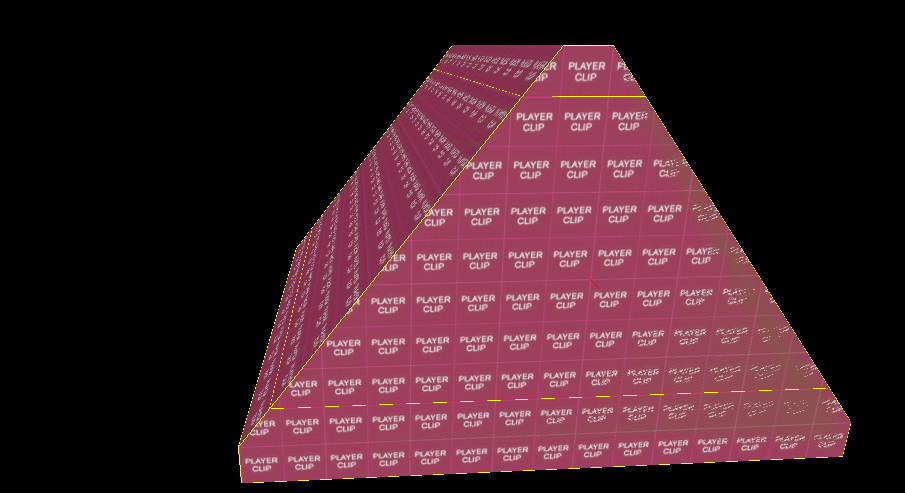
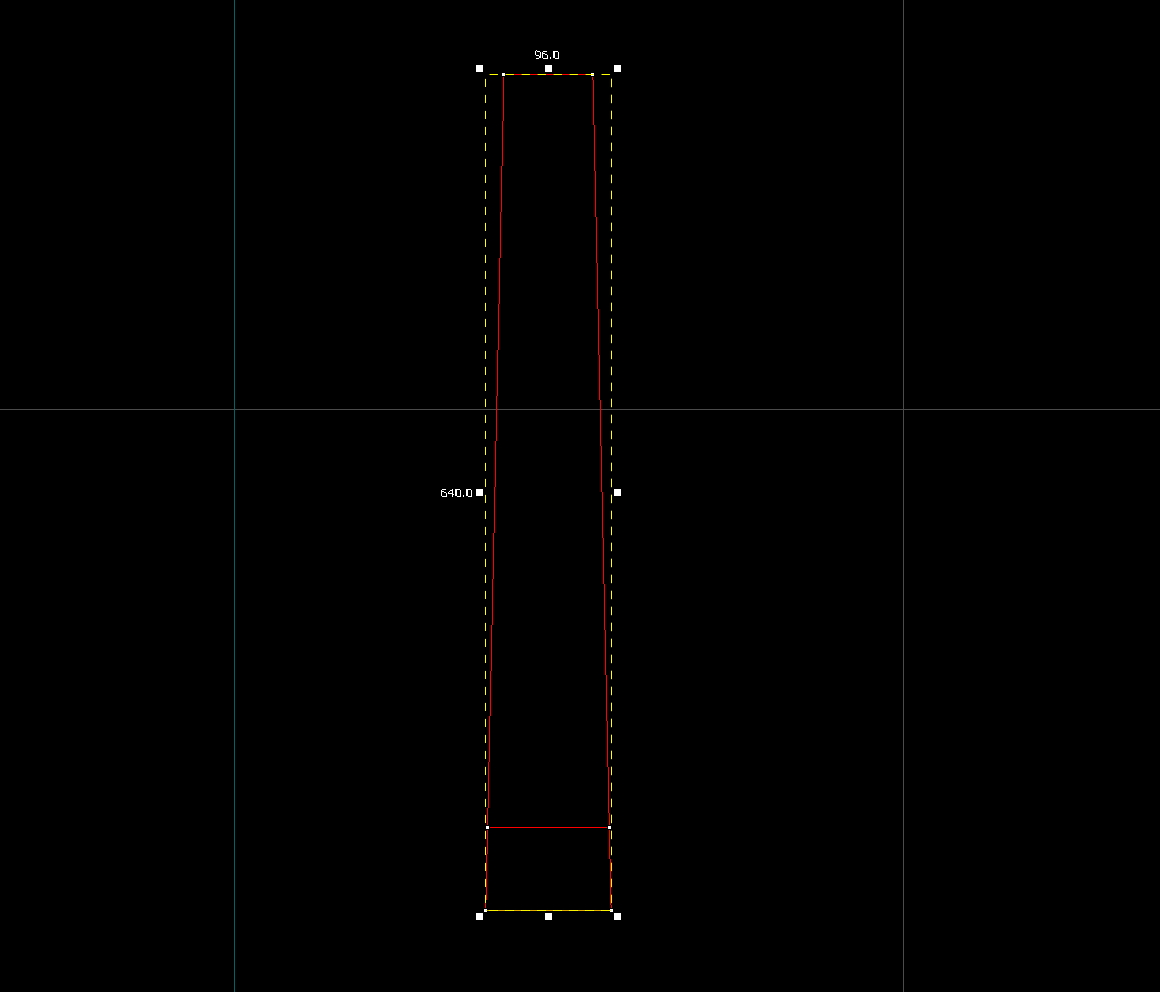
We will start off with just the collision of the ramp:
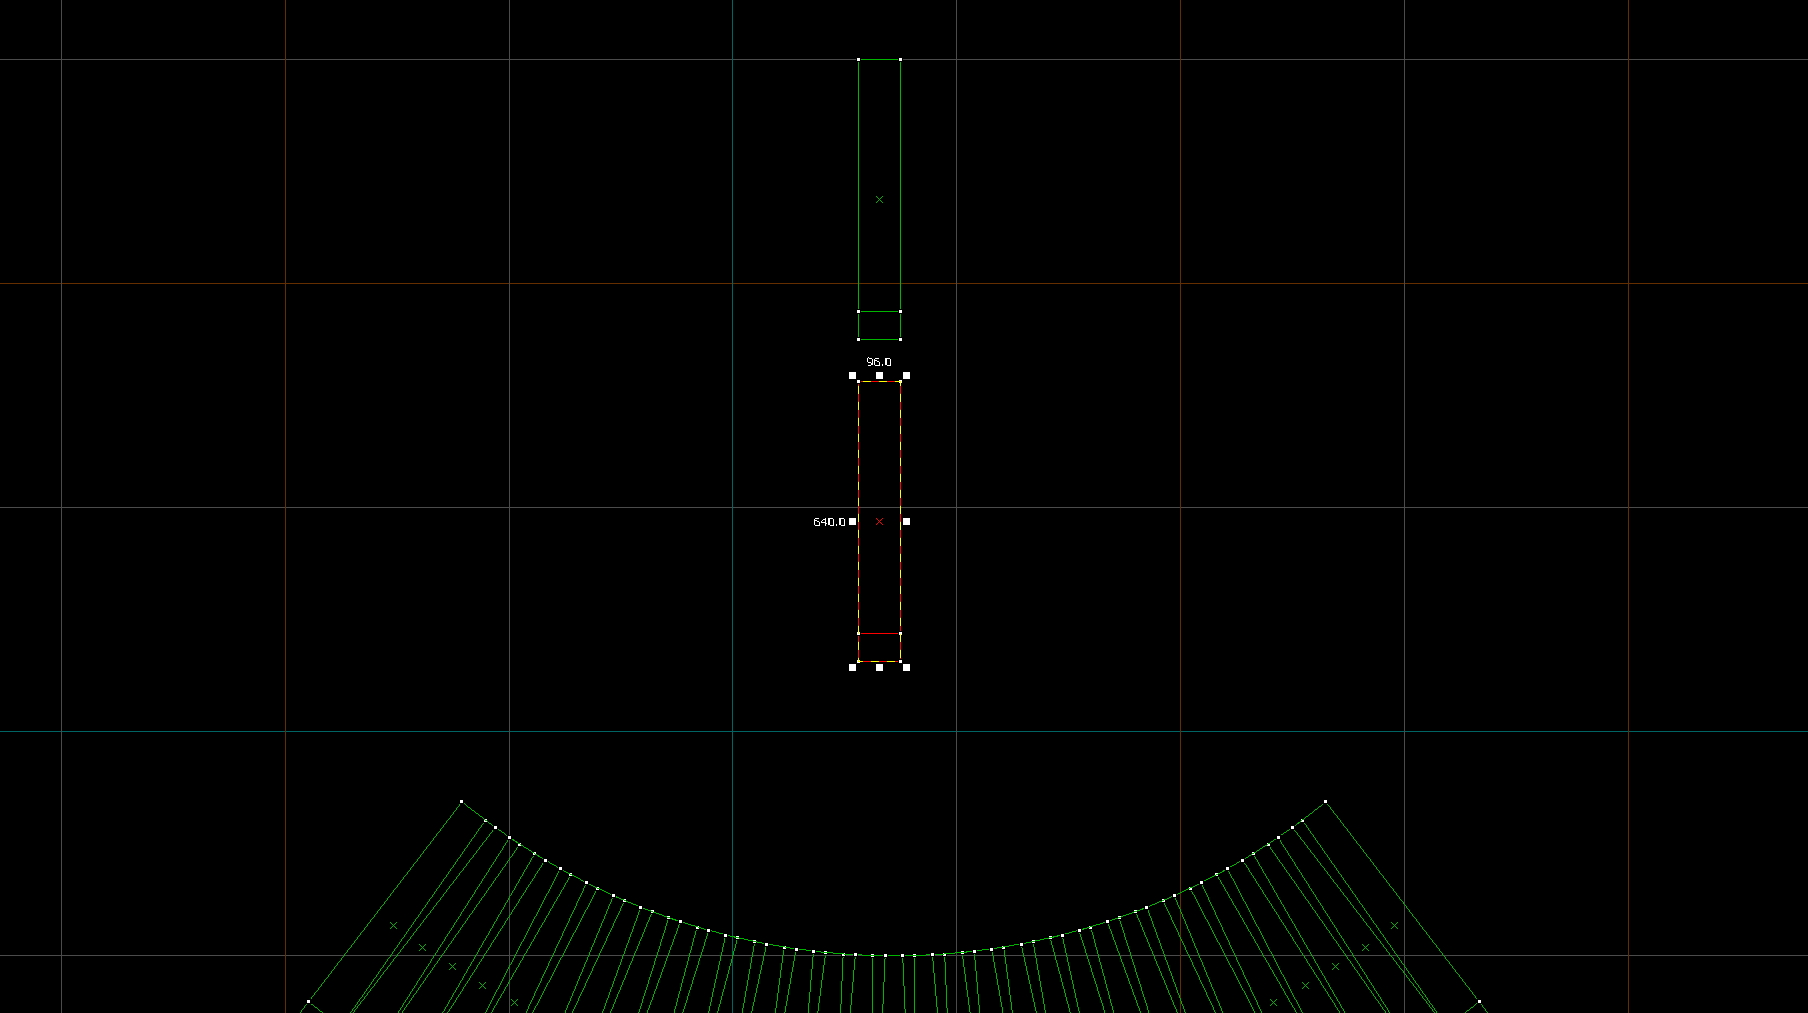
This was made just like the func_detail ramps, just using 96-unit long ramp segments and rotating the segment by 2.5 degrees instead of 5. This is fine since it keeps the collision brushes very simple.
For the visual portion things get more complicated. Start by copying a segment from the collision ramp and apply nodraw and textures to it. Keep two copies to use for later.
Now one of the segments needs to be cut in a way that will keep it from overlapping with the other visual brushes.
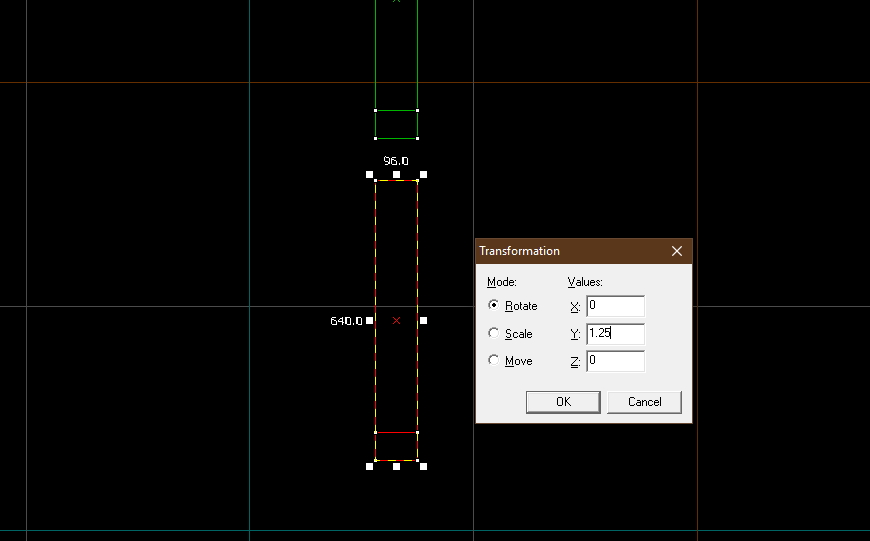
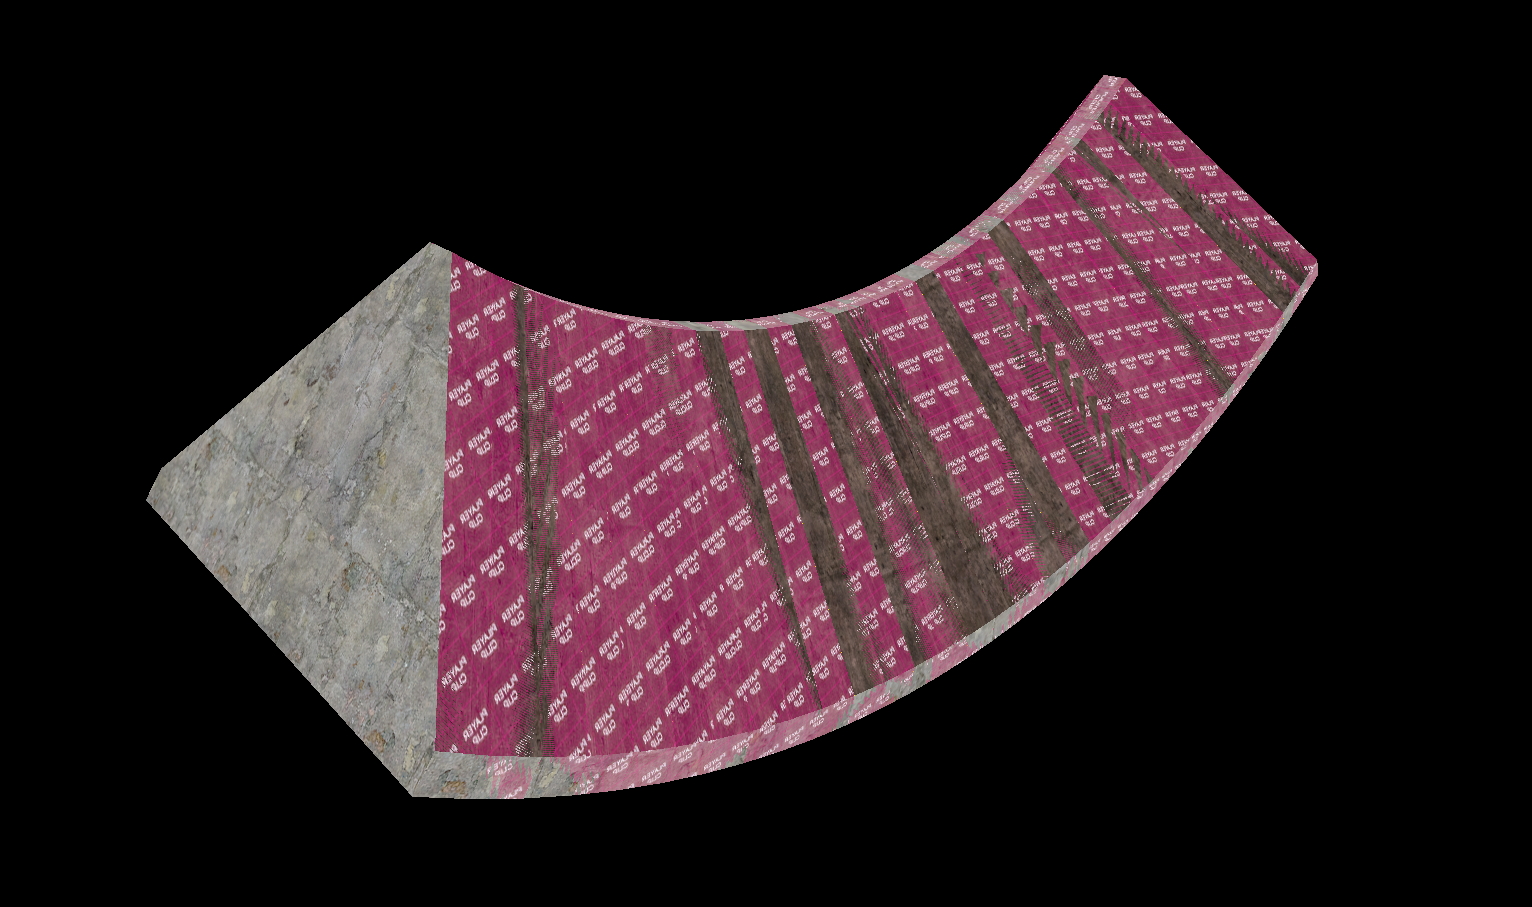
To do this, rotate the segment by half of the normal rotation value and align the bottom vertex to a grid point. For this example, every segment was rotated by 2.5 degrees. This means that the segment should be rotated by 1.25.
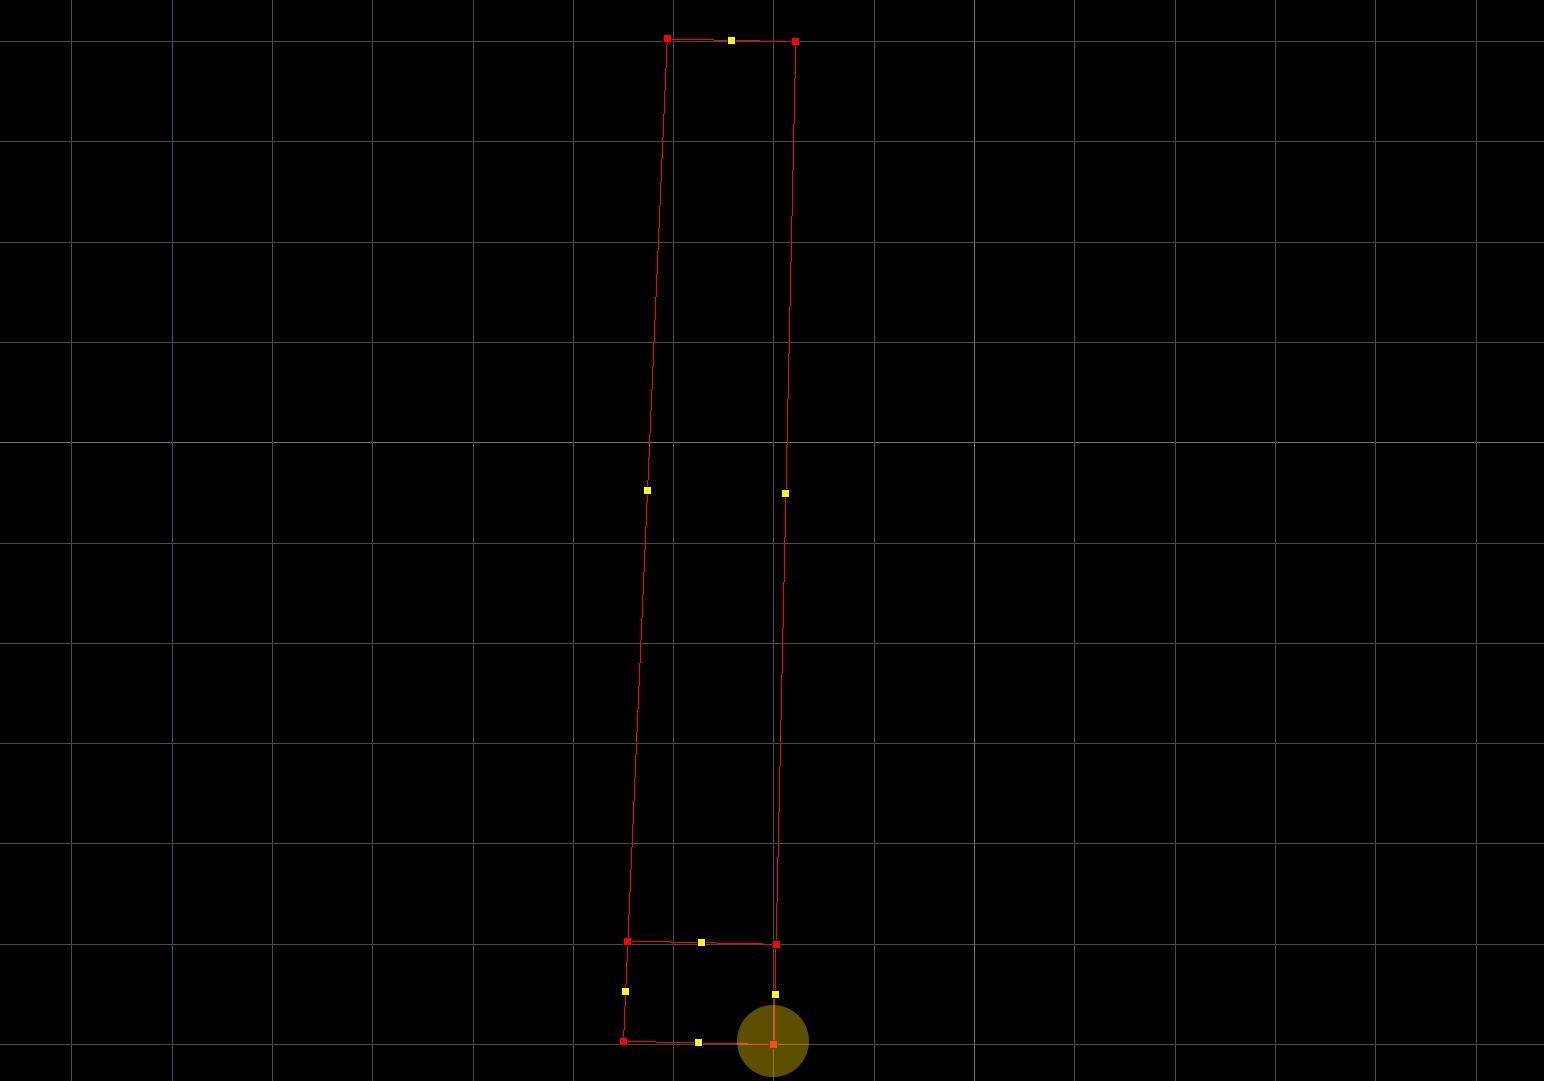
Now on the vertex aligned to the grid, use the cutting tool and cut straight upwards. This will take off all of the parts that will be overlapping.
Repeat this process to the other side, you can rotate it by -2.5 to quickly get it slanted to the other side.

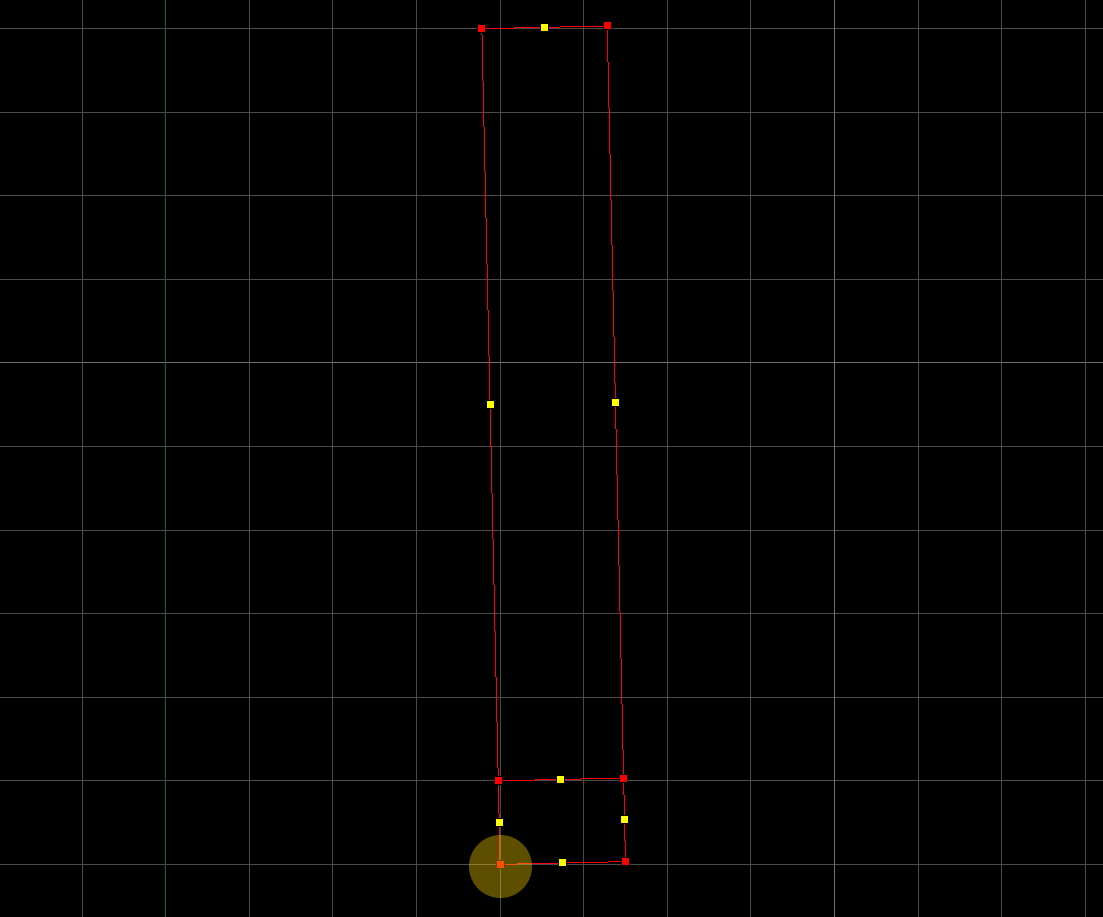
Now rotate by 1.25 again to get the segment back to its original rotation. Your segment should now look like this:
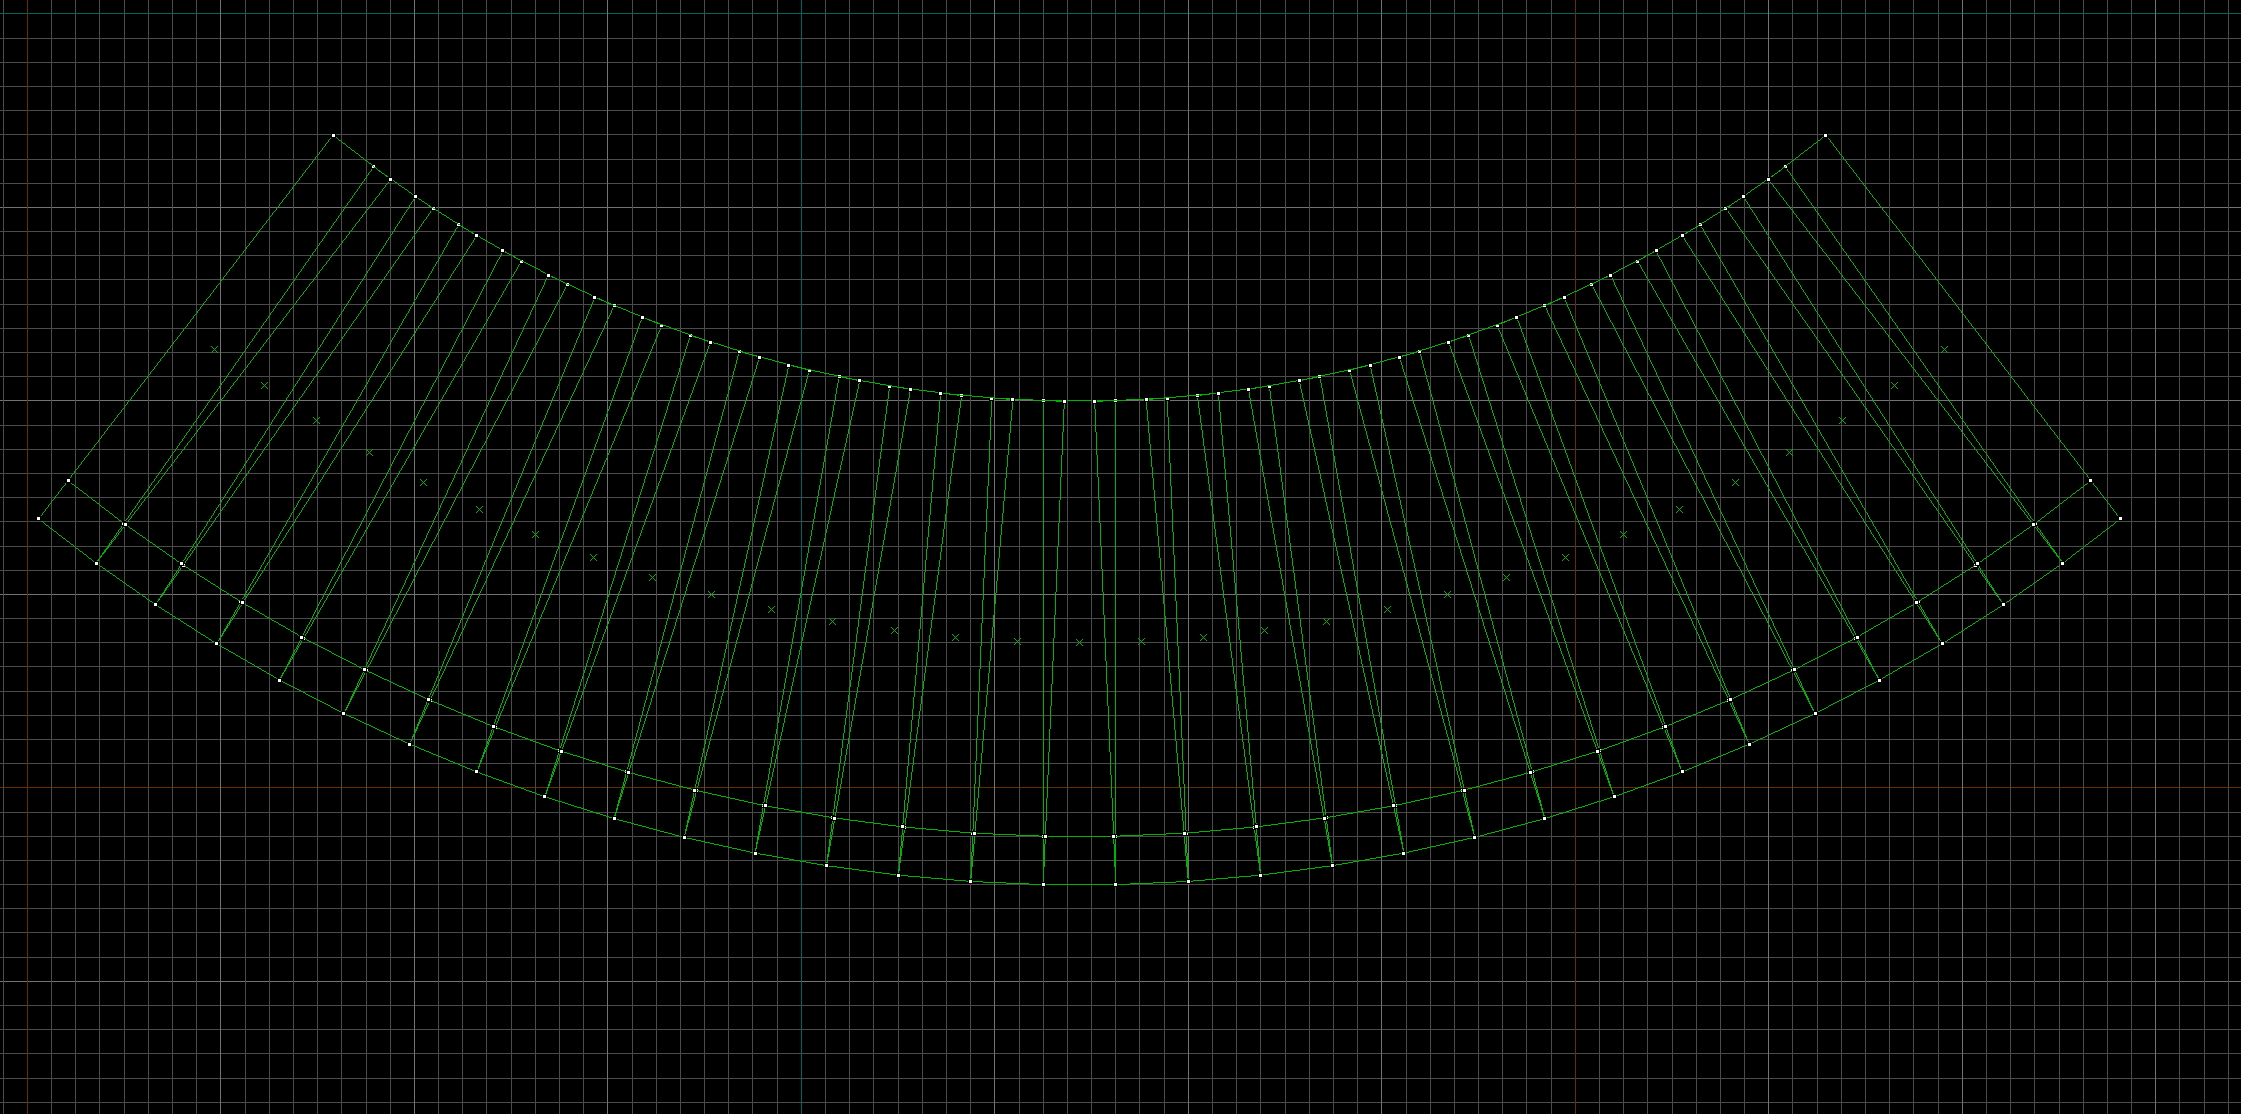
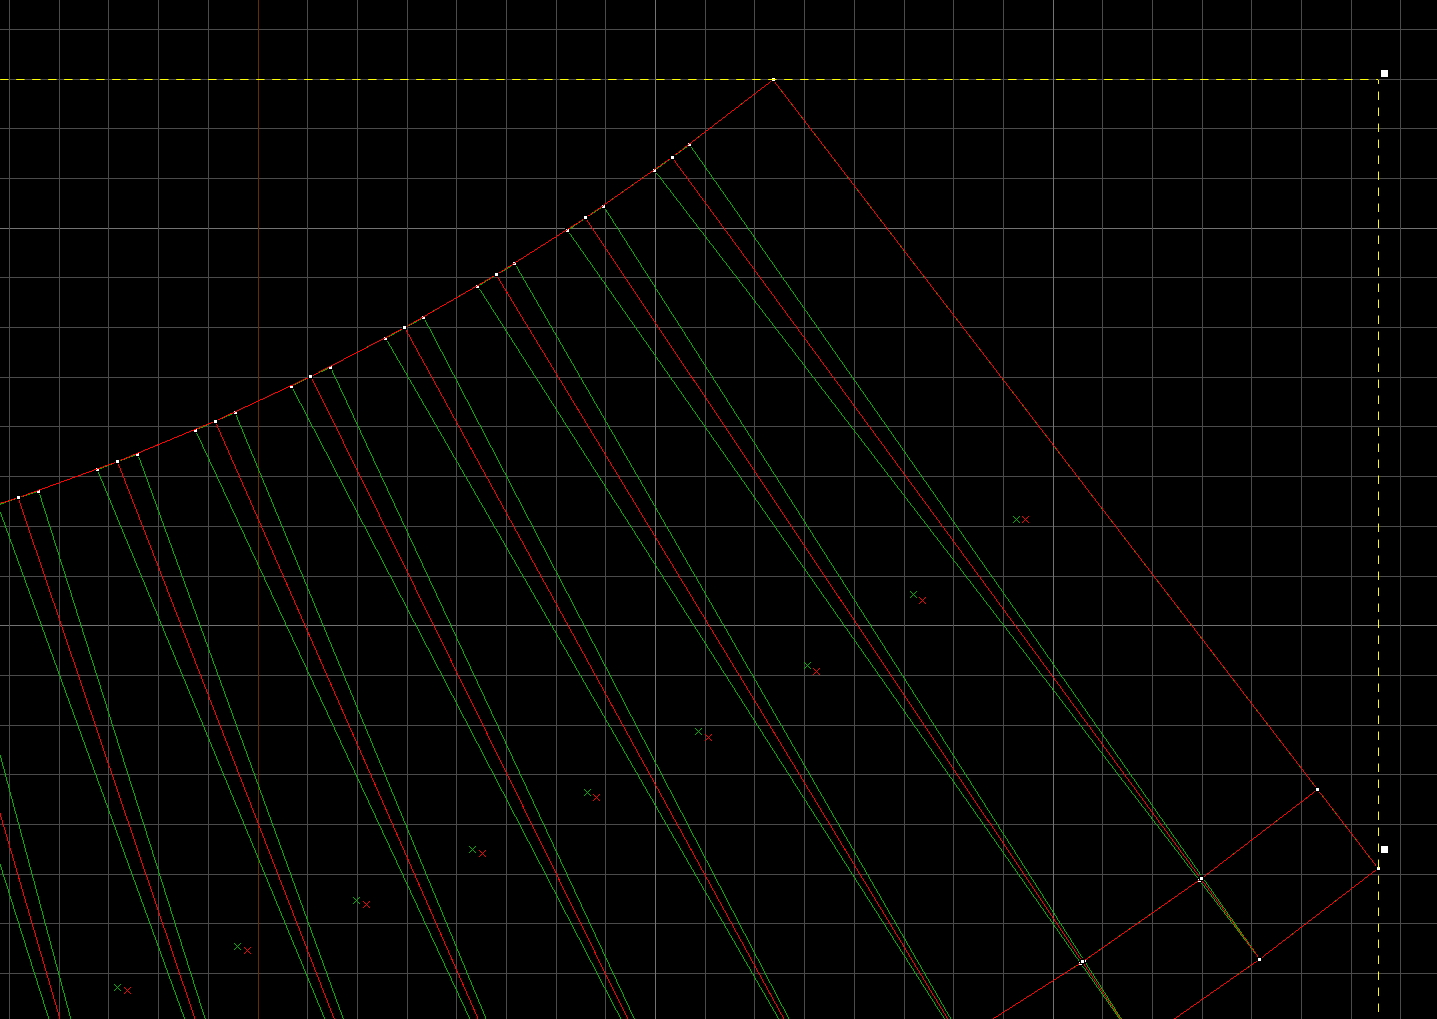
Create a curved ramp with this as the base segment. This is done the same way as before by rotating and connecting each segment.
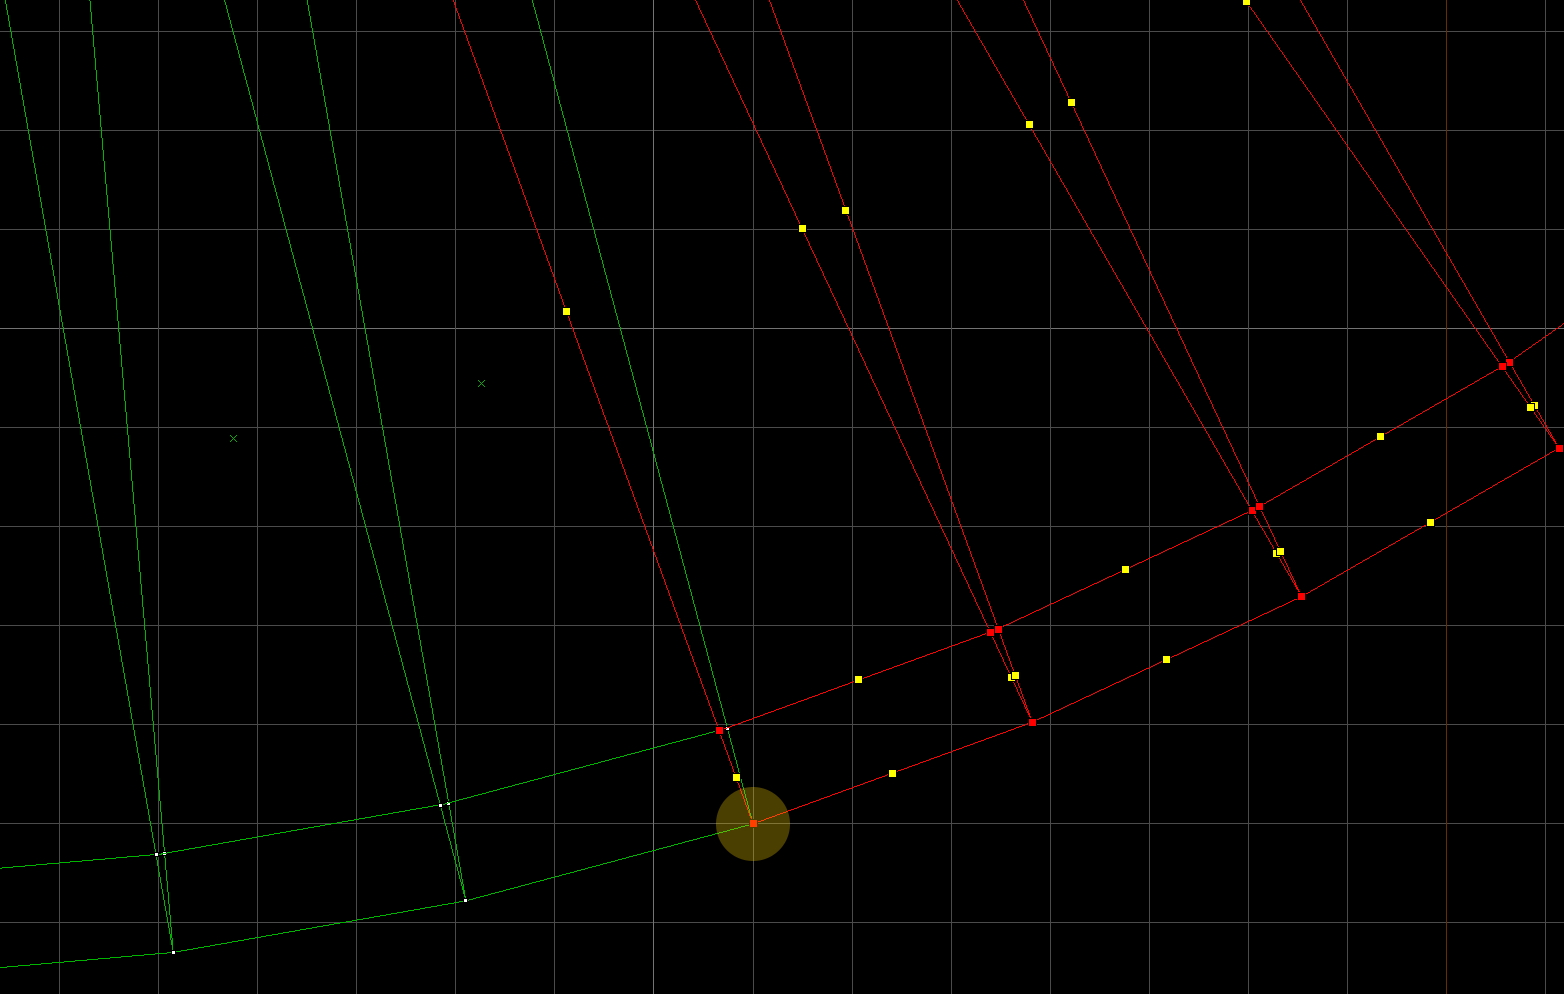
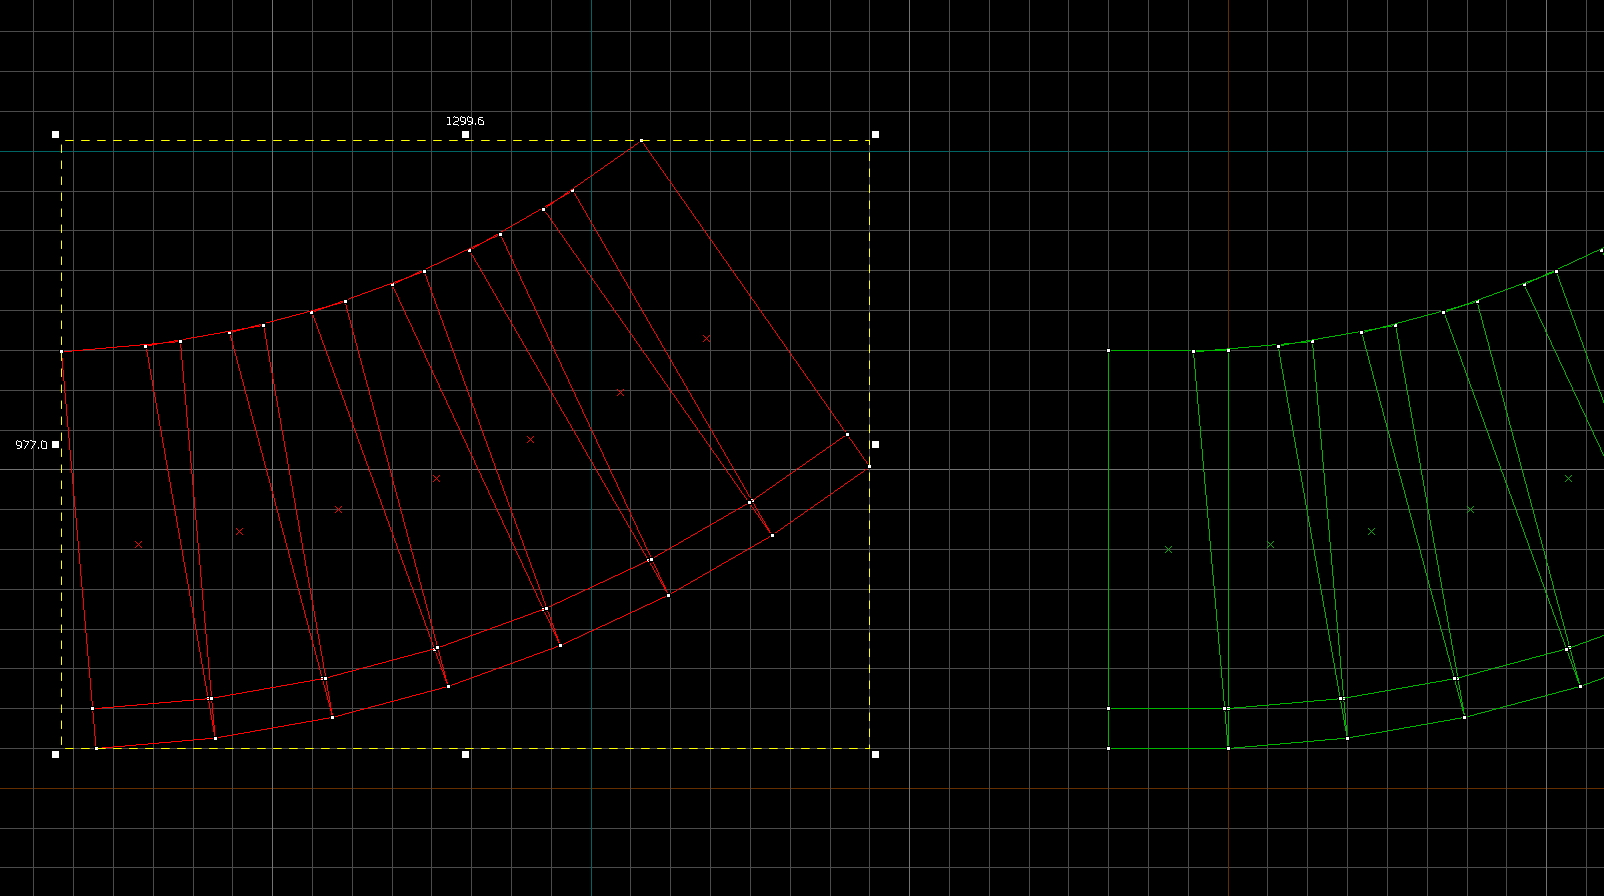
Notice that with this version of the ramp, nothing is overlapping so the 2d view looks much simpler. When aligning this ramp with the playerclip version there is a problem!
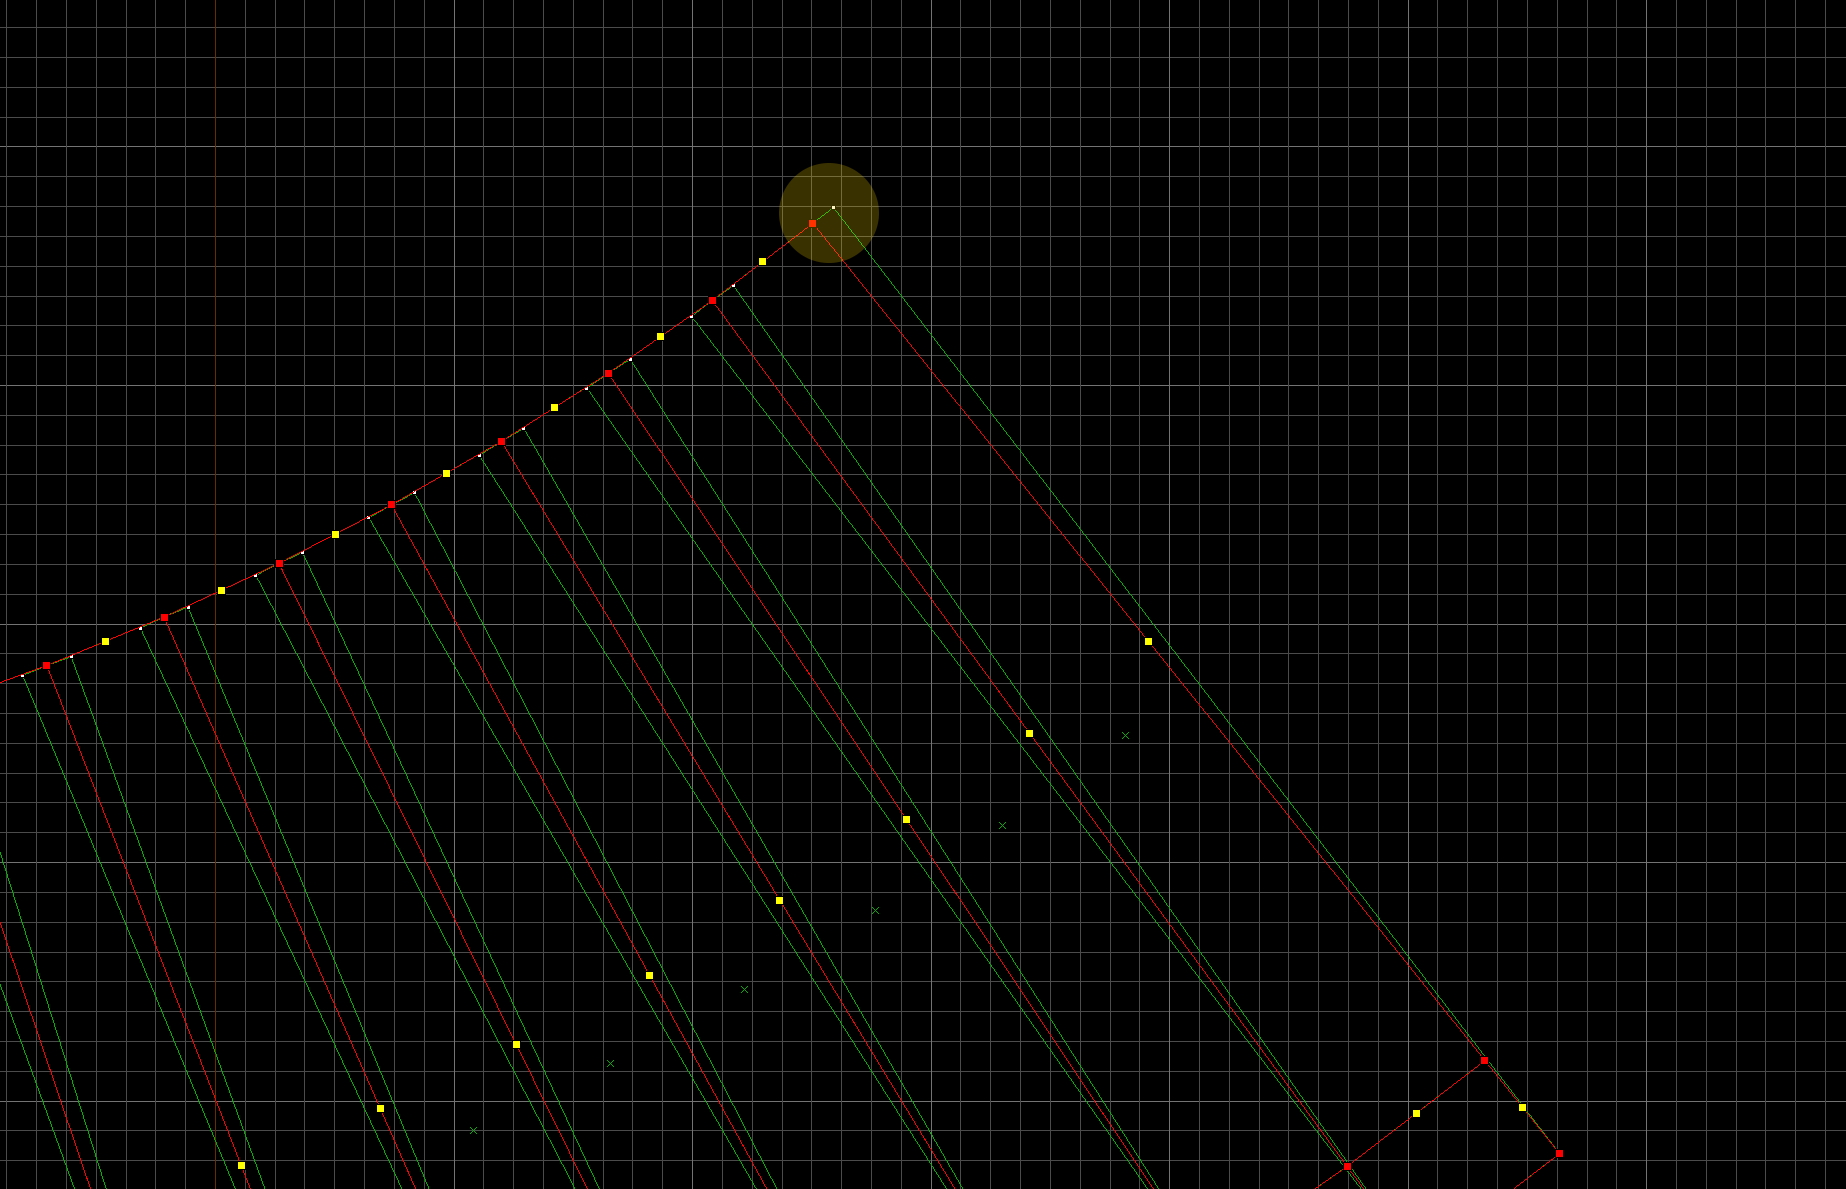
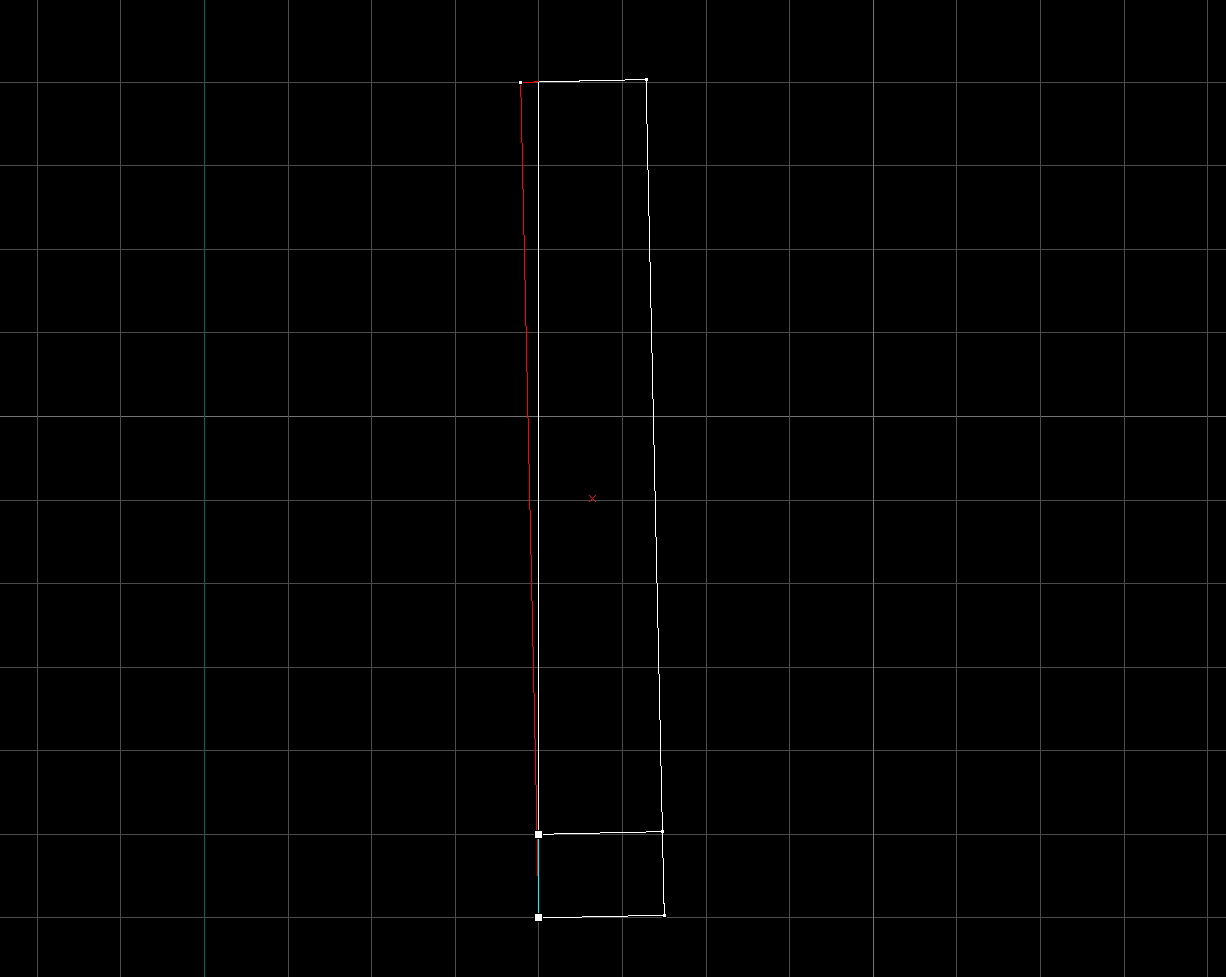
Because of the way these segments were cut, the segment on the end does not line up with the end of the playerclip.
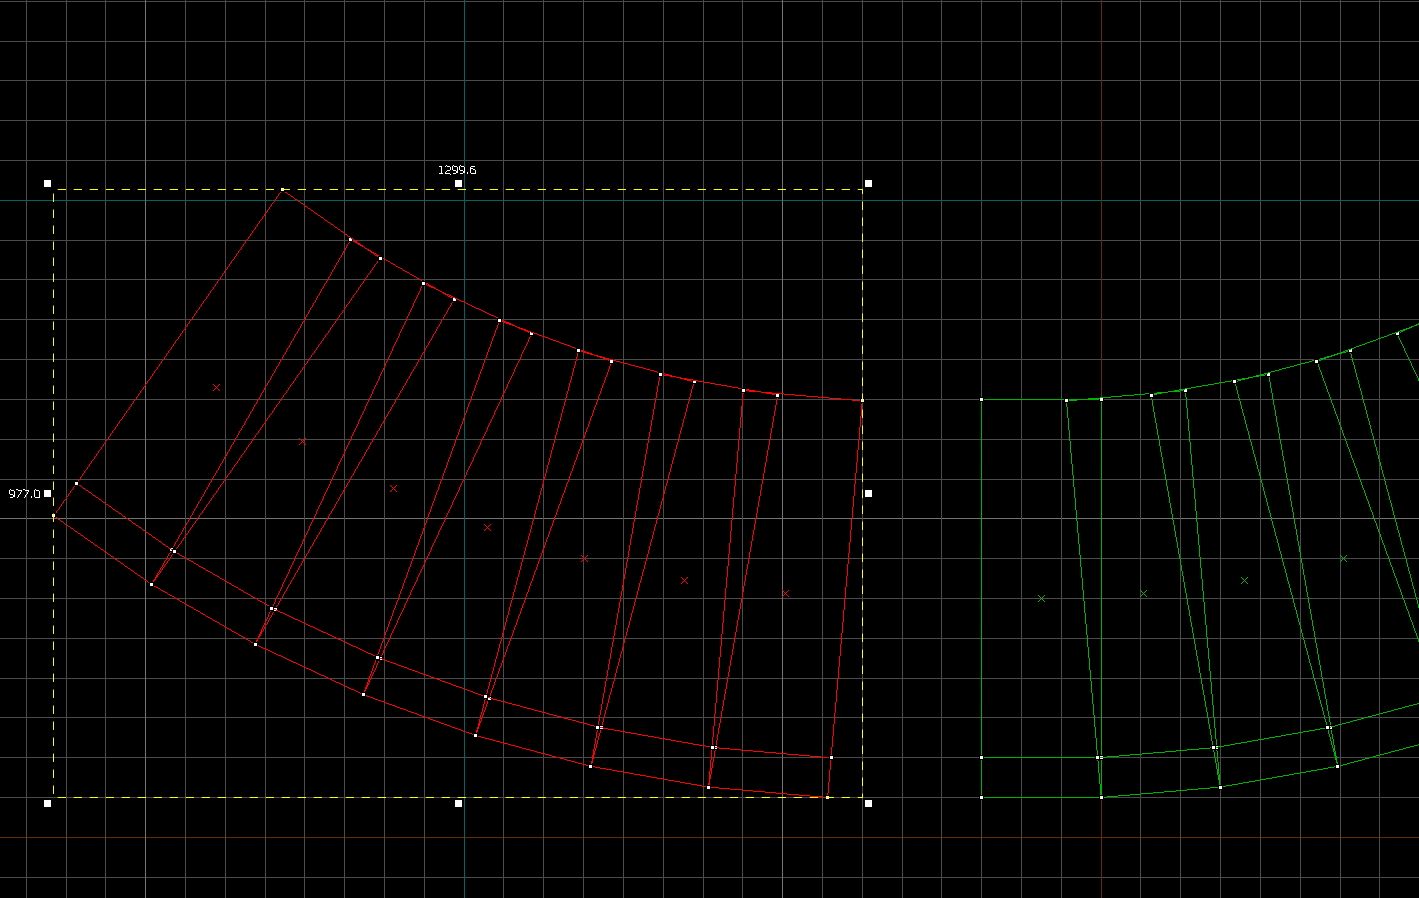
Luckily there is still a copy of the original segment before cutting. This can be cut on only one side so that it does not overlap with the previous segments but also lines up with the playerclip at the edge.
Use the same method of cutting the segments as before and use Ctrl + L on a copy of it to create one for both sides.
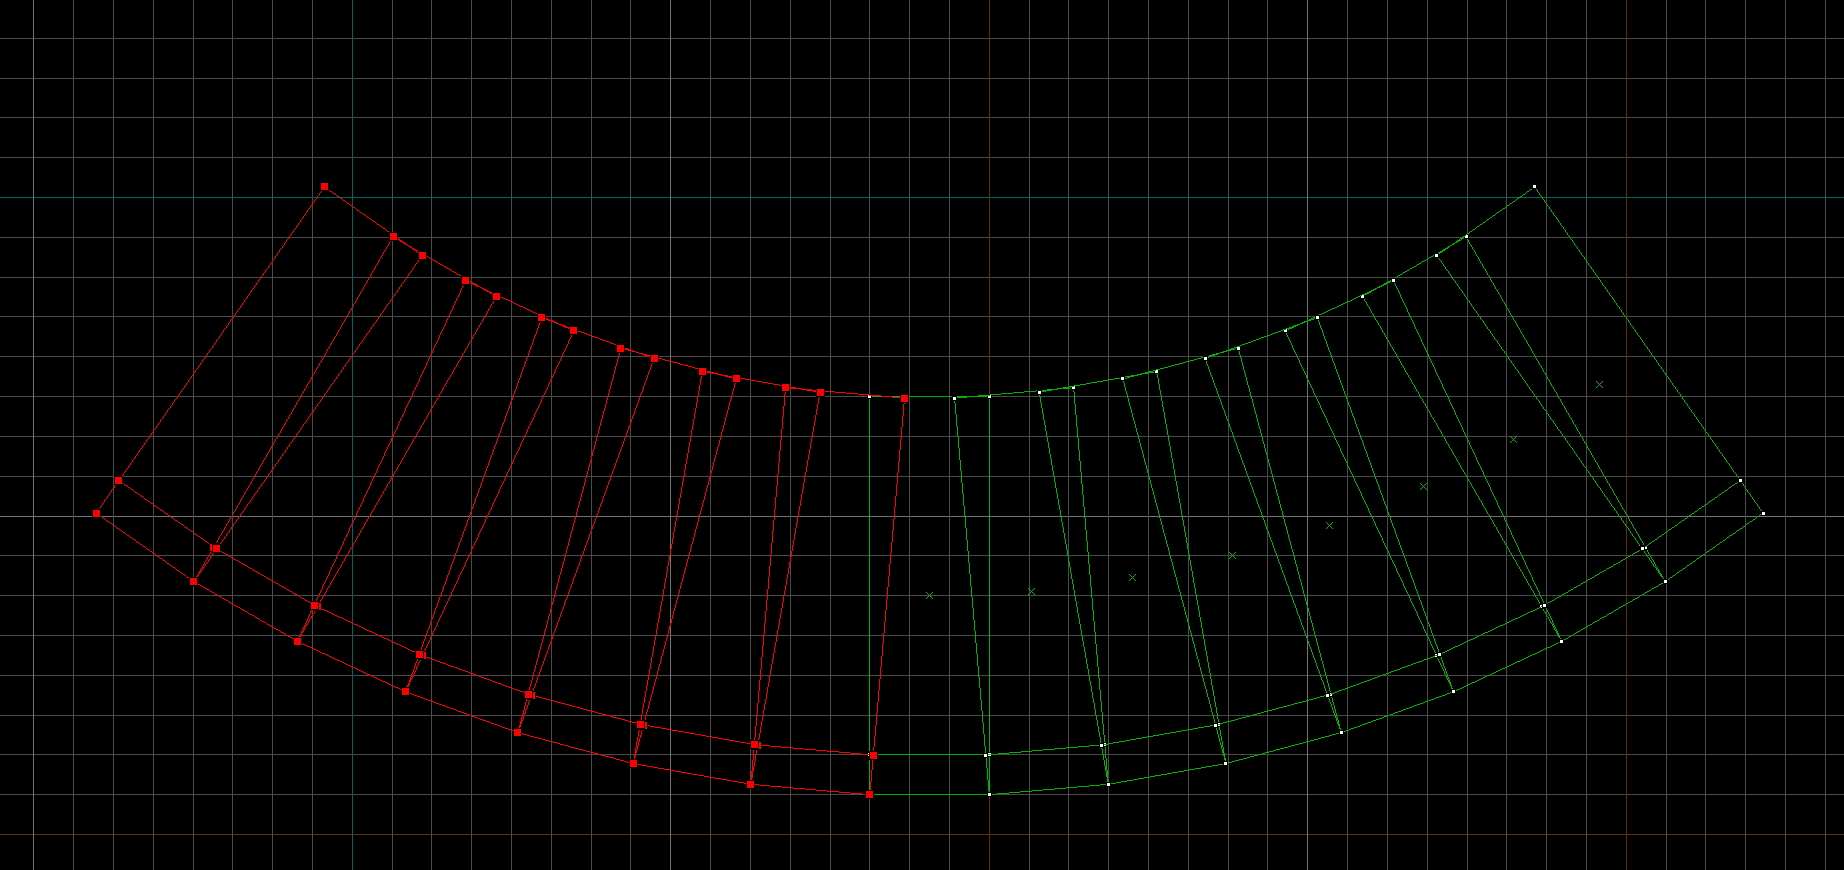
Delete the two edge segments that weren’t lining up properly and then align the edge of the ramp to the grid.
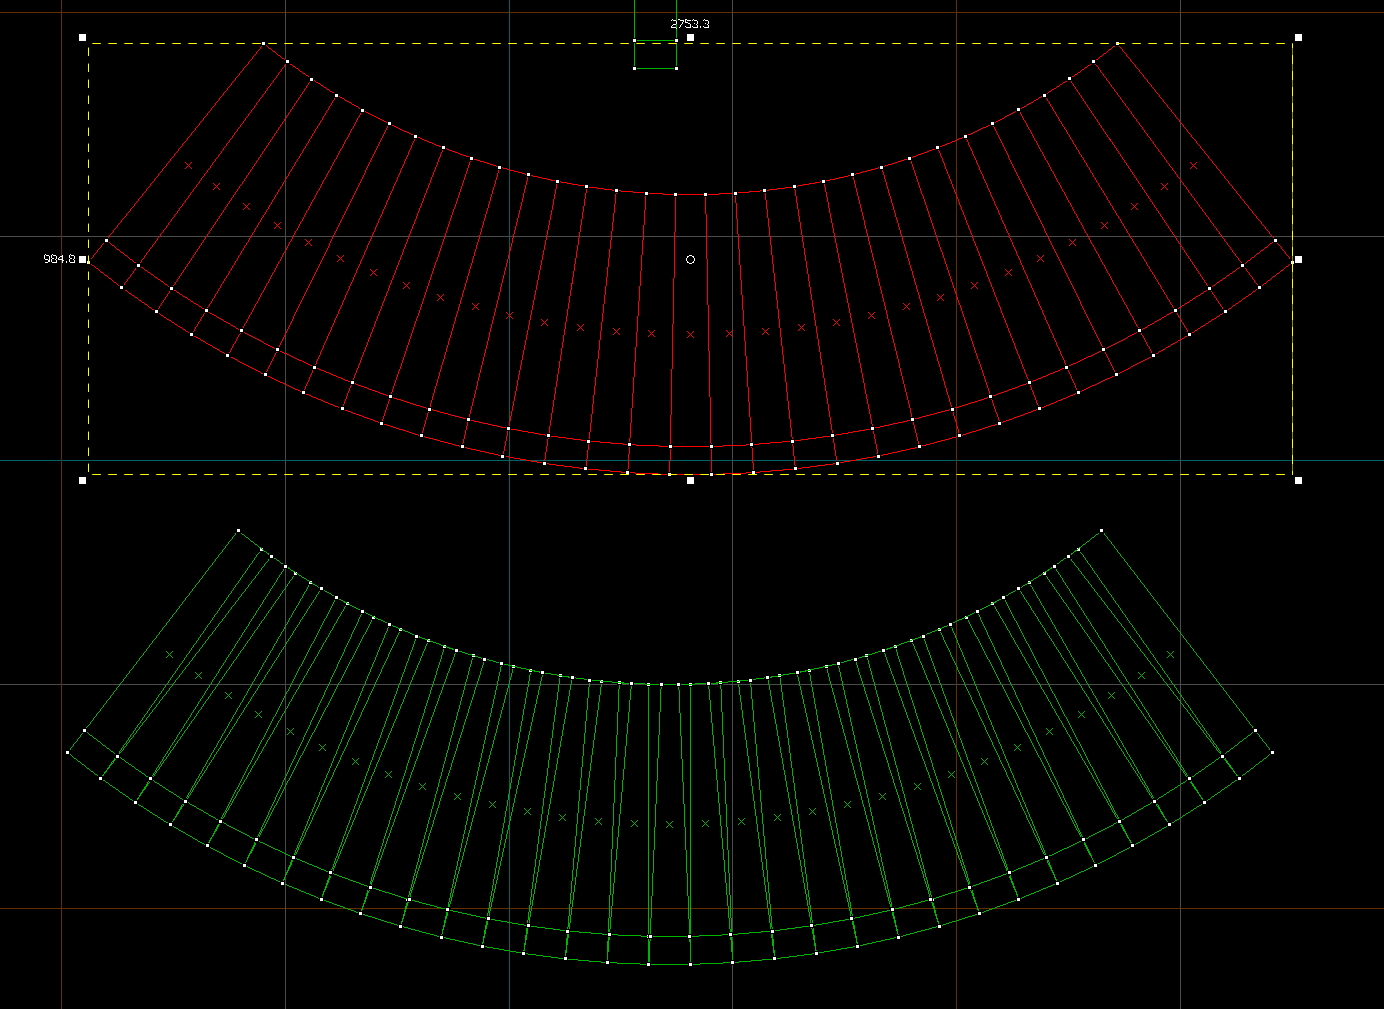
Rotate the corrected segment until it can connect with the others and align it with the rest of the ramp
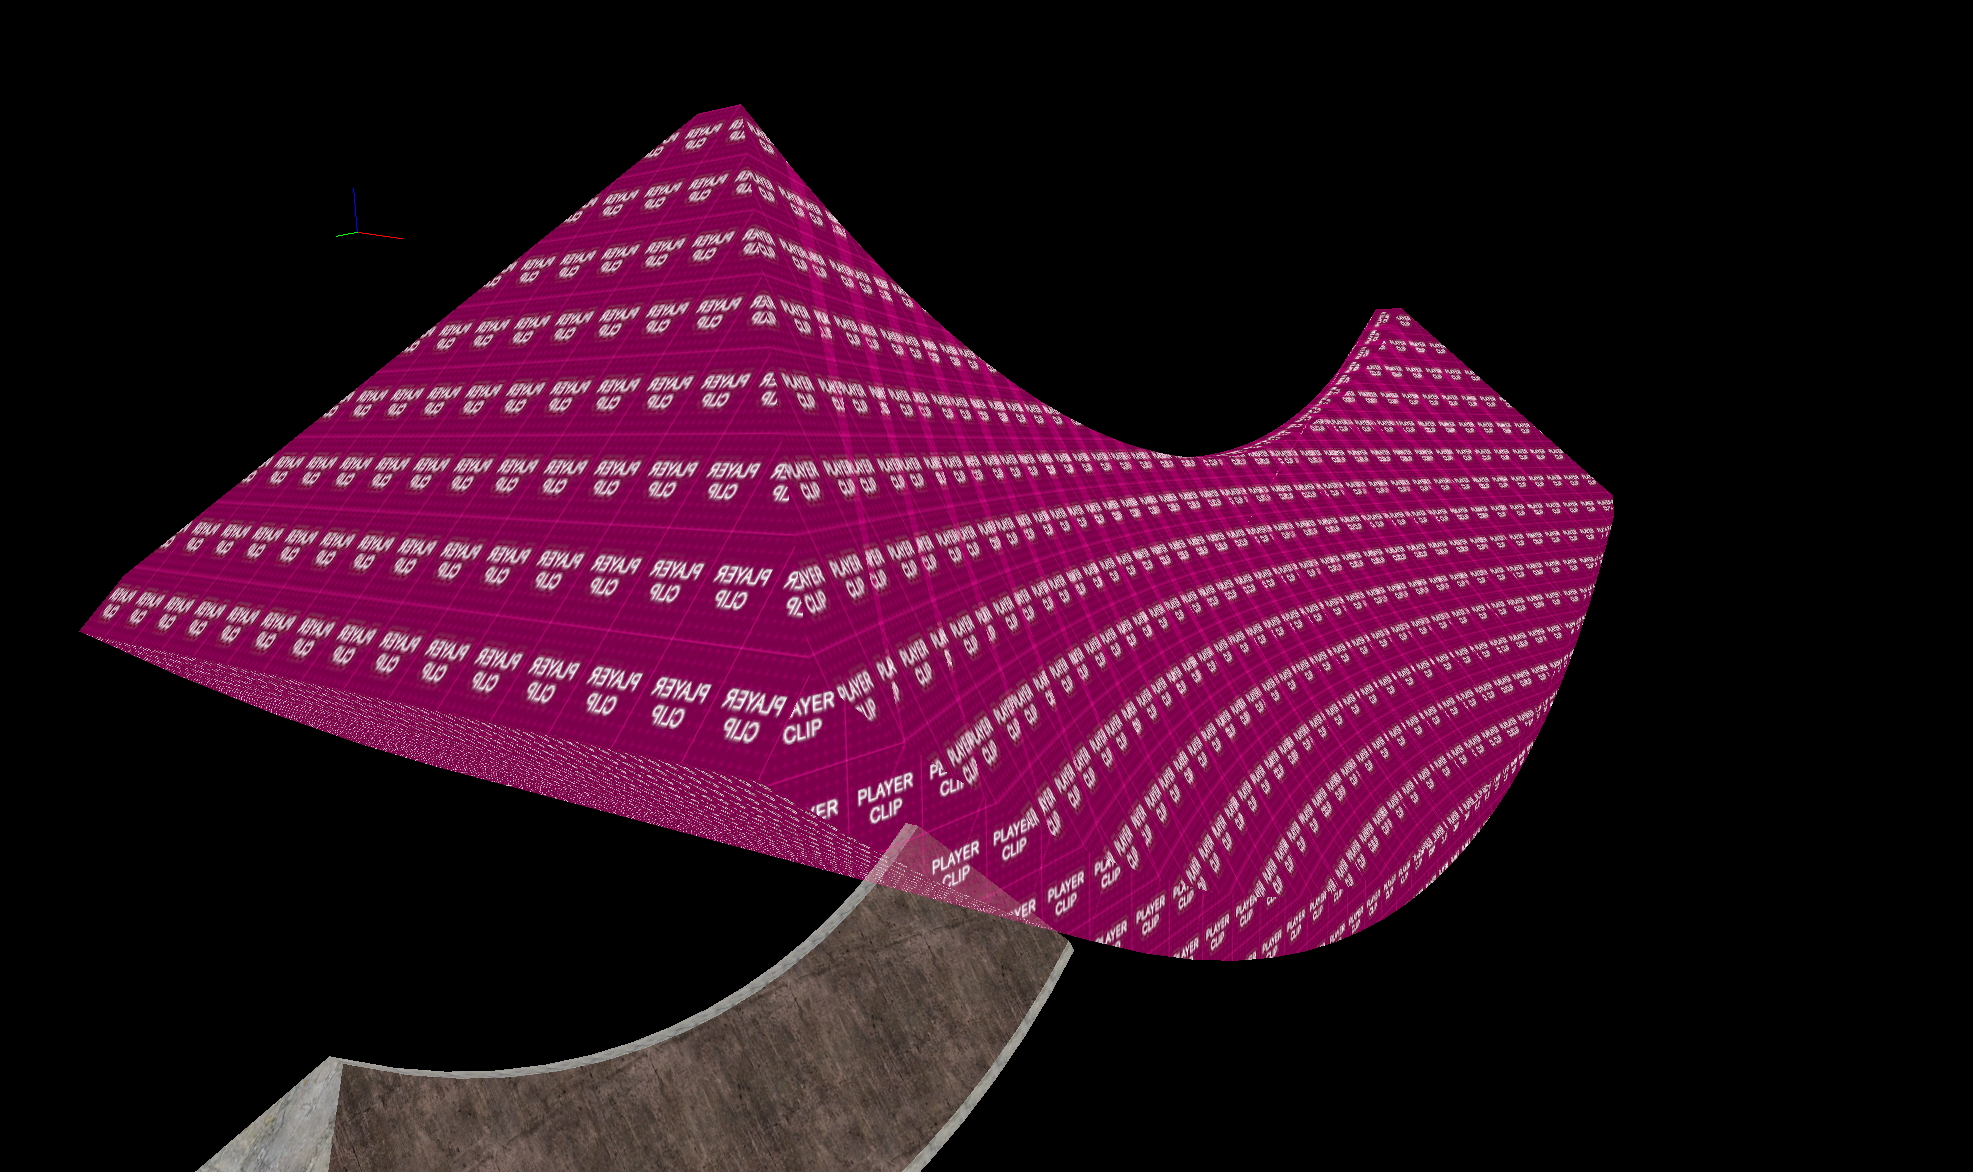
Do the same for the other edge of the ramp. After getting the ramp fixed, aligning it with the playerclip ramp shows that it now perfectly matches the collision.
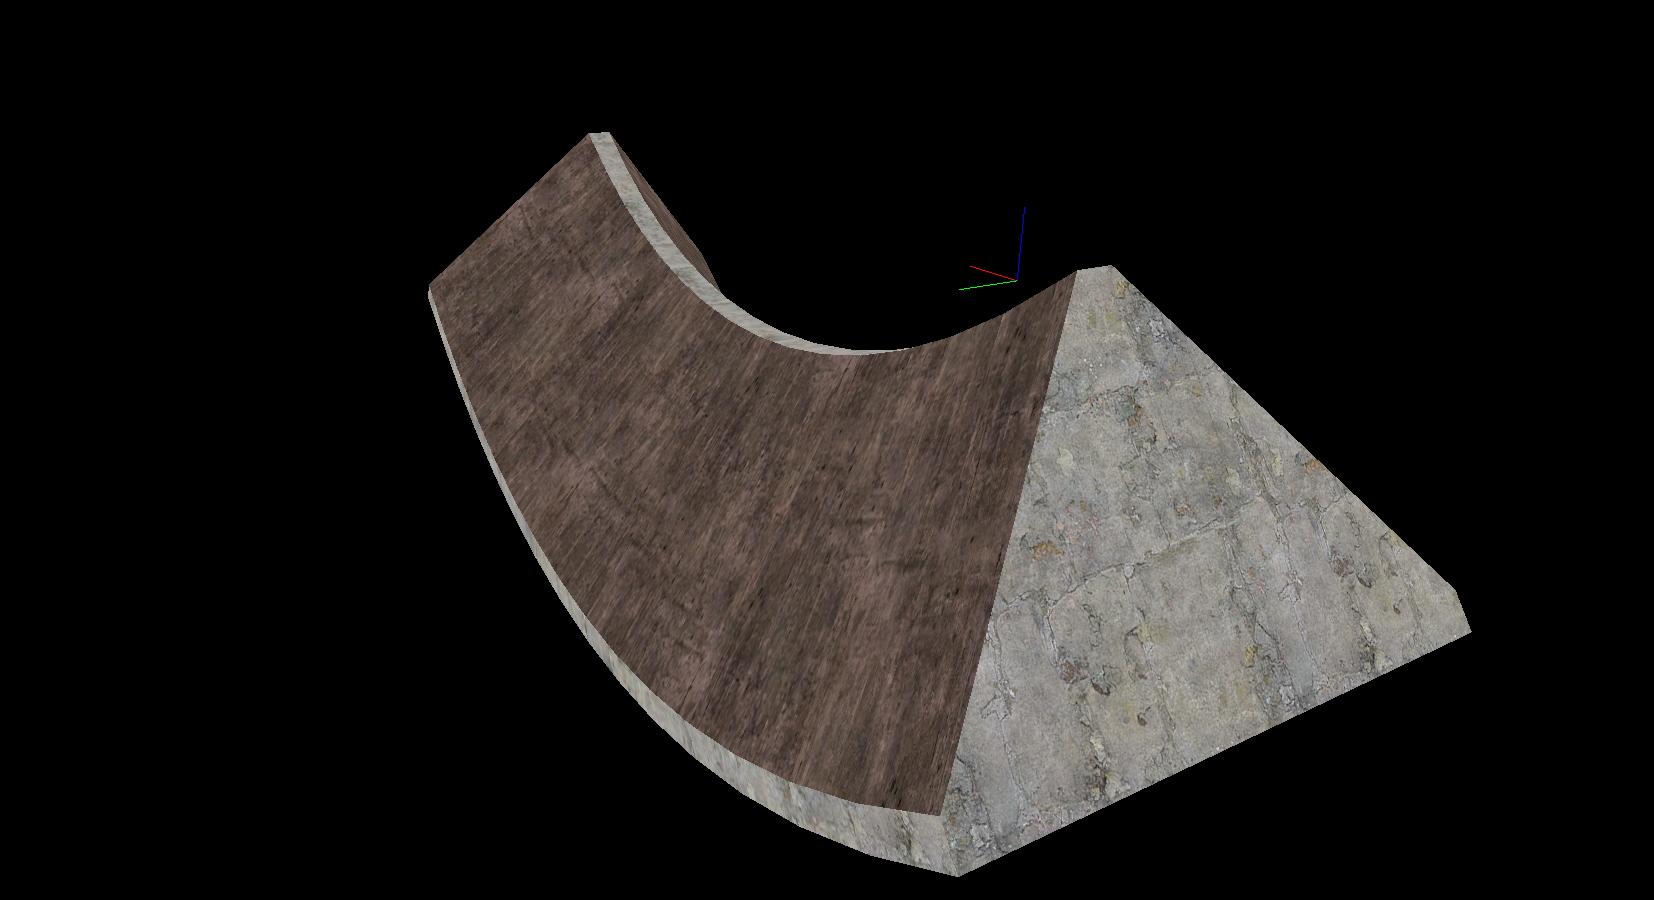
Now is the time to texture the edges of the ramp that are showing nodraw and make the visual portion into a func_brush with Solidity set to Never Solid.
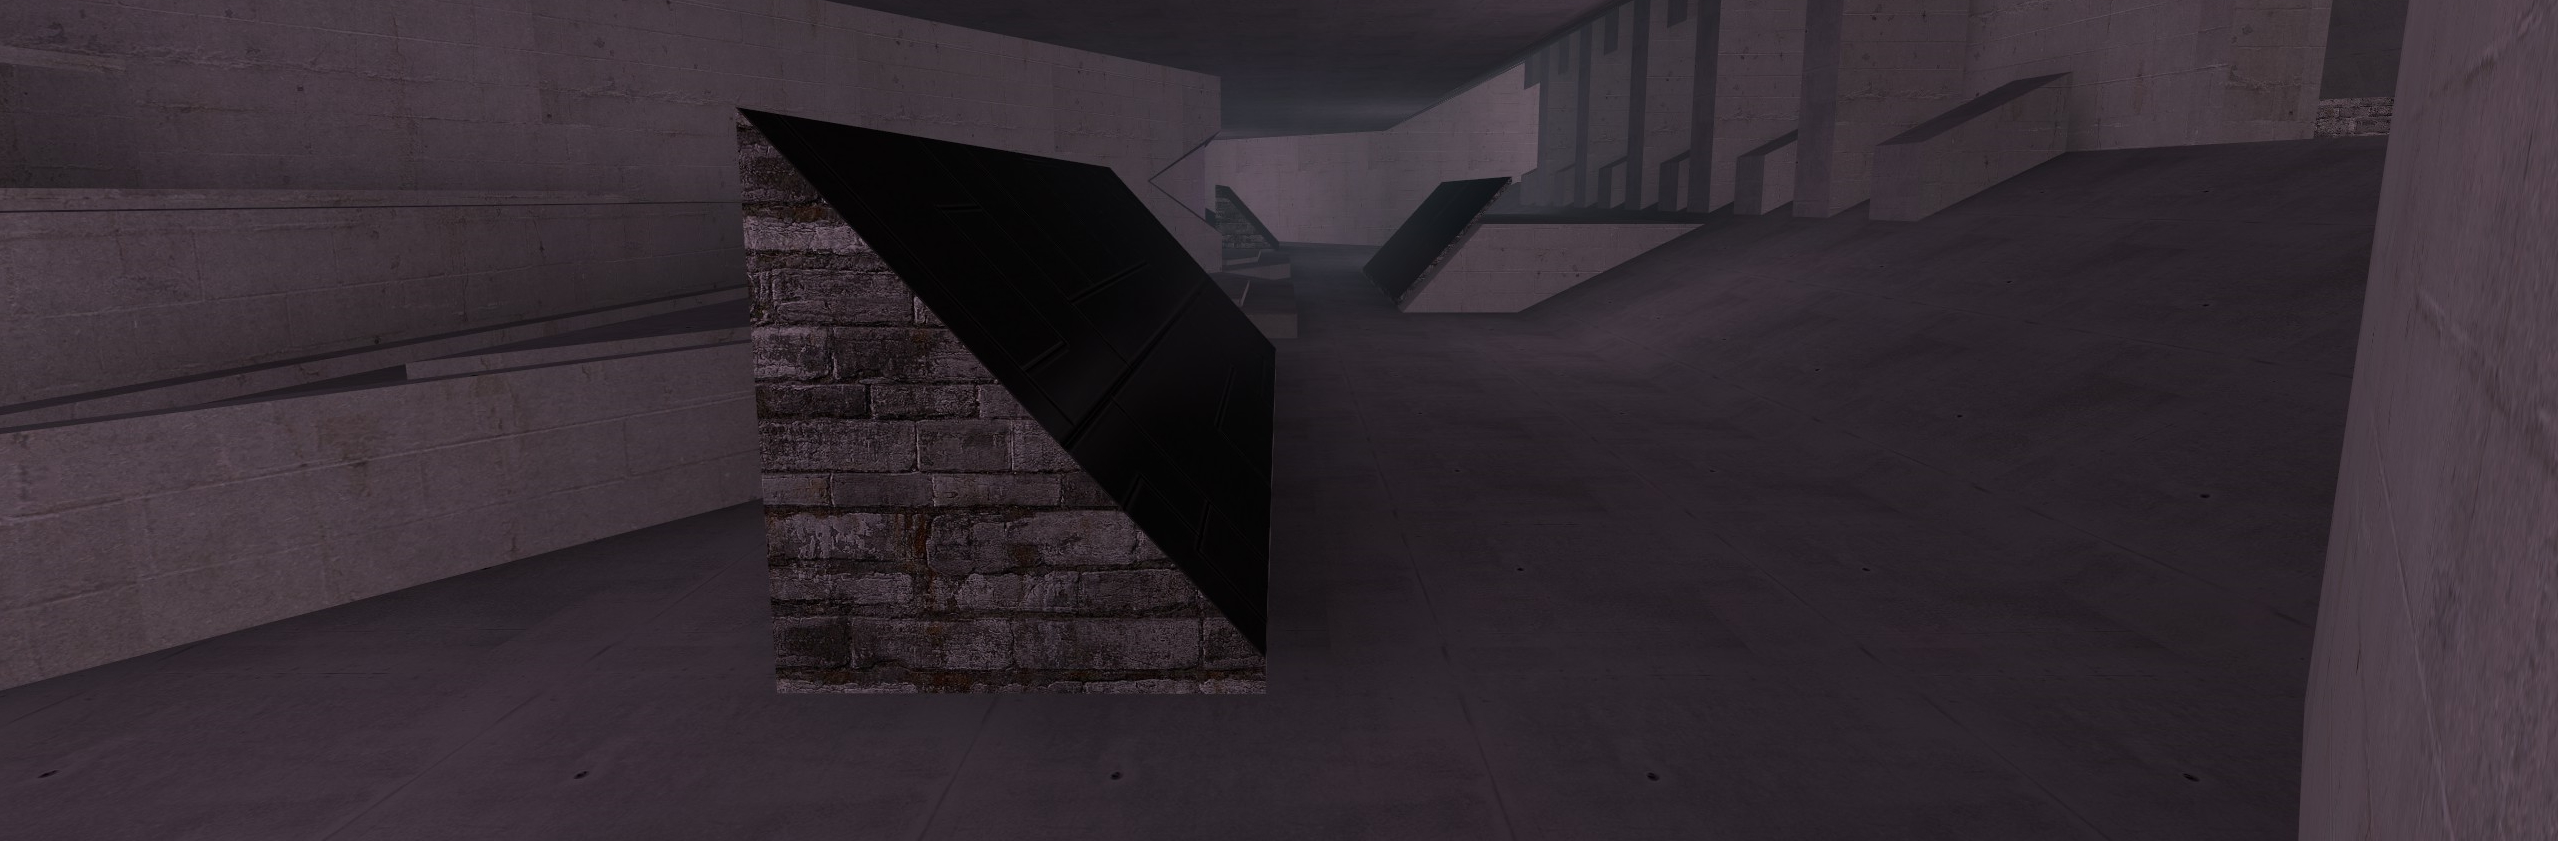
Just like that, you have a very smooth looking surf ramp.
If you find yourself with visual errors on ramps done with this technique, try cutting the base segment for the func_brush into more basic shapes (seperate the base from the triangular part, etc…) to make it easier for the compile process to handle.
The vmf created during this guide is available here.
Modeling Ramps #
While a lot can be accomplished with brushes, complex brushes and ramps will sometimes reach the limits of what can be done with them. At this point it may be time to look into making the ramps into models.
Normally this doesn’t need to be done until late in development when doing an art pass for details, but it tends to be a lot more involved and requires experience with modeling software.
Model collision without clip brushes can also be prone to having far more rampbugs. While this is fixed in Momentum Mod, it may be a concern for compatibility with other source games. Often modeled ramps are used alongside playerclip collision.
The use of modeled ramps can also help avoid reaching hammer’s brush limits by shifting the majority of the detail to static props.
Common tools used to create these models are Propper, SourceOps and Blender Source Tools.
Propper is an addon for hammer that allows you to convert world brushes directly into compiled model files.
SourceOps and Blender Source Tools are addons for Blender that allow you to export your blender models as source model files.
Creating and texturing models is a massive topic on its own so this guide will not look in depth at creating these models.