This Guide will cover the most basic usage of the Zoning Tools to create a Start and End Zone.
Looking for Stages and Bonuses?
Try the Advanced Zoning Guide.
Prerequisites #
To follow this Guide you should:
- Be on Momentum 0.8.0+
- Be running Momentum with
-mapping - Have the Developer Console enabled and be able to use it
Opening the GUI #
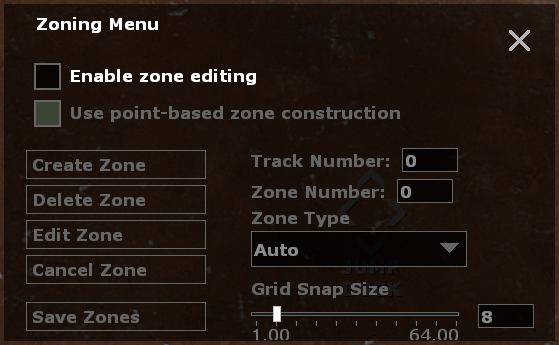
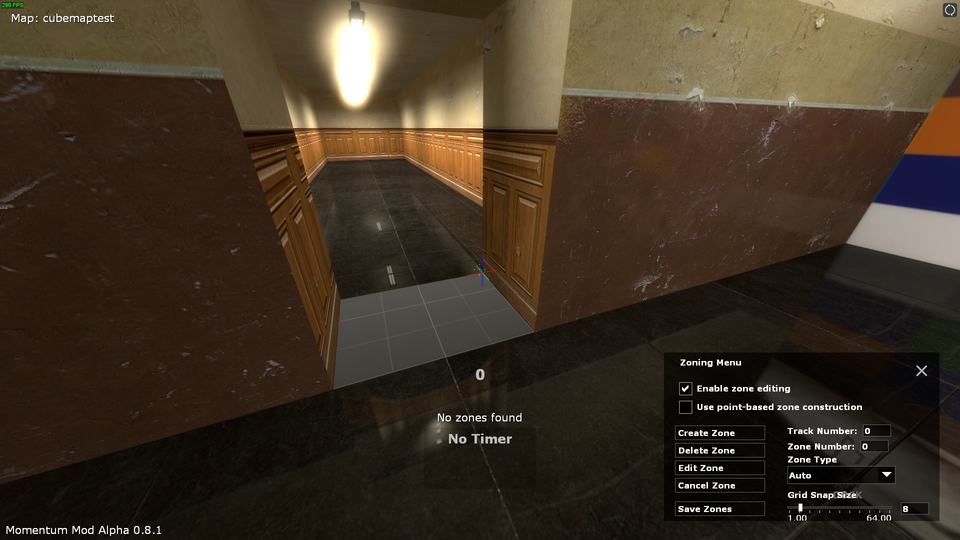
In order to get the GUI to appear, type mom_zone_showmenu in the Console, it should look like this:
You will lose the ability to look around at some point and your mouse cursor will re-appear.
To be able to look around again, right-click the GUI.
Right-clicking will toggle between looking around and interacting with the GUI.
To get started, click the Enable Zone Editing checkbox, the other options will become available.
You will also see a 3D “cursor” appear where you are looking:
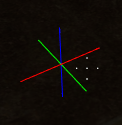
This shows where you will be creating the Zone in the map; it snaps to a grid, so it will not follow where you are looking exactly.
Creating a Zone #
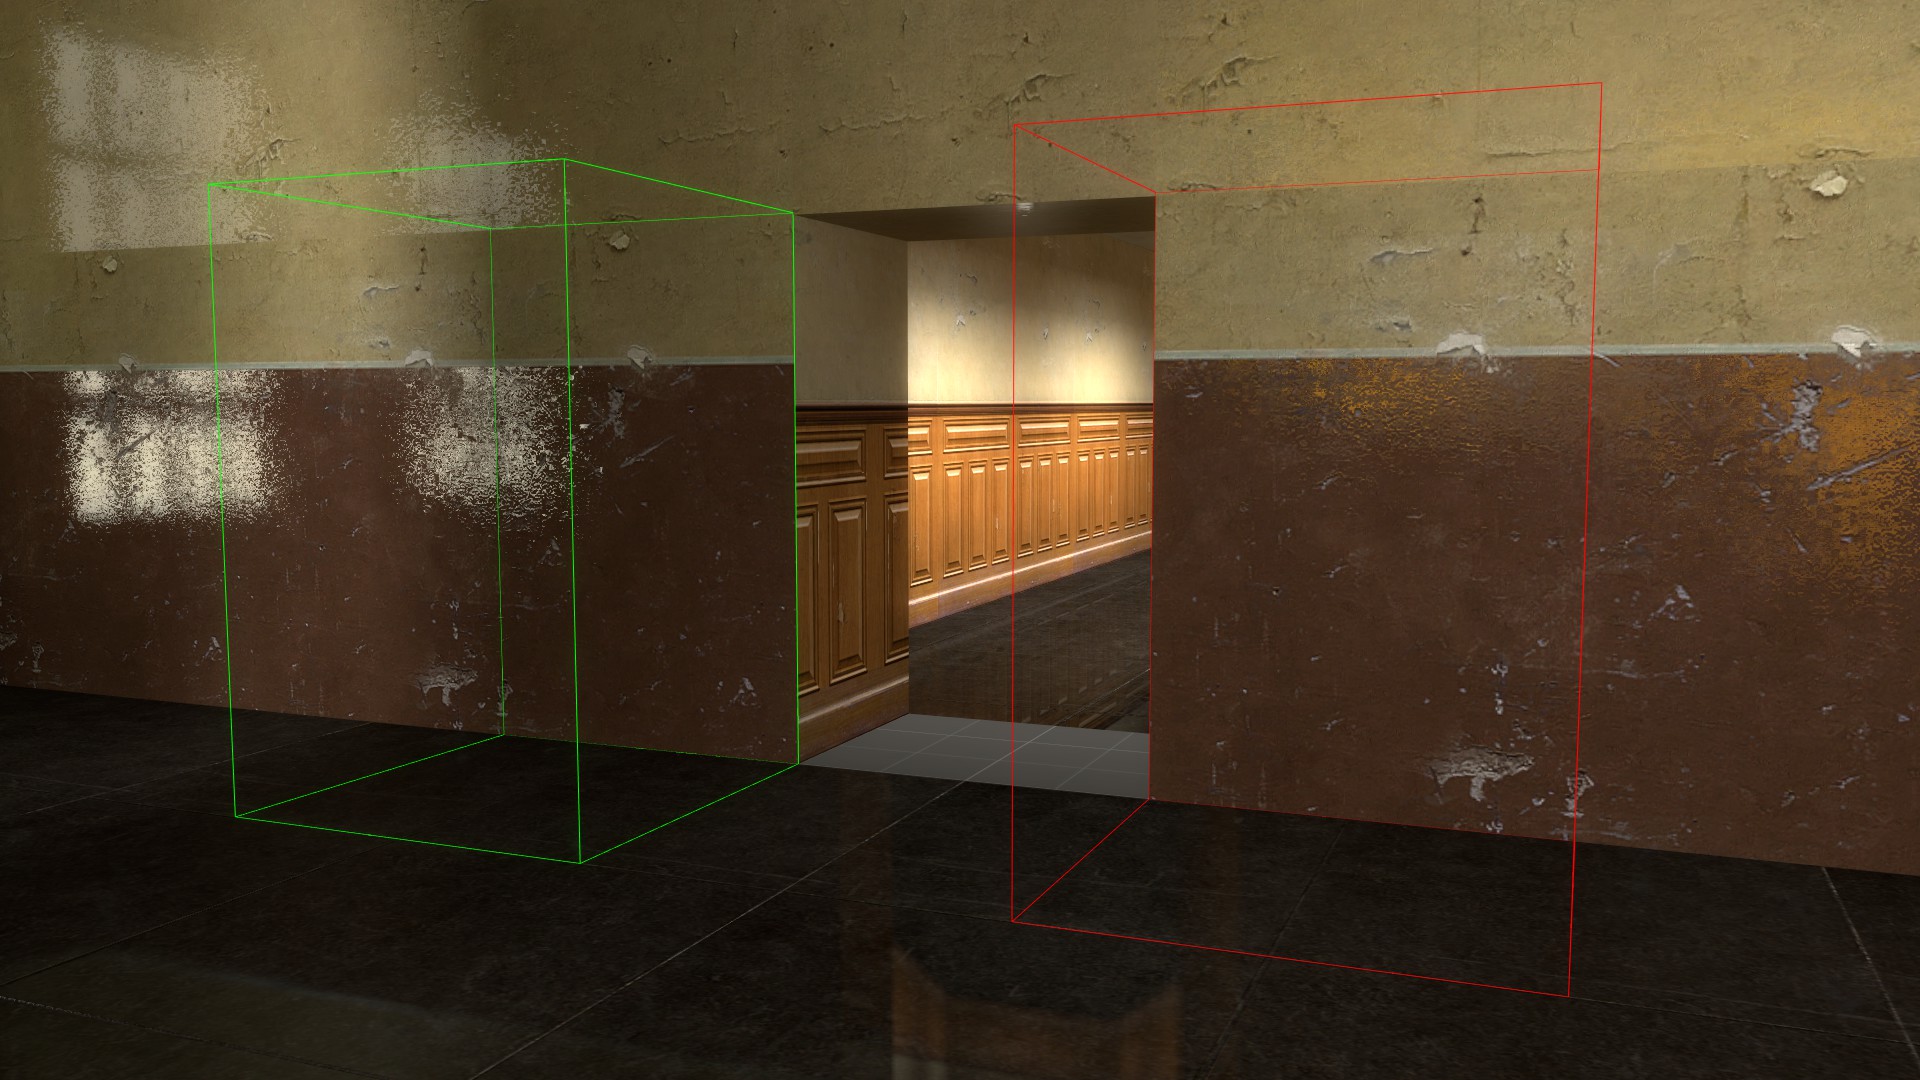
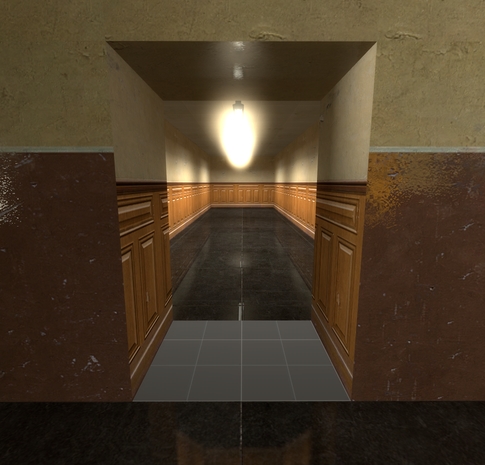
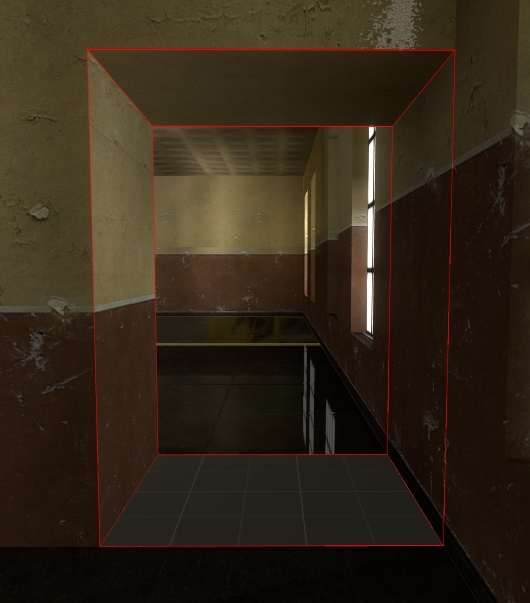
In this example the Zone will fill this doorway:
First, click the Create Zone button - you will be able to look around again.
If you want to start again at any point, click Cancel Zone.
Then find one of the corners of the Zone you want to create, so for this example that could be at the rear-right of the doorway:
Click and you’ll start to drag out a rectangle on the floor.
This example will move the cursor to the front-left corner to fill out the doorway:
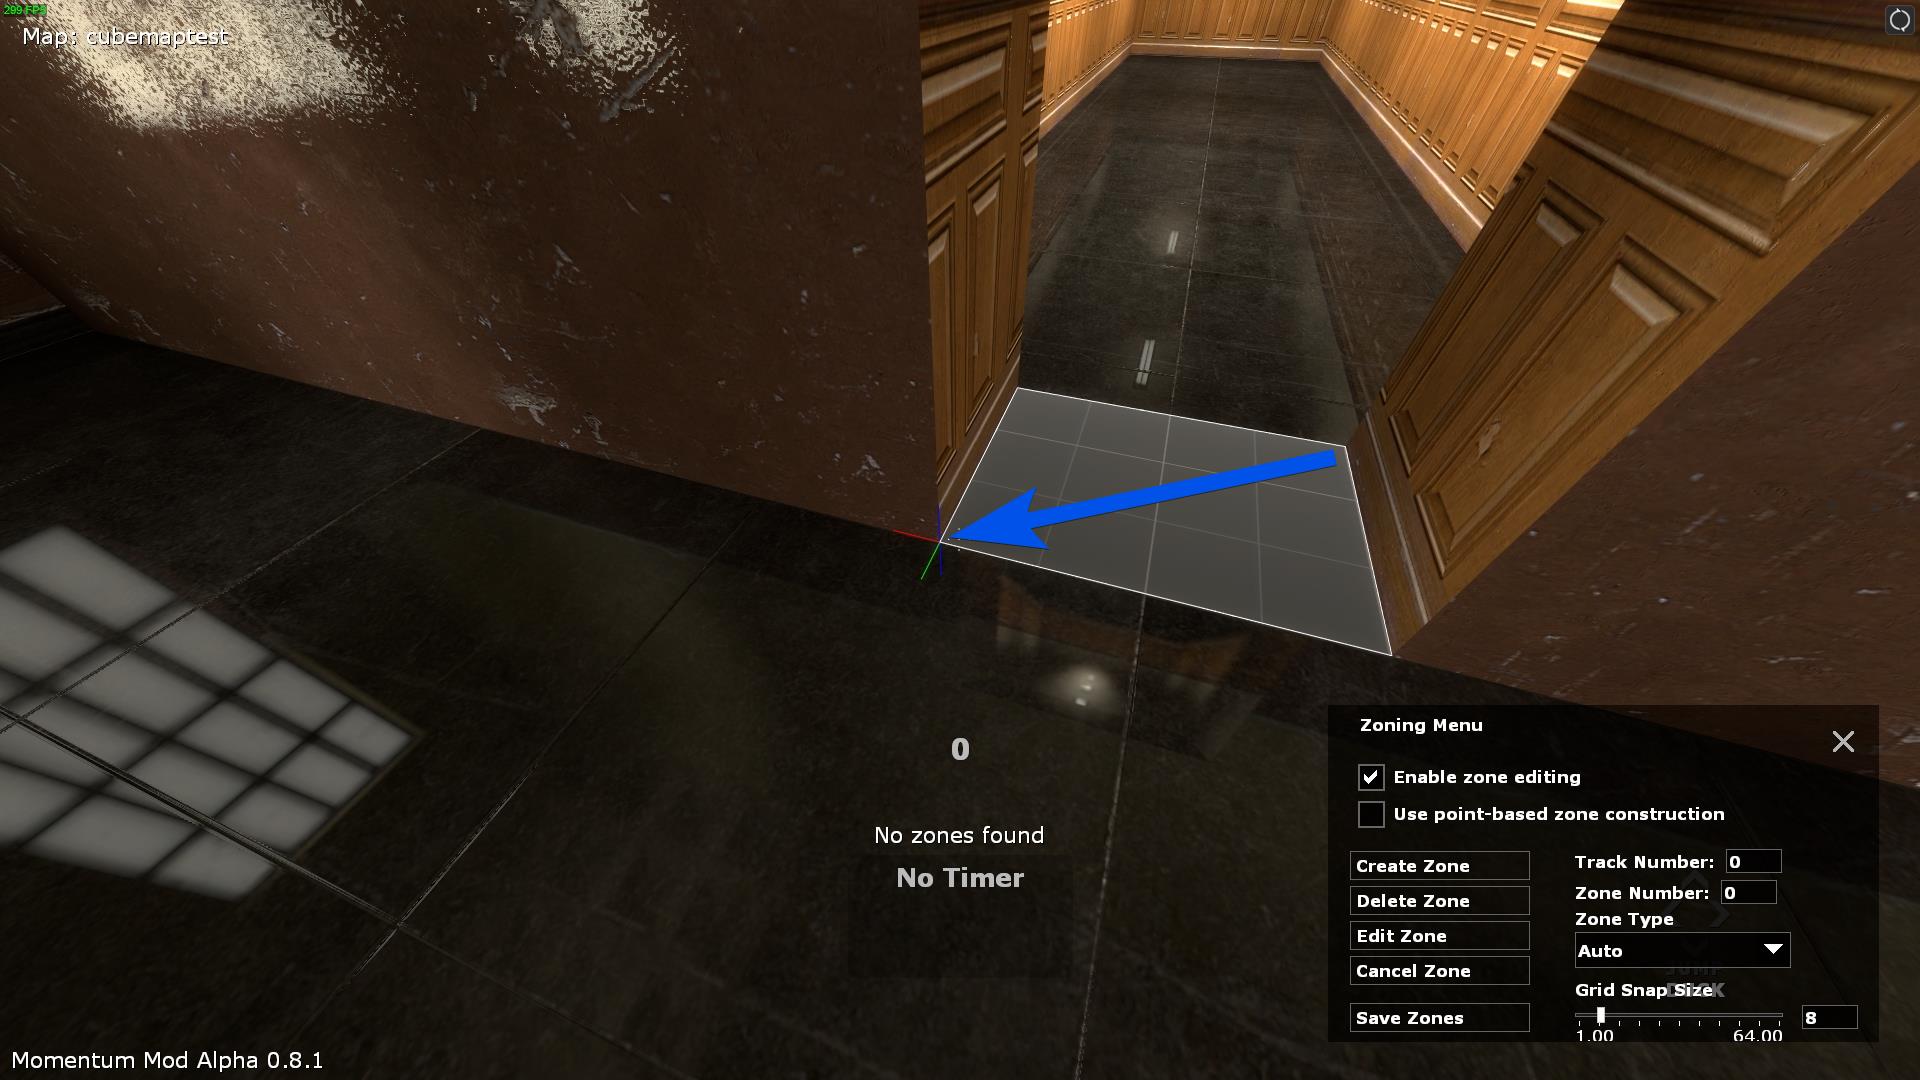
Once the other corner is where you want it, click again - the rectangle will become a cube.
Starting moving the mouse upwards to set the height of the Zone:
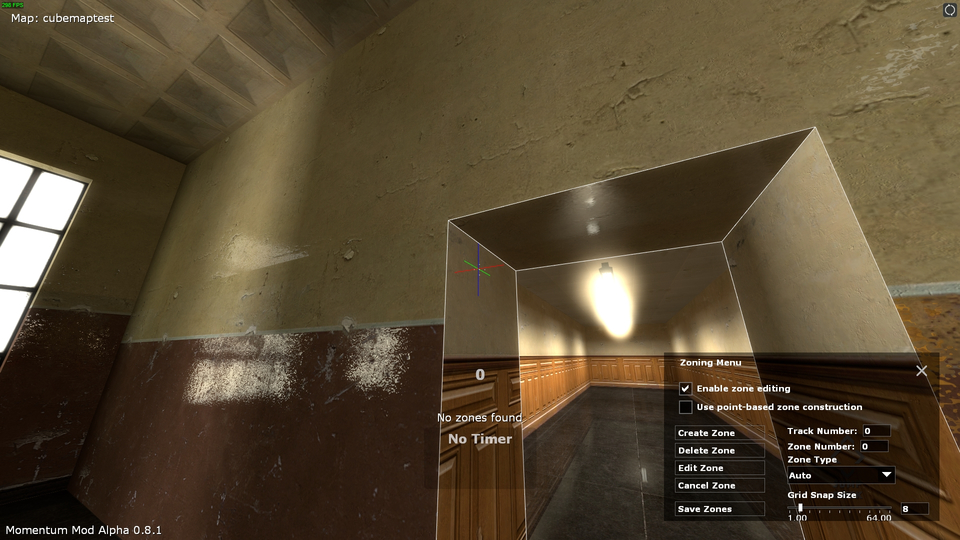
The height of a Zone does not snap to the grid currently, so you will have to eyeball it!
If you are satisfied with the Zone click again and the outline will change colour:
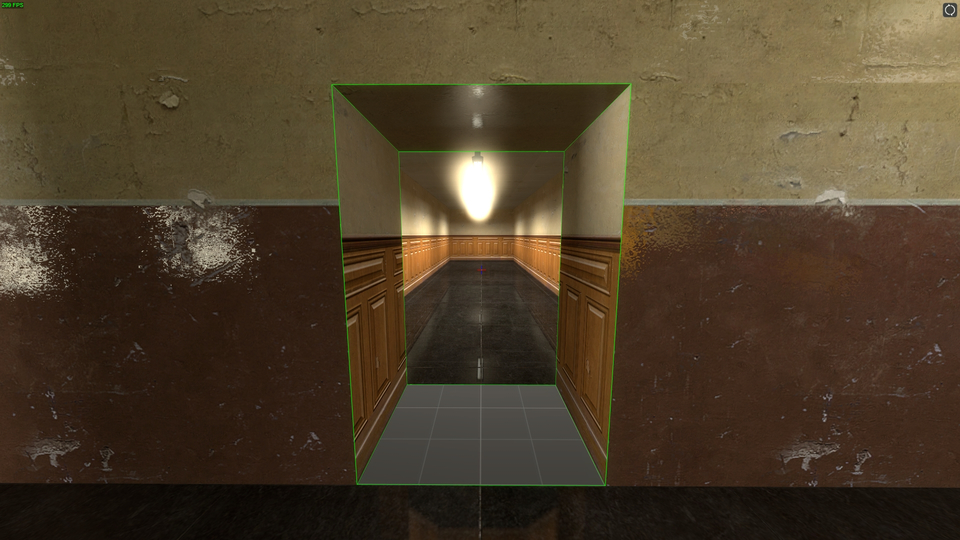
In this example the Zone has become green - it is a Start Zone.
Want to find out more about Zones?
Check the Zone Types Guide.
To create the End Zone, go to where you want it and repeat the process, you should have a red cube this time:
Saving the Zones #
If all goes well you should be able to click Save Zones, close the GUI and test the map.
Zones are stored in a .zon file of the same name as the map.
So for this example the map is called “cubemaptest” so the zones/ folder will now have a cubemaptest.zon file.
This should be enough for basic testing and Linear maps.
For more than one Stage or Bonuses check the Advanced Zoning Guide.