Introduction #
This guide gives an overview of all the steps required to officially port a map into Momentum Mod.
Porting is open to everyone, but the number one rule for porters is to not significantly change an existing map. We appreciate porting work but the map ultimately belongs to the author, and porters should not make significant visual or gameplay changes on maps without the author’s permission (including Easter eggs, sorry!).
Please try not to rush through ports, and take time to read these docs. We’re happy to help with any porting questions in the #map-porting channel of our Discord, ask there if you have any questions.
Reserving Maps / Getting Permission for Ports #
Our stance on whether to port an existing maps is opt-out, i.e. we assume it’s okay to port a map unless a mapper explicitly tells us they don’t want it ported. Momentum gamemodes are simply too old with too many inactive mappers for us to get permission in every case, so we’ve put a great deal of effort into making porting as streamlined as possible. In the majority of cases, porting to Momentum involves far fewer changes than other games (CS:S → CS:GO, CS:S → TF2 etc…). That being said,
- Mappers can reserve porting their own map or opt out of having their map ported via this form.
- Submissions to that form can be found on this spreadsheet. Always check that sheet first before starting a port. If you submit the map and it’s been reserved / opted-out of porting, we’ll reject the submission.
- If someone has requested it to not be ported, do not spam them with requests to port it.
- Try to verify whether a map has been released on a public forum (e.g. GameBanana, jump.tf forums) before porting.
- Don’t port a map if it seems like it’s been released for a single server, unless you can get explicit permission.
- If in doubt, try your best to contact the original mapper.
For mappers porting their own map, restrictions on visual/gameplay changes generally don’t apply and you’re welcome to recompile for Momentum — it’s your map.
Source Map Basics #
Momentum map porting is primarily about manipulating BSP files, the format for compiled Source engine maps. In rare cases it may be required to decompile a map to a VMF file to edit in Hammer (Source’s map editor), but since recompiling causes lighting recalculations and other small changes, we prefer modifying existing BSPs whenever possible.
As a format BSPs are notoriously complex (see the VDC page), consisting of numerous lumps with different data structures. Fortunately for us, we generally only care about a few:
The Entity Lump #
Entities are responsible for the interactive parts of a map, such as teleporters, spawn points, and triggers.
They can be either point entities, which have a single position in the map, or brush entities, which are defined by a brush shape in the map.
Entities are composed of key-value pairs, where the key is the name of the property and the value is its value.
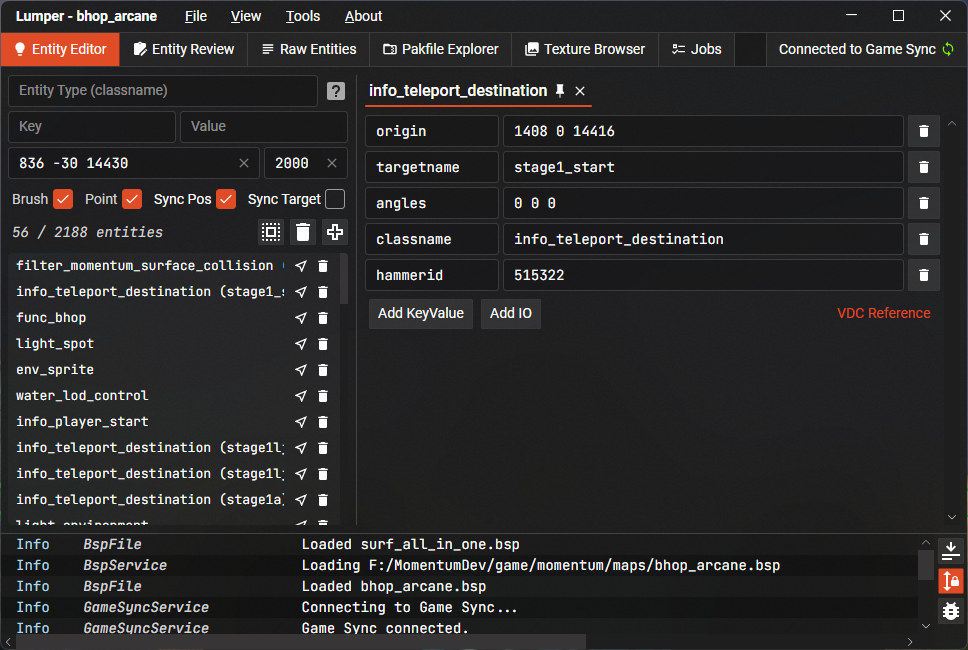
Here’s an example of the info_player_counterterrorist entity in Lumper, taken from a CS:S map:

classnamedesignates the entity as aninfo_player_counterterrorist; all it takes to change the type of an entity is to change that value.originis the position of the entity in the map. Changing it in Lumper/Hammer and saving/recompiling will change the position of the entity.anglesis the rotation of the entity when it spawns.
Generally, we’re not overly fussy with spawn points in maps. info_player_start entities will be prioritized for spawn points, otherwise the first info_player_terrorist/counterterrorist in the entity lump will be used.
This isn’t a required modification, but porters are welcome to clean up the additional spawn points — usually if you have multiple spawns, they’re placed in a grid and none are quite centered. To do this, all you need to do is:
- Delete all but one of the
info_player_terrorist/counterterroristentities - Change its classname to
info_player_start(though not really necessary) - Find the center of the room in-game, and set its
originto that coordinate
The Pakfile Lump #
The Pakfile lump contains all of the map’s assets, such as textures, sounds, and models. It’s essentially a ZIP file stored inside the map. When the map is loaded, the game mounts those assets in addition to the currently loaded assets from Momentum and other mounted games (e.g. CS:SS, TF2, etc.).
The pakfile also stores cubemaps, which are used for environment reflections and lighting in the map. These can be generated by the buildcubemaps command in-game.
The Toolkit #
Lumper #
The primary tool for porting maps is Lumper, a tool made specifically for modifying BSP files. It functions as a successor to tools like VIDE and Entspy, but supports Strata Source BSPs and contains features specifically aimed at map porting and reviewing. It includes:
- Entity Editor - Create and modify entities in the map
- Pakfile Explorer - View and edit the pakfile as a file tree. It can be used to remove or pack assets, as well as automatically refactor references to assets in other lumps.
- Texture Browser - View all textures in a map, similar to Hammer’s texture browser. This is used for content review.
- Jobs - Automated tasks that can be run on the BSP, such as:
- Remove official Valve assets
- Apply Stripper configs
- Batch replace textures
- Entity Review - Lists invalid or problematic entities in the map
- Compressed BSP Saving - Saves the BSP in a compressed format, which is required for map submissions
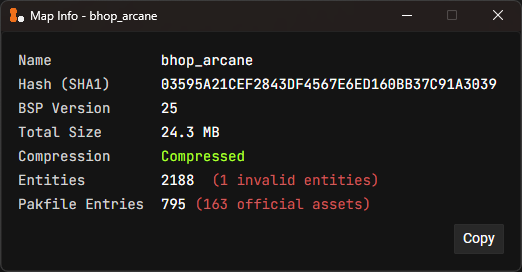
- Map Summary - Reviews content in the BSP according to map submission requirements
To use Lumper, download the latest release from the Lumper releases page. Lumper is a standalone application, so you can run it without installing anything. Just extract the ZIP file and run it from anywhere.
For Windows users, you can runRegisterLumperURLProtocol.ps1with PowerShell to register thelumper://URL protocol. This allows you to open BSP files directly from dashboard map pages, which is useful for reviewing.
You can use Lumper to open any BSP file, modify it accordingly, and then save it.
Please note that Lumper does not currently have undo/redo functionality, so be careful when making changes. Save regularly — Lumper will create backup files in the same directory by default.
Game Sync #
When editing entities, it can be difficult to find specific ones in the Entity Editor. You can use getpos and setpos in-game alongside Entity Editor filters and origin properties to find entities, but we also have a system called Game Sync which drastically improves this workflow.
To enable game sync, launch the game on the current map loaded in Lumper, set sv_cheats 1 and mom_lumper_sync_enable 1. Then, press the “Connect to Game Sync” button in the top-right corner of Lumper. You should be able to:
- Sync your current in-game position with the “Spherical Radius” filter
- Sync the entity you’re currently looking at with the key-value filters
- Teleport to entities by pressing the arrow icon on the Entity Editor list
- Automatically import Stripper configs from the in-game Entity Tools into Lumper
Map Summary #
Lumper’s “Map Summary” info box (Tools > Map Summary) is a quick way to summarize the current state of the map. Map reviewers will always use this tool to check the map before approving it, so it’s a good idea to check it yourself as you go.
In-Game Entity Tools #
Some entities must be modified or replaced to improve gameplay and promote competitive integrity according to Momentum Mod’s standards.
Entities can be modified in-game with the devui_show entitytools command. This command will open an interface with various tools for quickly modifying and fixing map entities, and can modify those entities in-game in real-time, allowing you to test the changes without reloading the map.
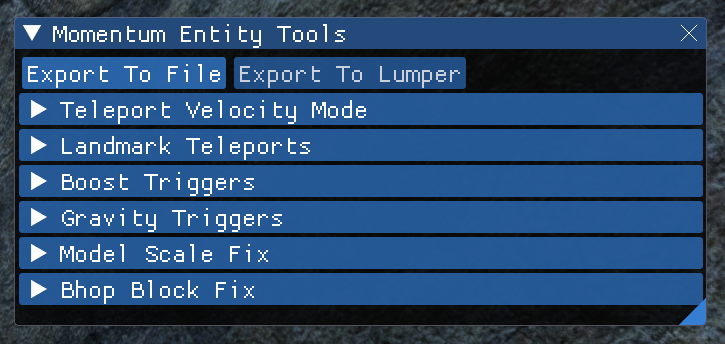
The Entity Tools use ImGui which can have very small fonts on large monitors. You can use devui_font_scale to change the font size.
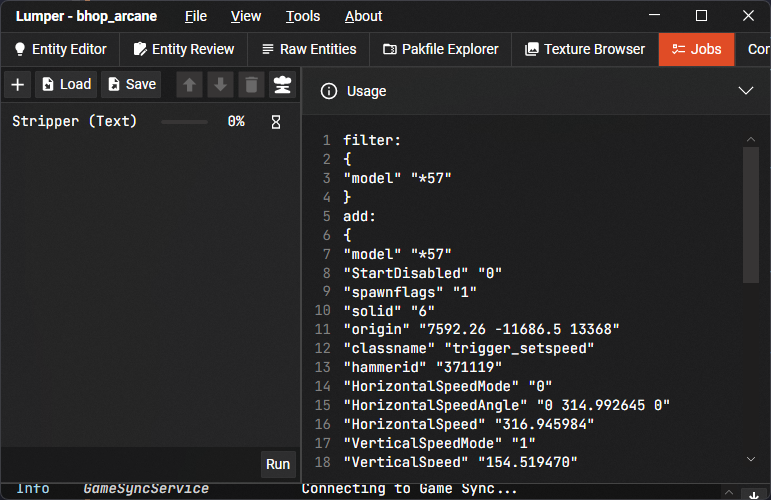
Exporting to Lumper #
The Entity Tools change in-game entities in real-time. To permanently apply these changes to a BSP, it generates a Stripper config file that can be used in Lumper.
You can export changes made with the Entity Tools by clicking the “Export To File” button. The entity changes are then written to a <mapname>.cfg file in your maps/entitytools_stripper folder. To use these files in Lumper, go to the Jobs page, create a Stripper (File) job, and then load it from disk.
Alternatively if you have Game Sync enabled, you can click the “Export to Lumper” button in the Entity Tools, which will immediately create a Stripper (Text) job.
Once a job is created, you can run it by clicking the “Run” button. This will apply the changes to the BSP file in Lumper. These changes will be displayed in the logs panel and modified entities will be marked as changed (indicated by *) in the Entity Editor.
Hammer #
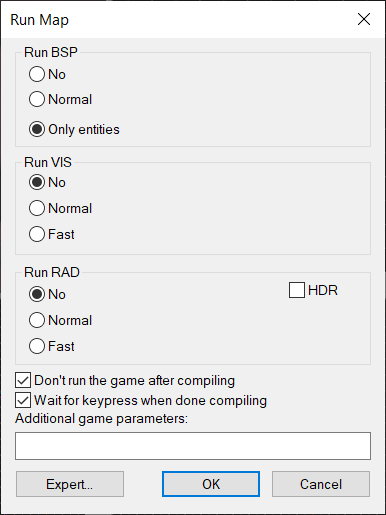
Entities can also be modified in Hammer without having to recompile the entire BSP. This is done by decompiling the map, making the entity changes, and then compiling with the “Only entities” option checked. The BSP file has to be in the same directory as the vmf for this to work.
Required Modifications #
Entity Review #
Lumper’s entity review tool will point out entities that are not supported by Momentum, or should be replaced with a different entity.
If an entity is marked as Invalid or Warning, it will generally have comments explaining the issue and what to replace it with. Invalid entities must be replaced or removed, while warnings are suggestions that are worth reviewing.
Pressing the “Edit” button on the right side of an entity in the Entity Review page takes you to the Entity Editor, and filters the list by that entity’s classname. If you’re not sure of the entity’s purpose, teleporting in-game using Game Sync is helpful. You can also press the VDC Reference button on a page for that entity to see its docs on the Valve wiki. And if in doubt, please ask for help in the #map-porting channel on Discord!
In-game Entity Modifications #
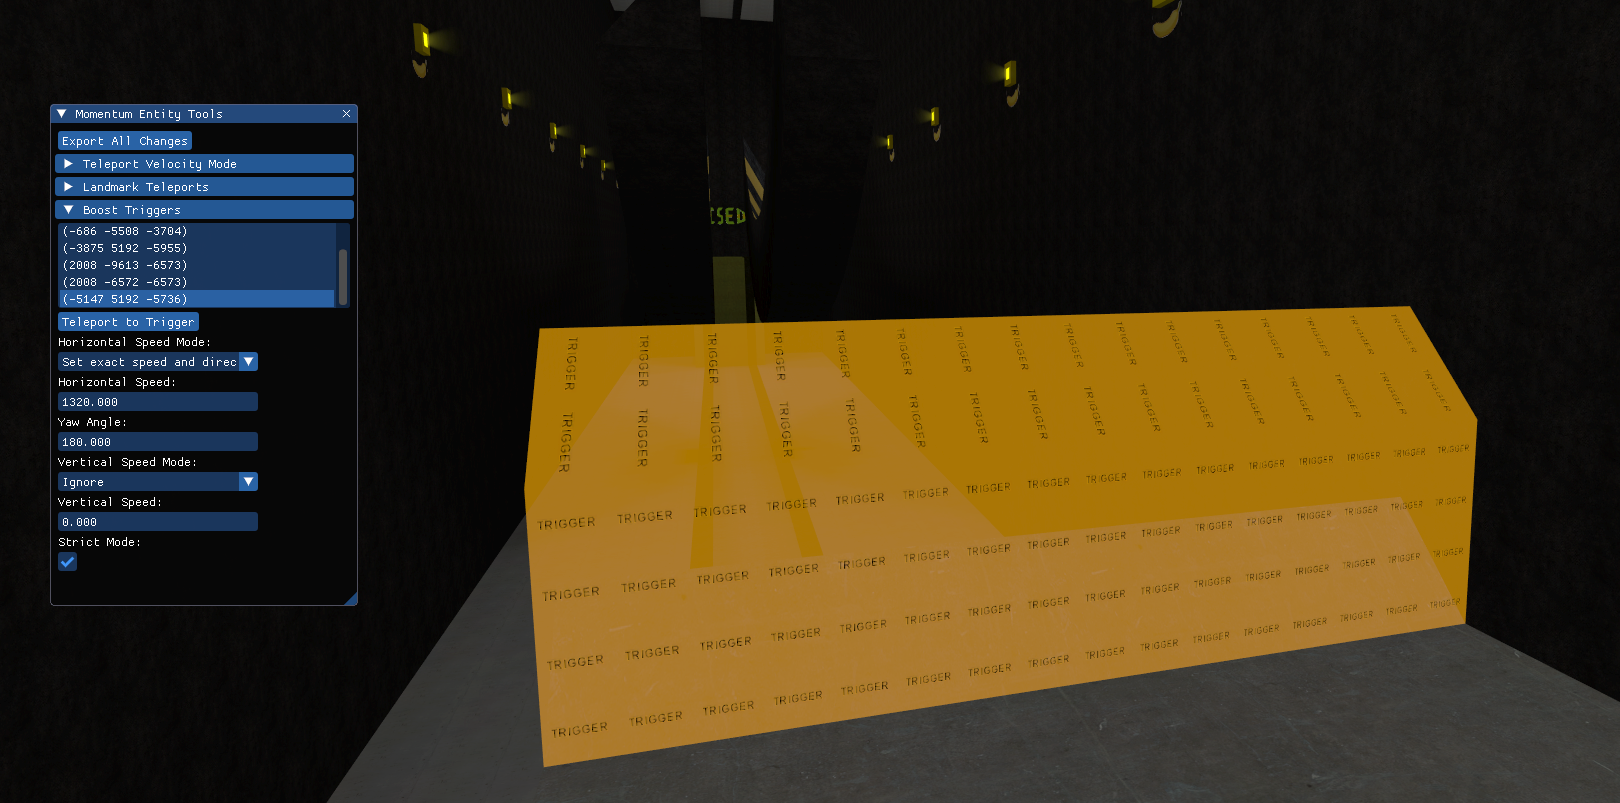
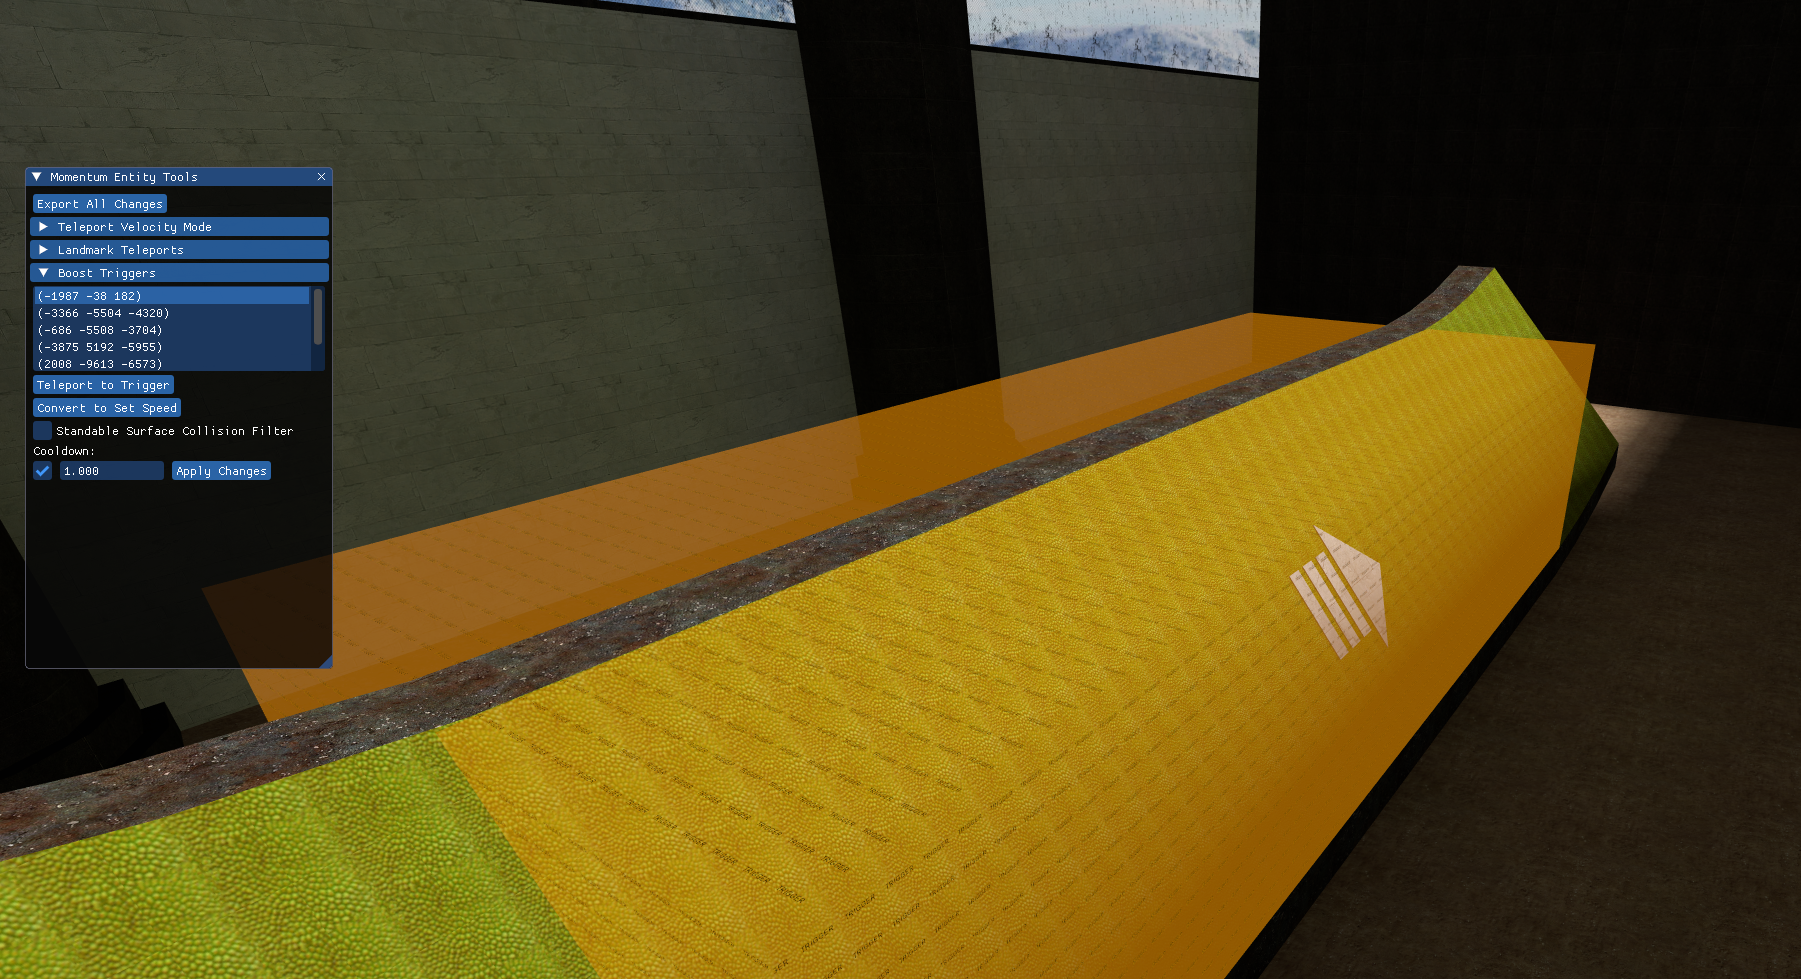
Boost Ramps #
trigger_push entities that push the player into a ramp are very inconsistent and give different speeds depending on how you jump into it. Replace these with trigger_setspeed for a more consistent and less exploitable boost.
Running directly into a trigger_push and getting boosted by it will automatically record your resulting horizontal and vertical speed in the Entity Tools window. Clicking “Convert to Set Speed” will then perform the conversion, applying the best settings to replicate this boost consistently. The resulting trigger_setspeed may have a horizontal speed that differs from the original trigger, but in combination with the automatically detected vertical speed, the original boost is replicated accurately.
Rapidly Reactivating Boost Triggers #
The player can sometimes activate a boost multiple times in quick succession with problematic techniques, including “crouchboosting”. Different styles of boost triggers require different adjustments to fix this issue:
- Jump-based Boosts - Boosts that are designed such that the player should be boosted when they jump on them should be converted into a
trigger_multiplethat boosts the player with anOnJumpoutput, such asOnJump !activator,AddOutput,basevelocity # # #.

-
Constant Push Floor Boosts - If the boost is
trigger_pushbased and it is important that the player is continuously pushed while inside it (not just when they jump or exit the trigger), you can leave it as atrigger_push, but use afilter_momentum_surface_collisionfilter with the “Touching standable surfaces” option so the boost only applies when the player is on the ground. You should only use this option if the floor is completely flat, otherwise the boost will re-apply every time the player touches another surface. If you have the original VMF and can recompile the map, removing the trigger and replacing the surface below it with afunc_conveyoris also an option. -
Surf Ramp Boosts and Other Airborne Boosts - When there is no ground for the player to jump on, a boost can be fixed by adding a cooldown so the player has to wait before re-activating the trigger. The Entity Tools trigger cooldown option will configure the trigger to disable for one second when the player exits it.
Jump Boosts #
Boosts that should boost the player when they jump should use the new OnJump output instead of OnEndTouch. In addition to avoiding crouchboost exploits as mentioned previously, this also prevents other exploits. This goes for both basevelocity-based and gravity-based boosters.

Some upward boosts briefly reverse the player’s gravity instead of using basevelocity. This method may have a gradual and potentially awkward acceleration period. In particularly bad cases, consider converting these to the snappier basevelocity style. Note that the map geometry is sometimes built around the gravity acceleration period in a way that basevelocity cannot replace, so be sure to test this change well before committing it.
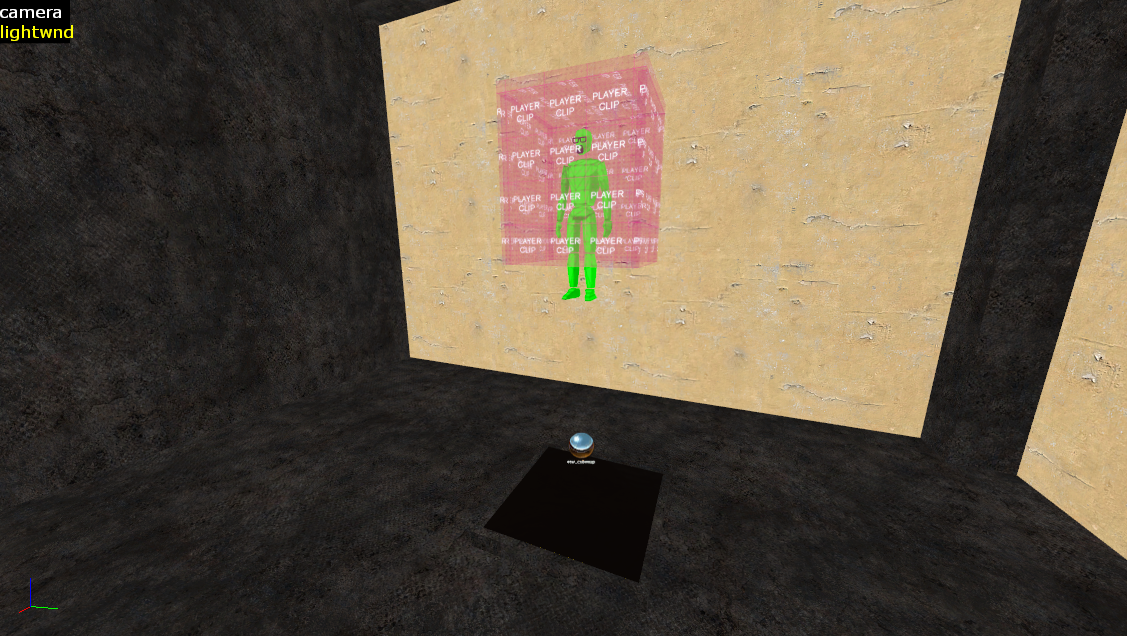
Drop Teleports #
Some maps, most notably surf maps, teleport the player into a floating “cage” that is open on the bottom to reset the player’s velocity after they fail or transition between stages.
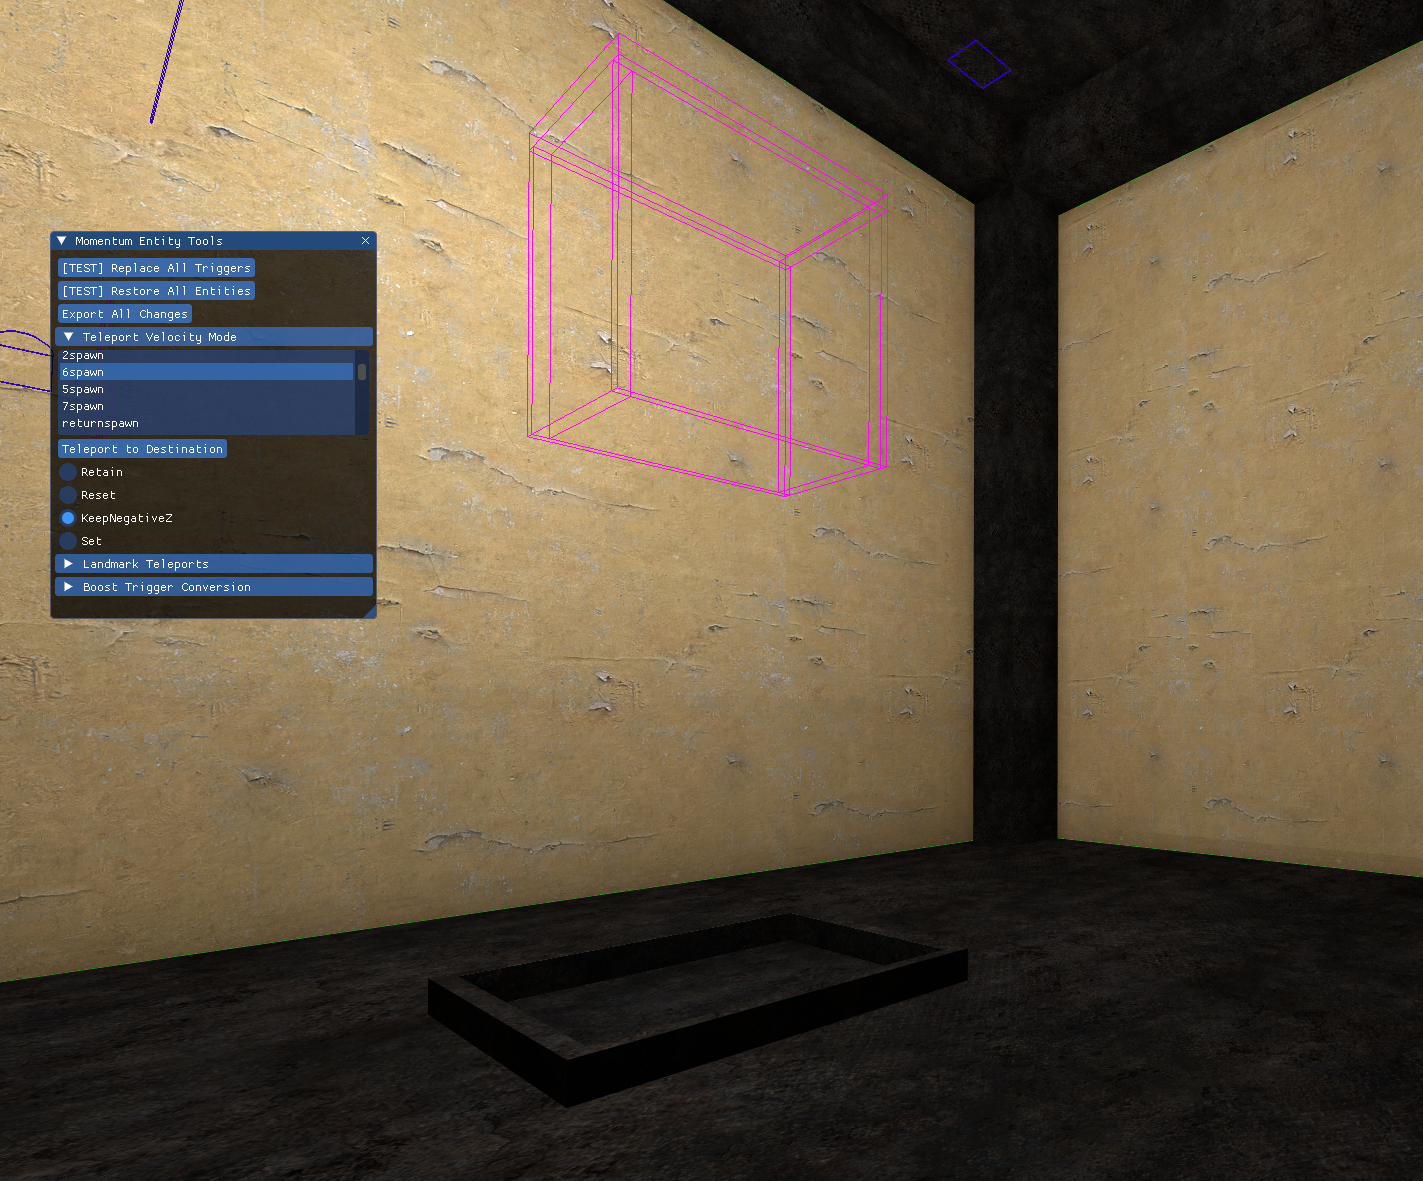
Momentum Mod introduces the “Keep Negative Z Velocity Only” velocity mode option for trigger_teleport that removes any horizontal velocity or upward vertical velocity from entities when they are teleported. This is more robust than only relying on the cage, but more importantly, this activates some important behaviors in Momentum Mod:
- When teleporting directly into a stage zone, it keeps the zone from activating until the player lands on the ground. This results in more competitively correct splits.
- It prevents players from using air acceleration until they land on the ground, preventing an unfavorable technique to gain speed early.
These behaviors only activate when there is standable ground below the teleport destination, but you should still use “Keep Negative Z Velocity Only” for caged teleport destinations that are not above standable ground.
All teleports with caged teleport destinations should use this velocity mode. In the in-game Entity Tools, open the “Teleport Velocity Mode” dropdown, select the destination that you want to change to a drop teleport, and then select the “Keep Negative Z” radio button.
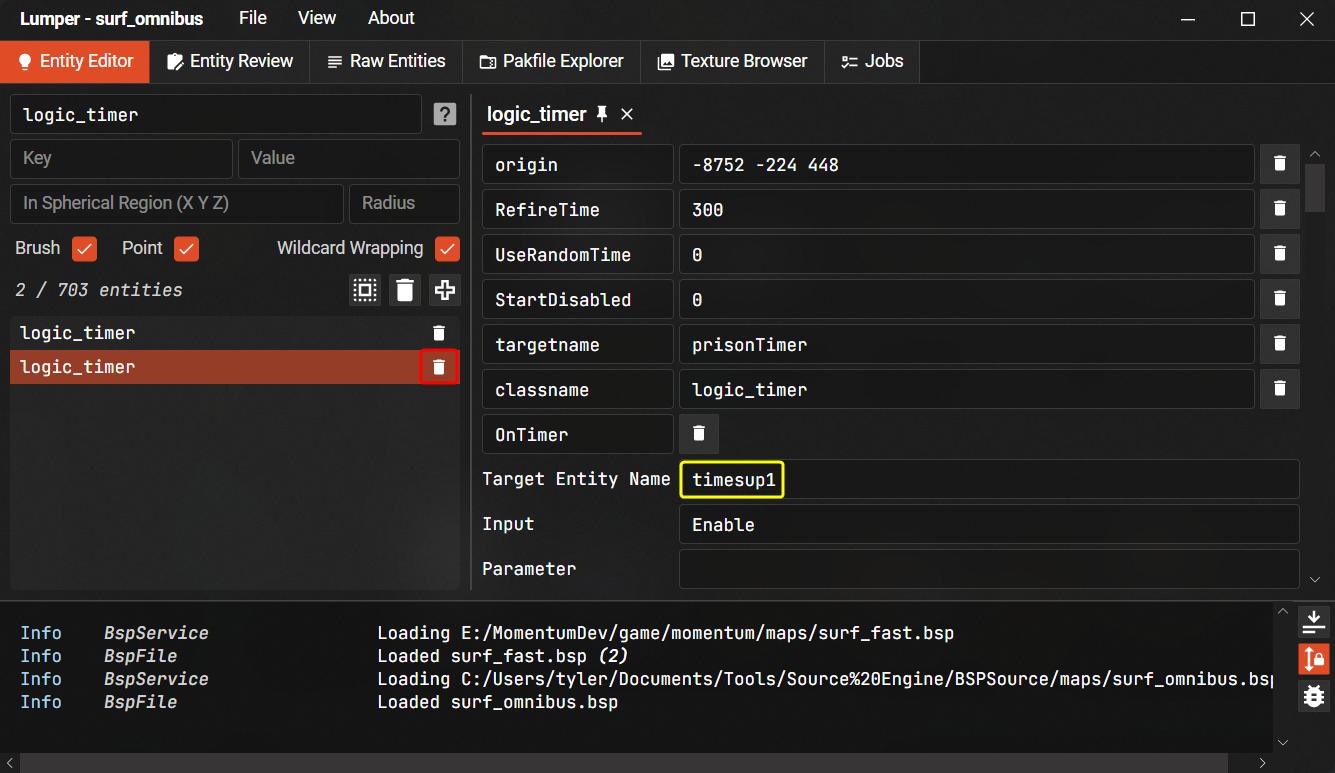
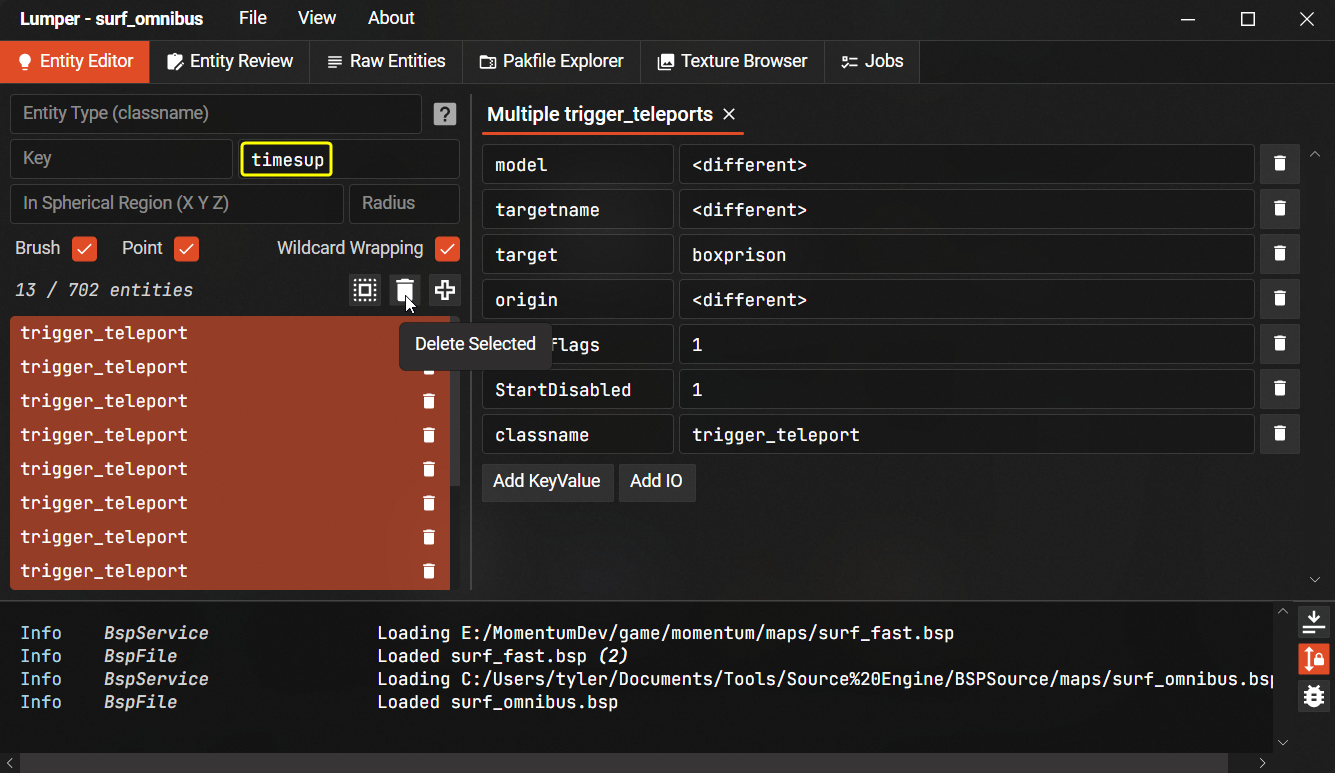
Jail Timers #
Some old surf maps use a logic_timer to teleport all players to a jail after a few minutes. These timer entities and the associated teleport triggers should be removed using Lumper:
Textures #
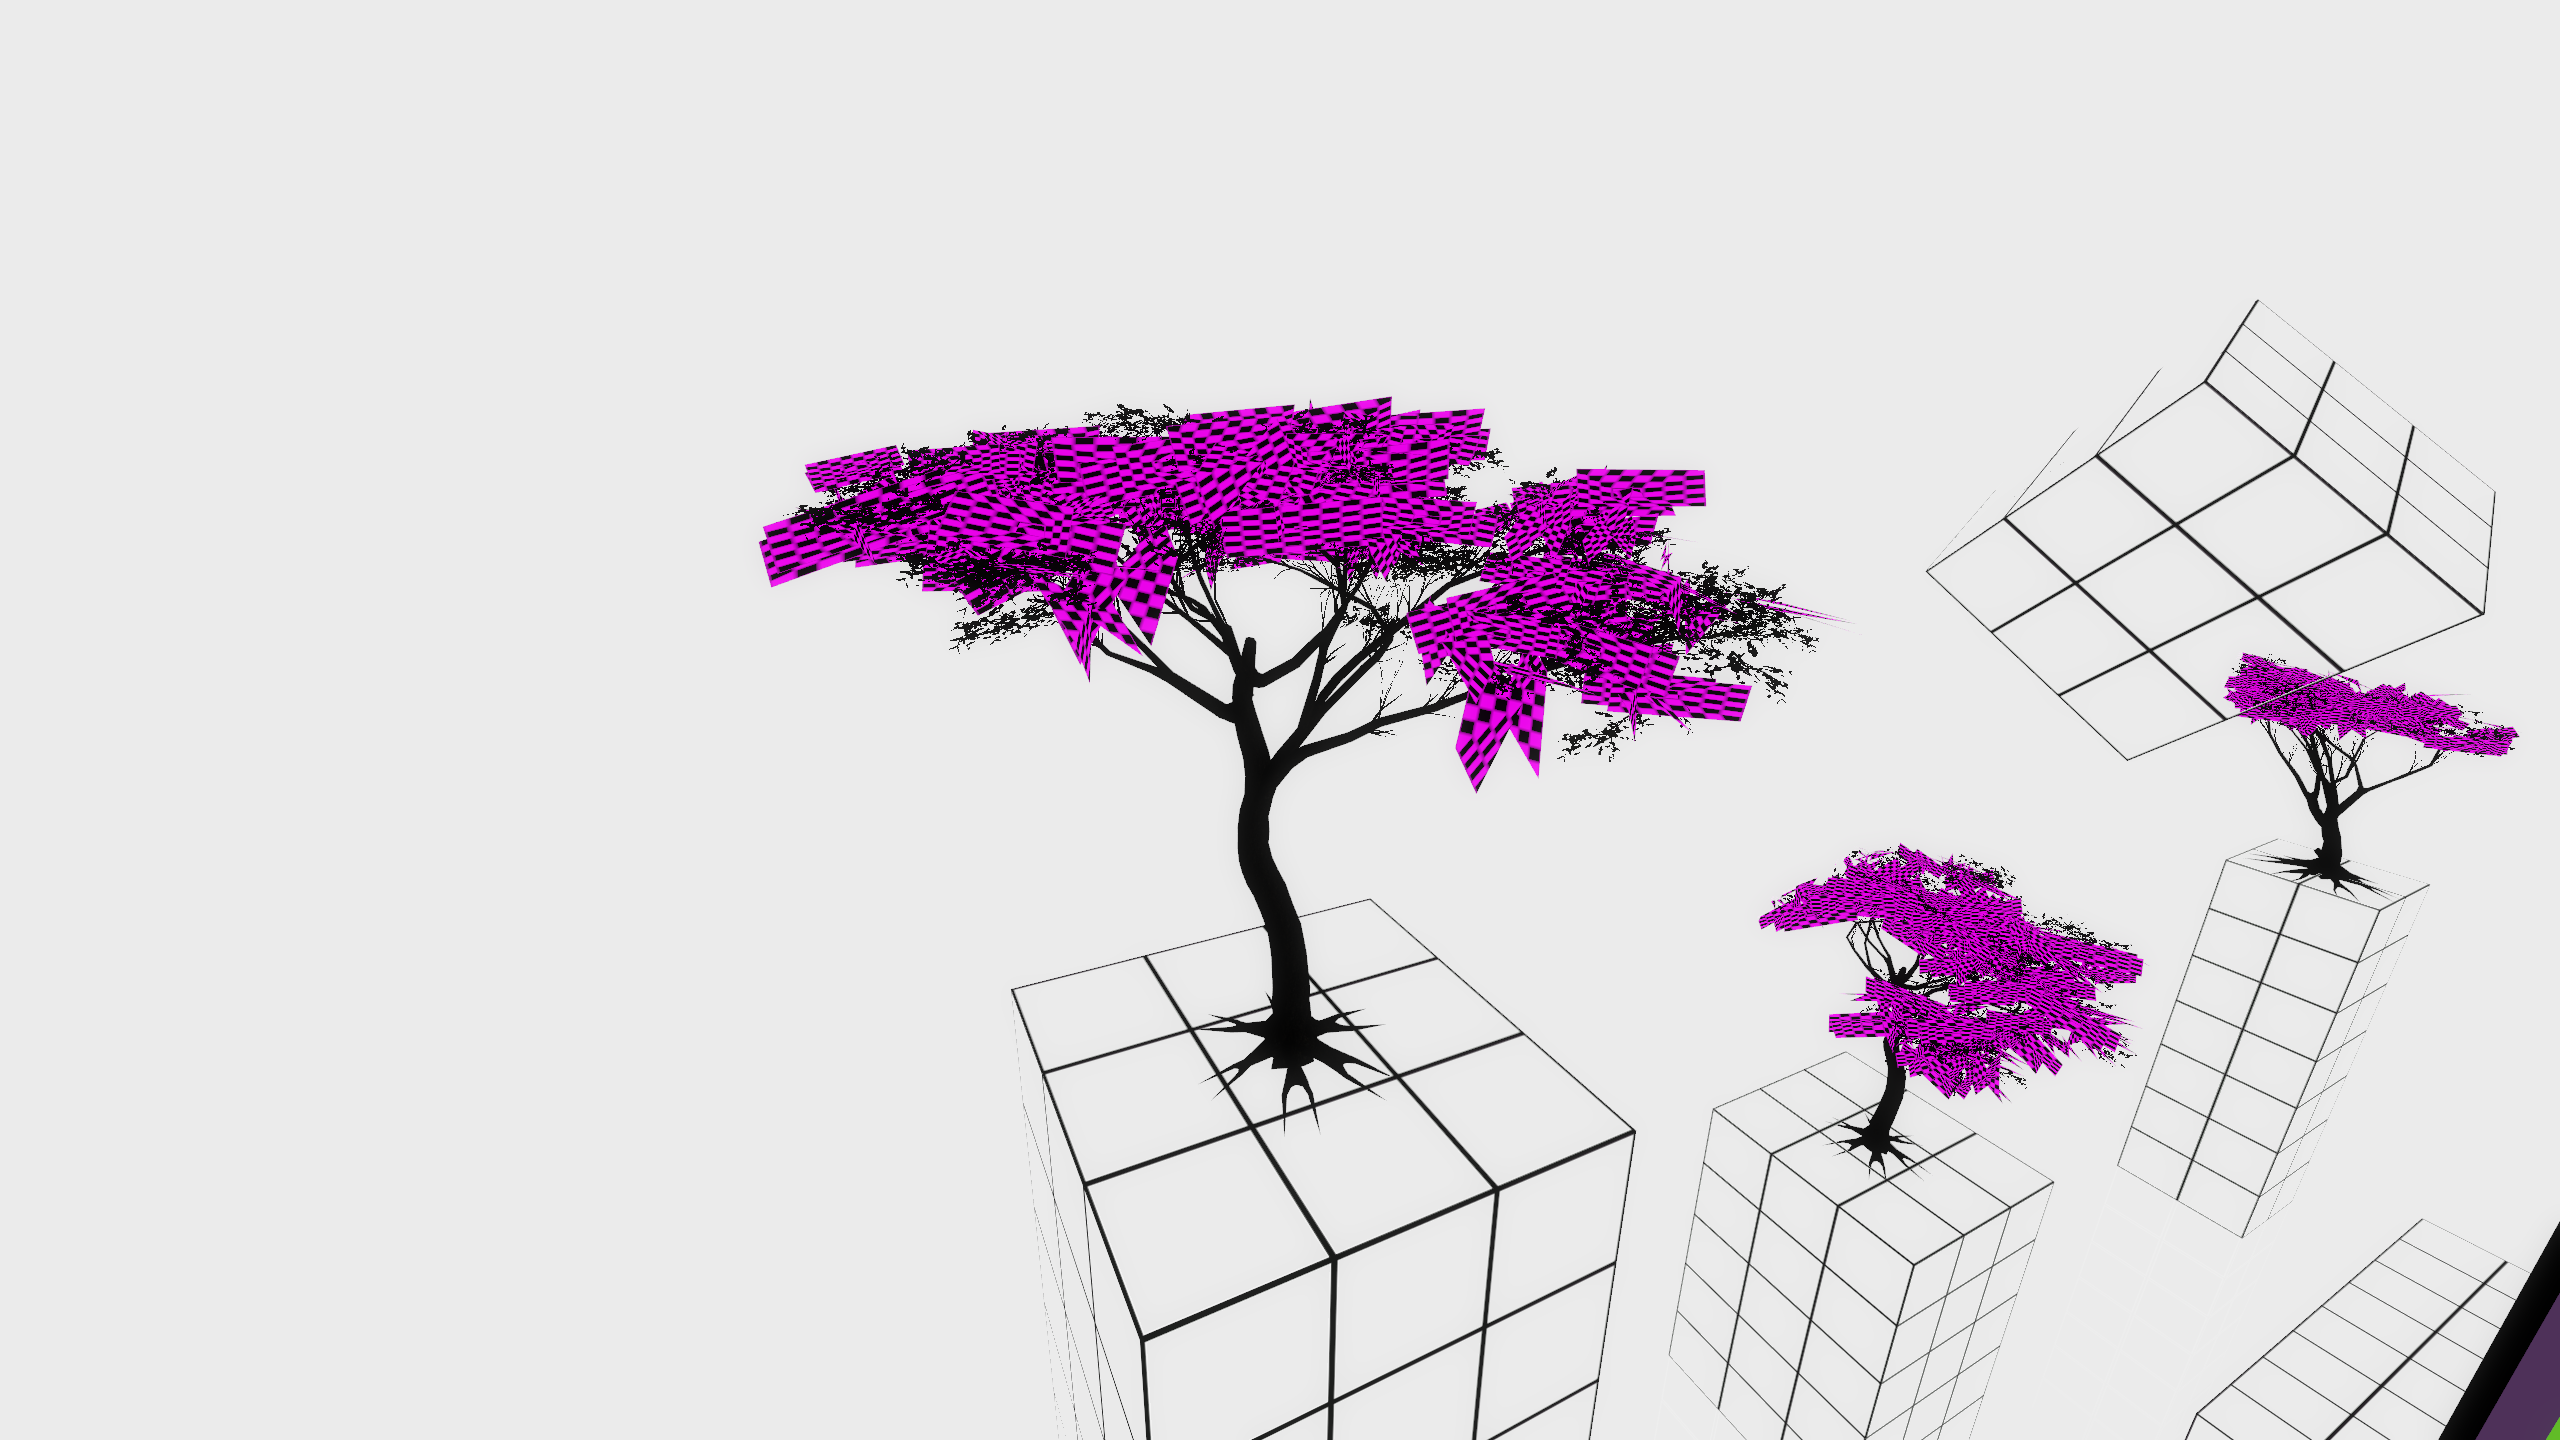
Maps will sometimes contain textures that we don’t want to include:
- Pornography, racism, or other “edgy” content
- If something seems questionable and you’re not sure about it, ask in Discord.
- Obvious copyrighted assets from other media
- See map submission guidelines
- This can be hard to make a judgment call on. Just look out for anything extremely glaring.
- Again, ask in Discord if you’re unsure.
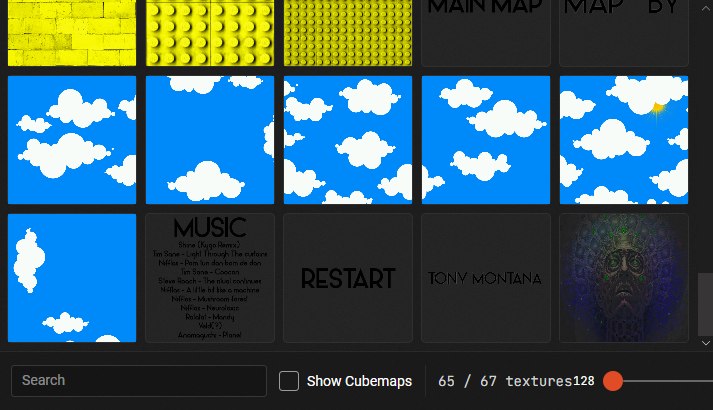
Lumper’s Texture Browser is a fast way to quickly review all textures in the map, and can be used to replace bad textures with placeholders.
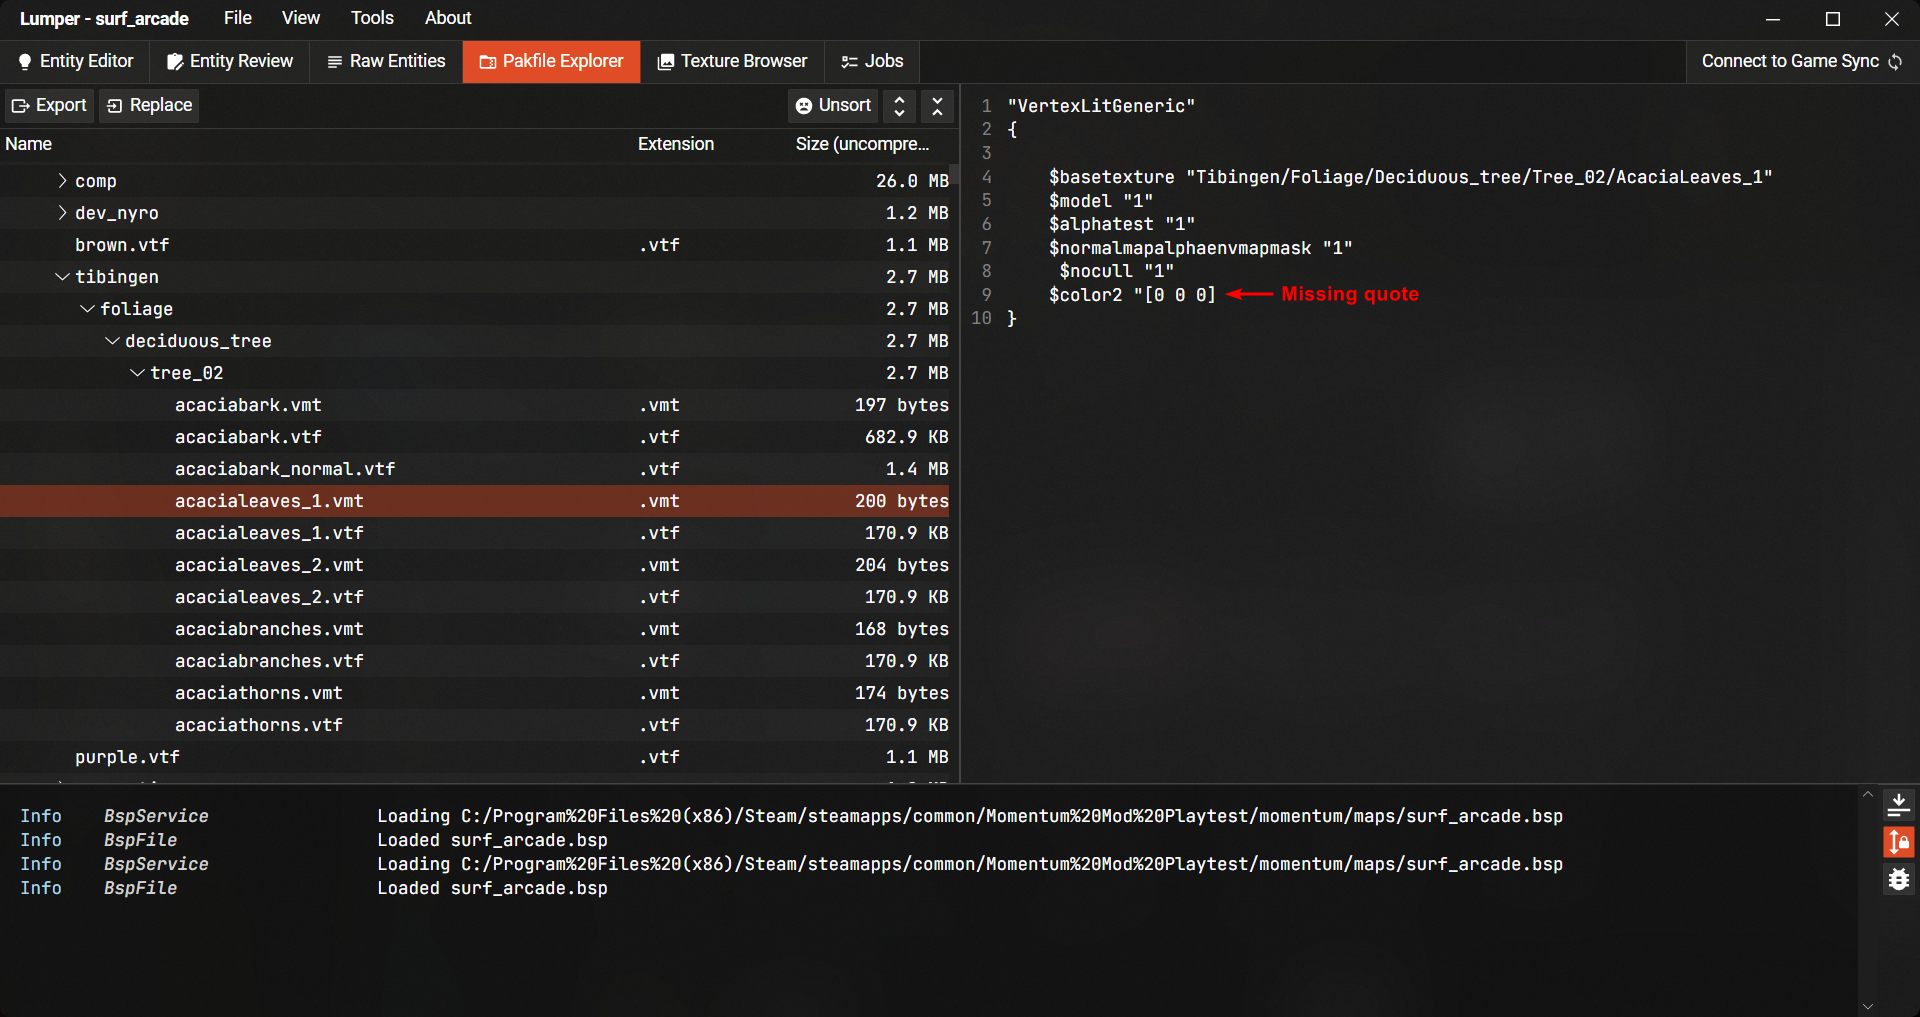
The easiest way to replace a texture is to modify any VMT files that refer to the VTF file in question.
- Find any instances of VMTs files that refer to that VTF file in the Pakfile Explorer
- Currently we don’t have automation for this, but it’s usually relatively obvious
- Replace the
$basetexturevalue (maybe also$bumpmapand others) with some other texture on the map that won’t look out-of-place - Remove the original VTF file via Texture Browser / Pakfile Explorer
Source engine textures are stored in VTF files, which are the image files, and VMT files, which are the material definitions for those textures.
VMTs are text files that define how the texture is used in the game, such as its shader type, properties, and other settings. VMTs are usually stored in the same directory as the VTF files, and have the same name as the VTF file, but with a
.vmtextension.Note that multiple VMT files can refer to the same VTF file, so you may need to check multiple VMTs if the texture is used in multiple places.
Packed Game Assets #
The pakfile lump of many maps contain copyrighted Valve assets, which we cannot include.
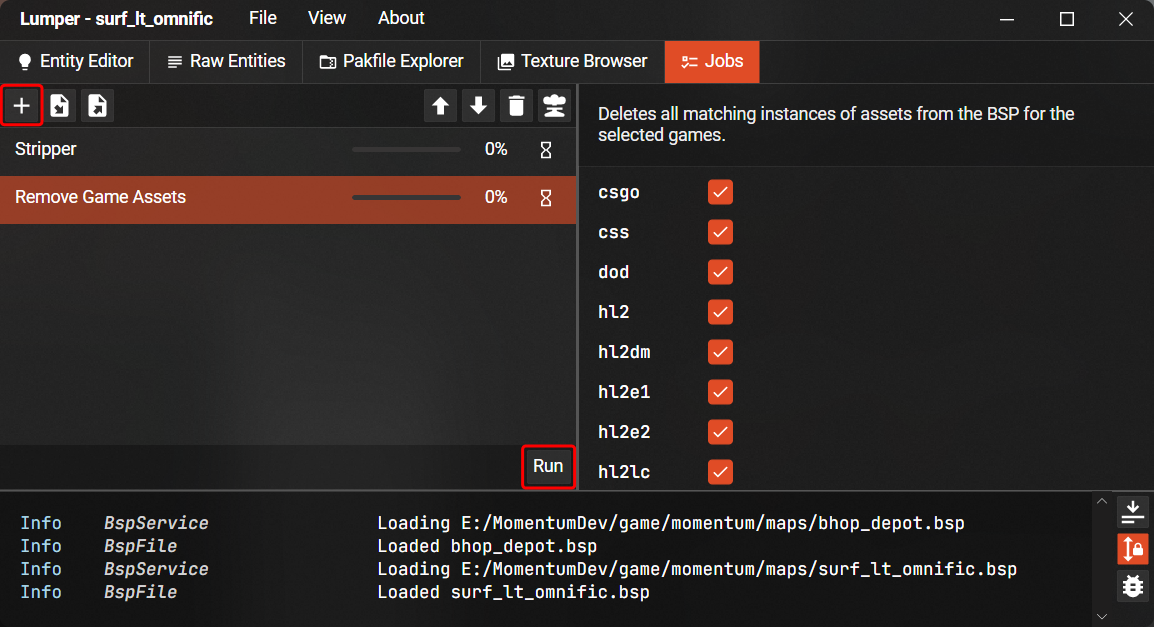
Lumper contains a hash-based manifest file of all these assets, so removing them is very straightforward. You just need to run the Remove Game Assets job.
Sounds #
The game allows players to set a volume level for each of several sound channels. Sound files packed in each map should be organized into specific folders corresponding to these sound channels:
| Channel | Folder |
|---|---|
| Ambient | sound/ambient/ |
| Music | sound/music/ |
| Movement | sound/player/ |
| Weapons | sound/weapon/ |
| UI | sound/ui/ |
Lumper makes this process easy by automatically detecting entities and soundscapes that use these sounds (in fact it works for all assets!) and updating their paths. Simply drag-and-drop the sounds you want to move into the appropriate folder, then press “Yes” on the dialog that appears.
Note: Path refactoring is very technically complex and has had issues in the past, so it’s worth testing in game
Common Issues Porting Older Maps #
When porting maps from older Source engine versions, there are a few issues that might come up due to incompatibilities with Strata Source.
HDR Skyboxes #
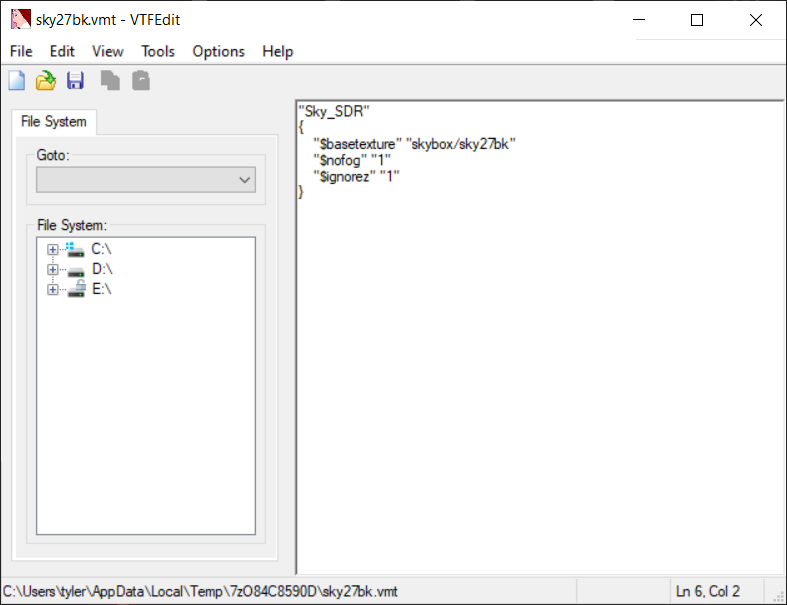
Skyboxes will sometimes fail to load in maps compiled with HDR. This is because the “sky” shader defaults to HDR, but will fail to load if the textures are not HDR. This issue can be fixed by setting the shader to “Sky_SDR”.
Corrupt HDR Cubemaps #
Some maps have corrupted HDR cubemaps. The cause of this issue is unknown and there are no known ways to fix this without decompiling and recompiling the map.
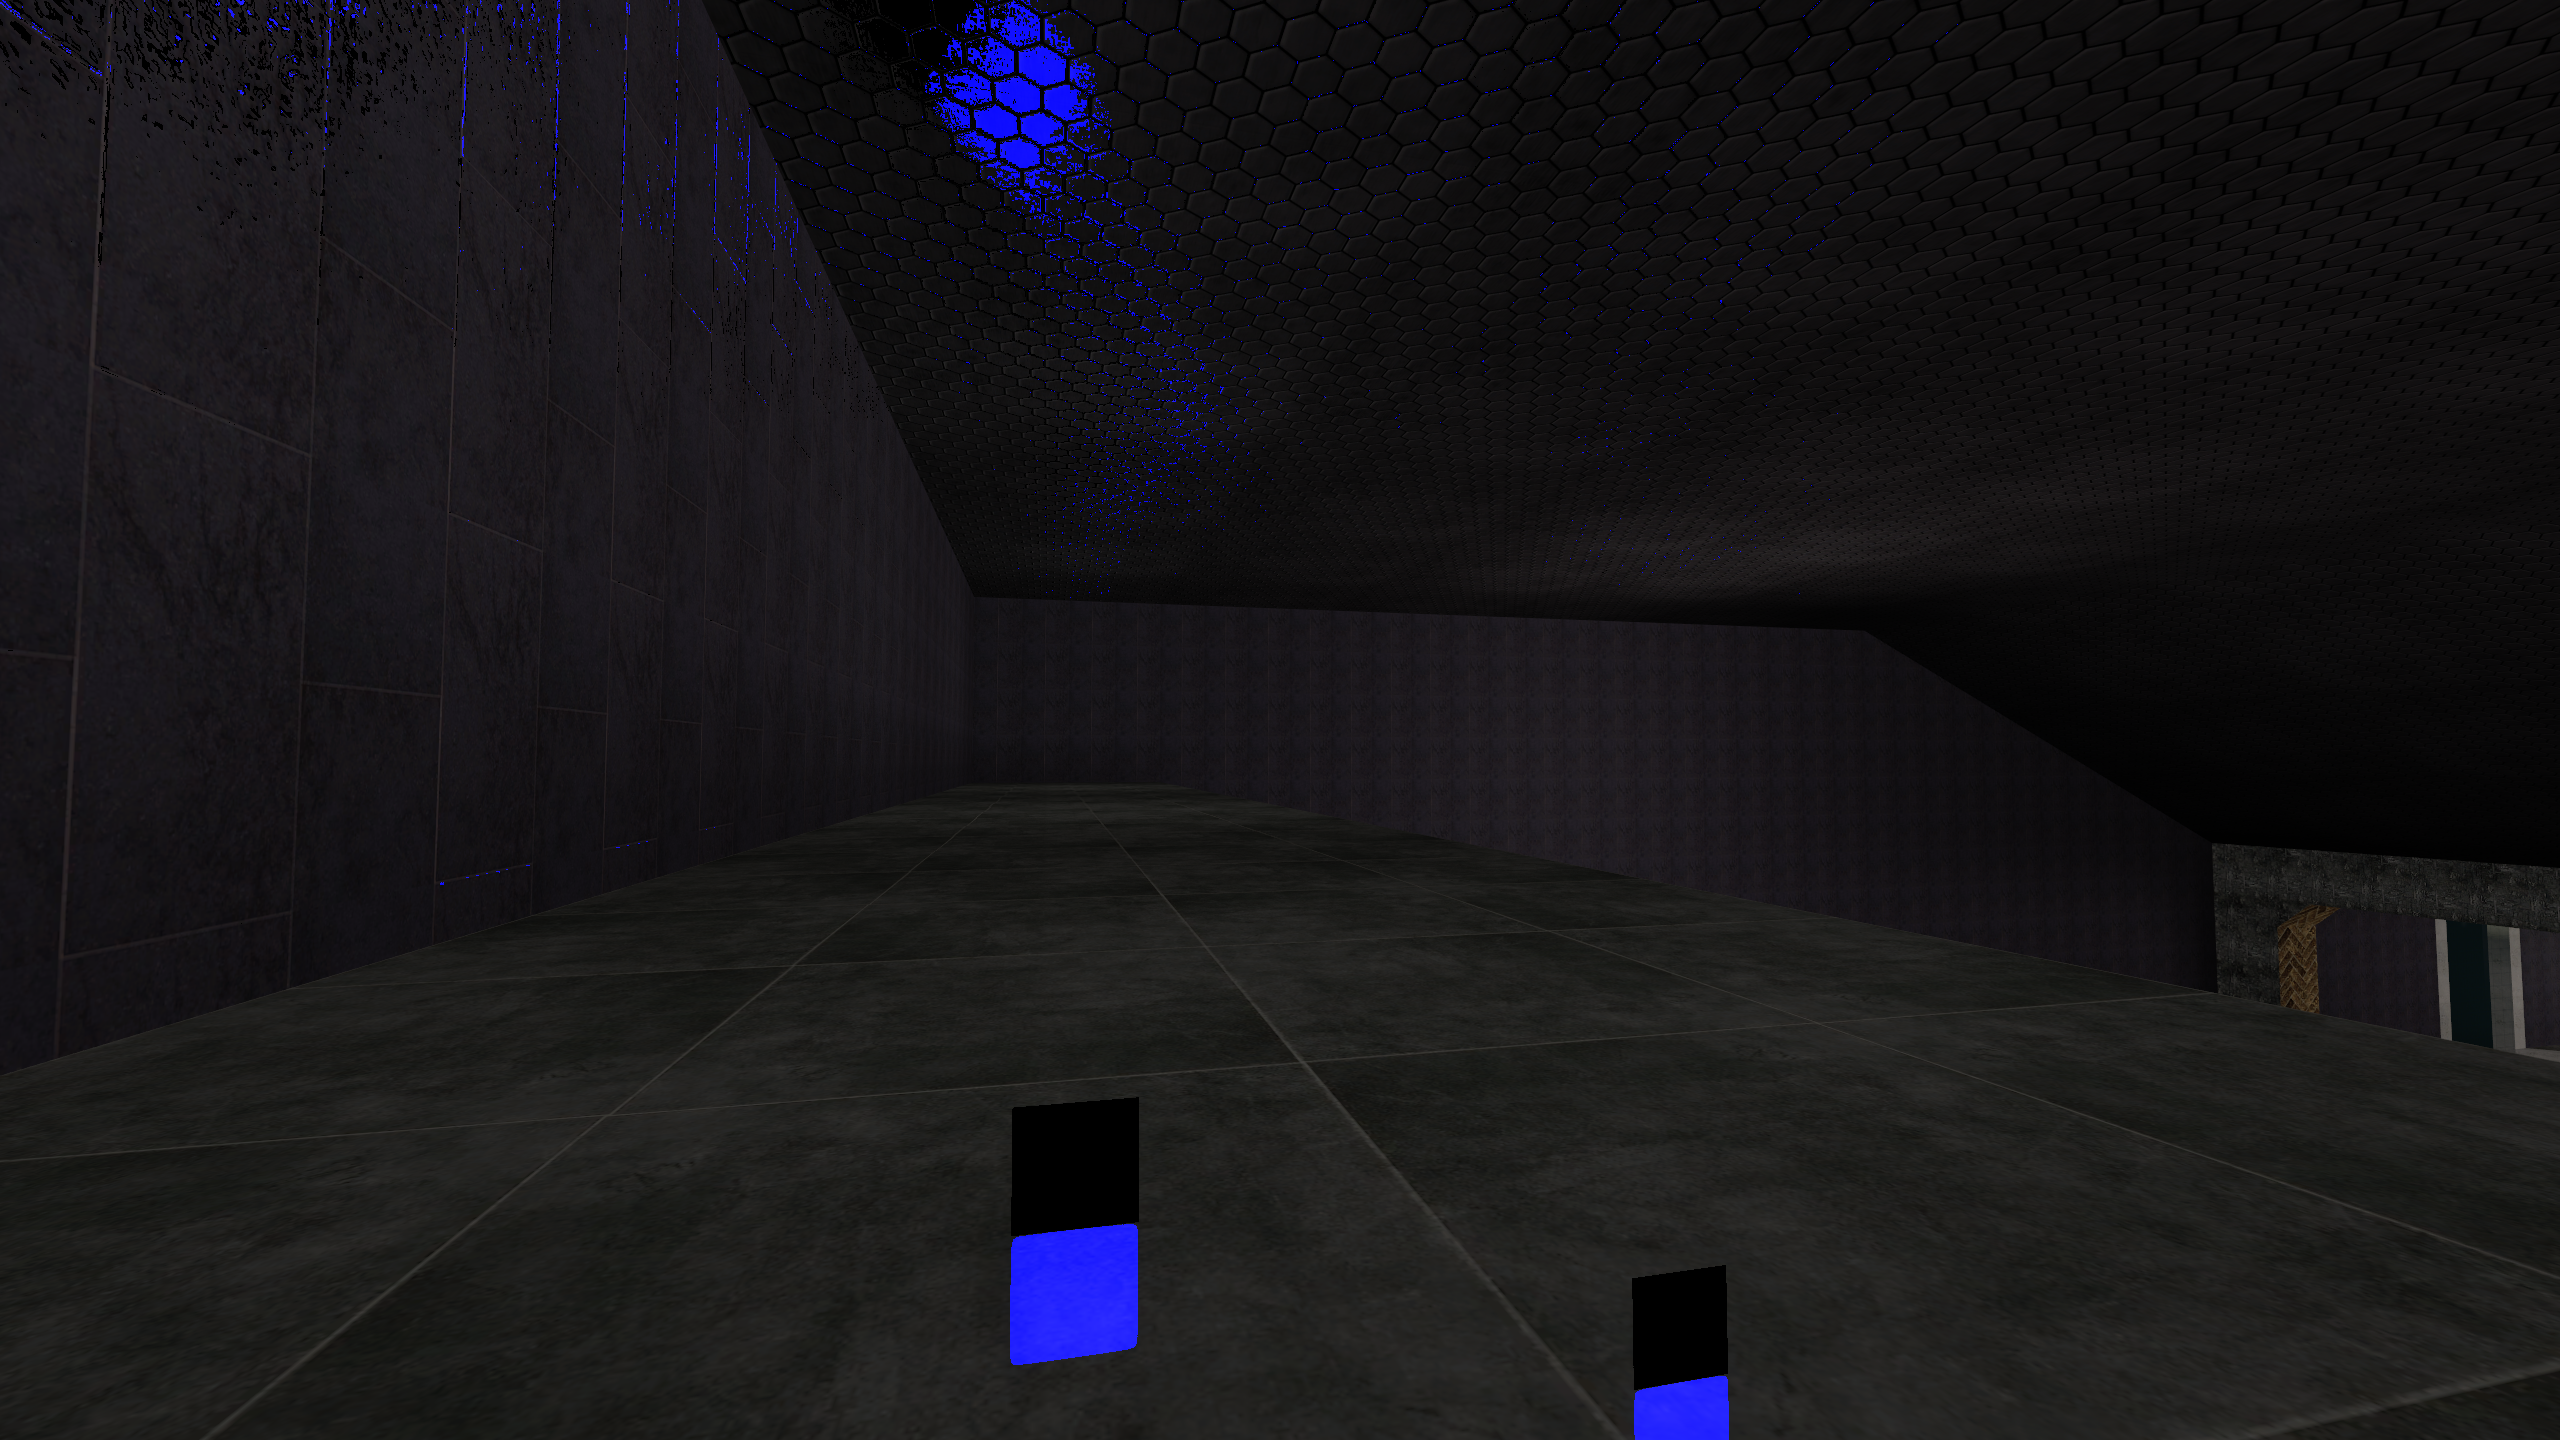
Dark Refraction Textures #
Refraction textures in most maps do not render correctly. The cause of this issue is unknown and the only way to fix it currently is to recompile.

Invalid VMT Files #
Strata Source has stricter VMT parsing rules and will not load VMTs with syntax errors. These invalid VMT files must be manually fixed in Lumper or VTFEdit in order for the textures to load in game.